Utilizing Metrology For On-Site Precision Machining
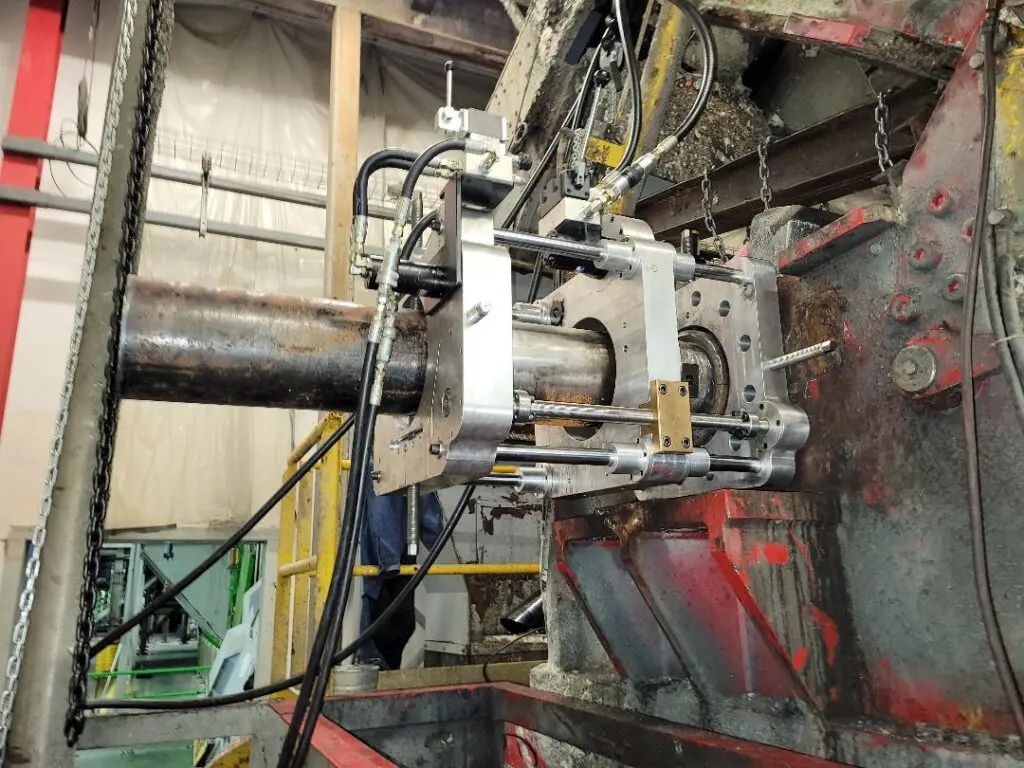
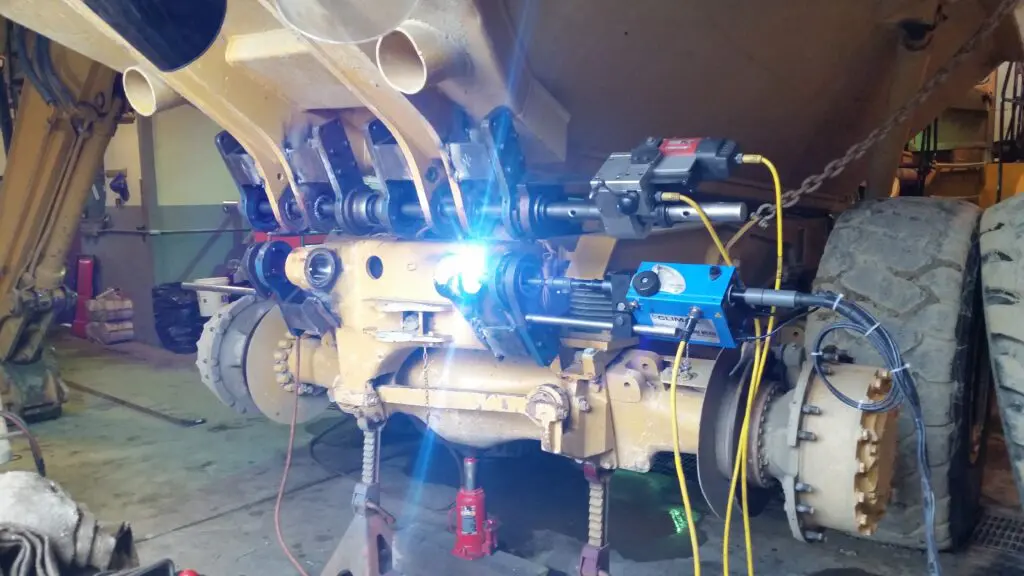
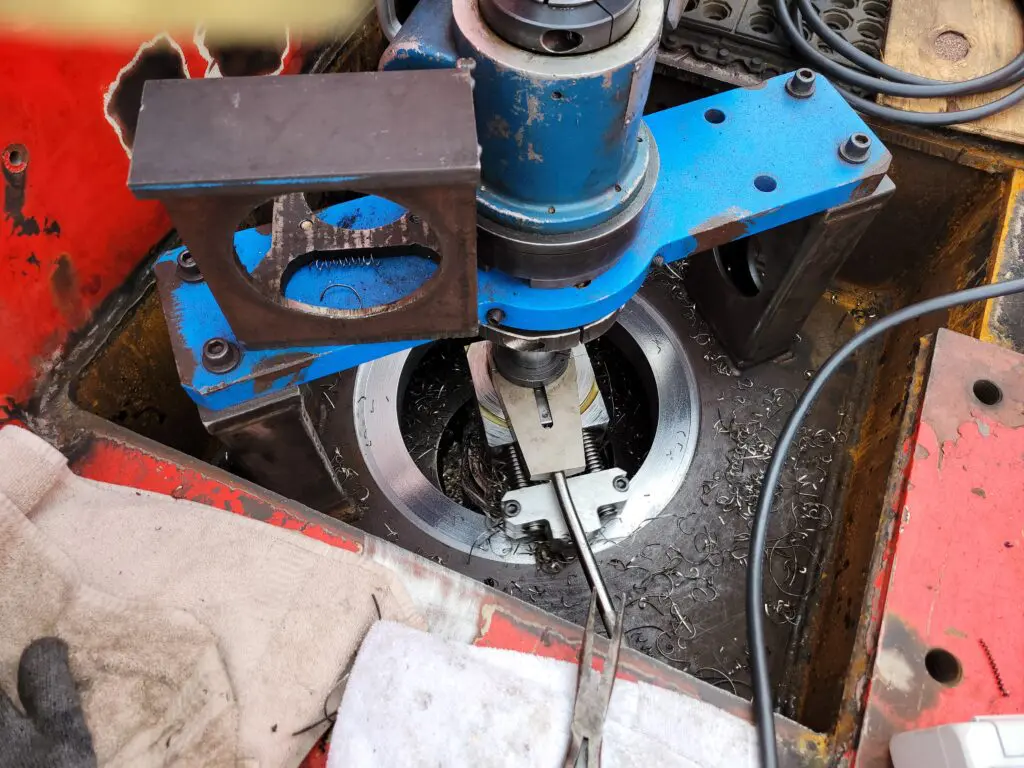
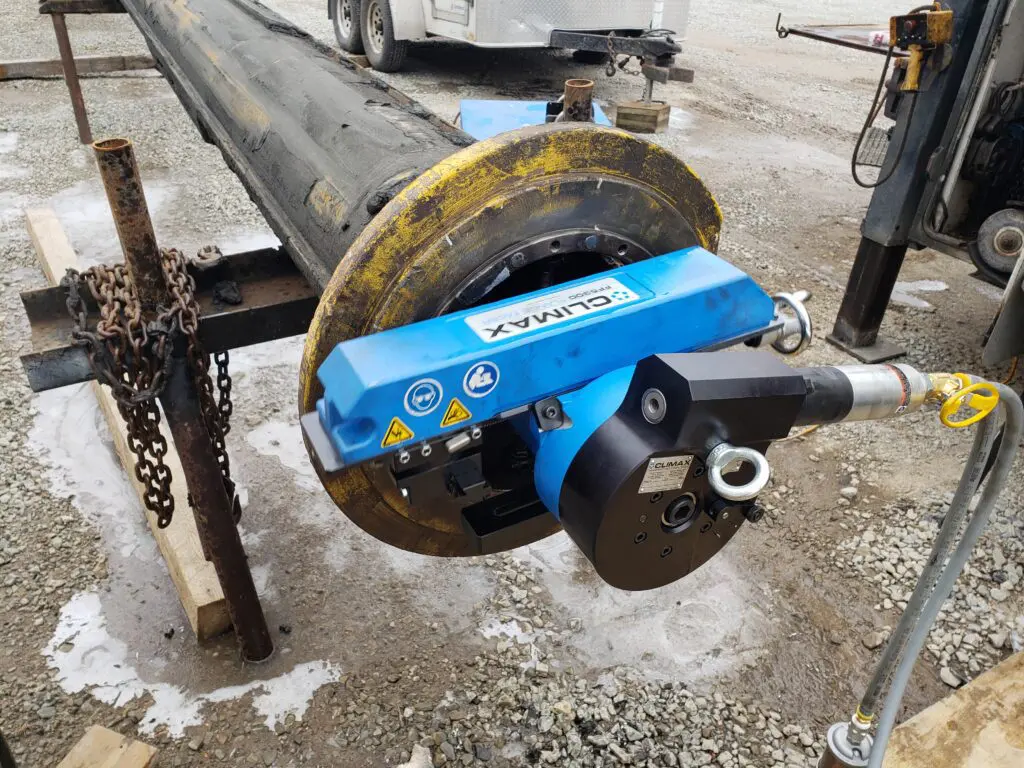
If you need on-site machining for industrial applications, plant services or heavy equipment repair, we have you covered. We can address any of your on-site machining problems to keep downtime to a minimum and avoid business continuity risks.
Our Key Capabilities
Since 1979, our company has been proudly serving industrial and manufacturing clients, plus government agencies in our large service area, including most of the eastern seaboard. Imagine the time and cost savings of having us travel to your location and perform what needs done right on site. You can turn to us for the following:
Metrology How it can work for you!
Laser alignment, measuring flatness of surfaces, straightness of journals, bore accuracy, and many more applications.
Accurate on-site large volume measurement and alignment with the Faro Vantage Laser Tracker along with the Faro QuatumMax Arm, for scanning and probing stand-alone or for measuring outside the line of sight of the Tracker but stay within the Tracker's coordinate system.
FARO® Laser Tracker
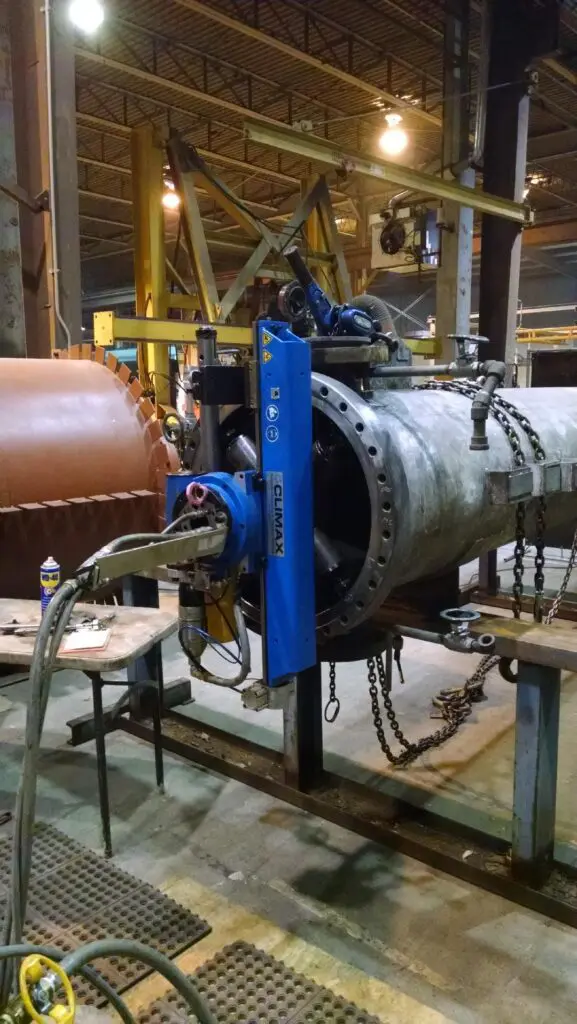
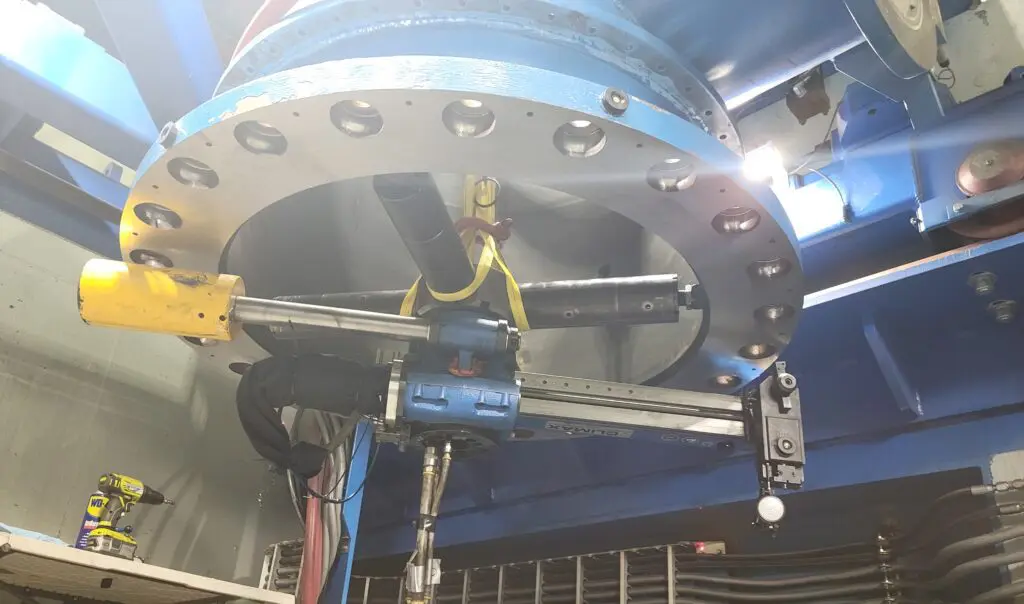
We employ the latest technology in large volume measurement and alignment by using an accurate coordinate-measuring machine called FARO® Laser Tracker. This shows the ''as found" and "as left" measurements of a flange inside of a titanium plant. When it's critical for exact measurements, you can rely on our work.
FARO® Laser Tracker and 4 Meter Arm
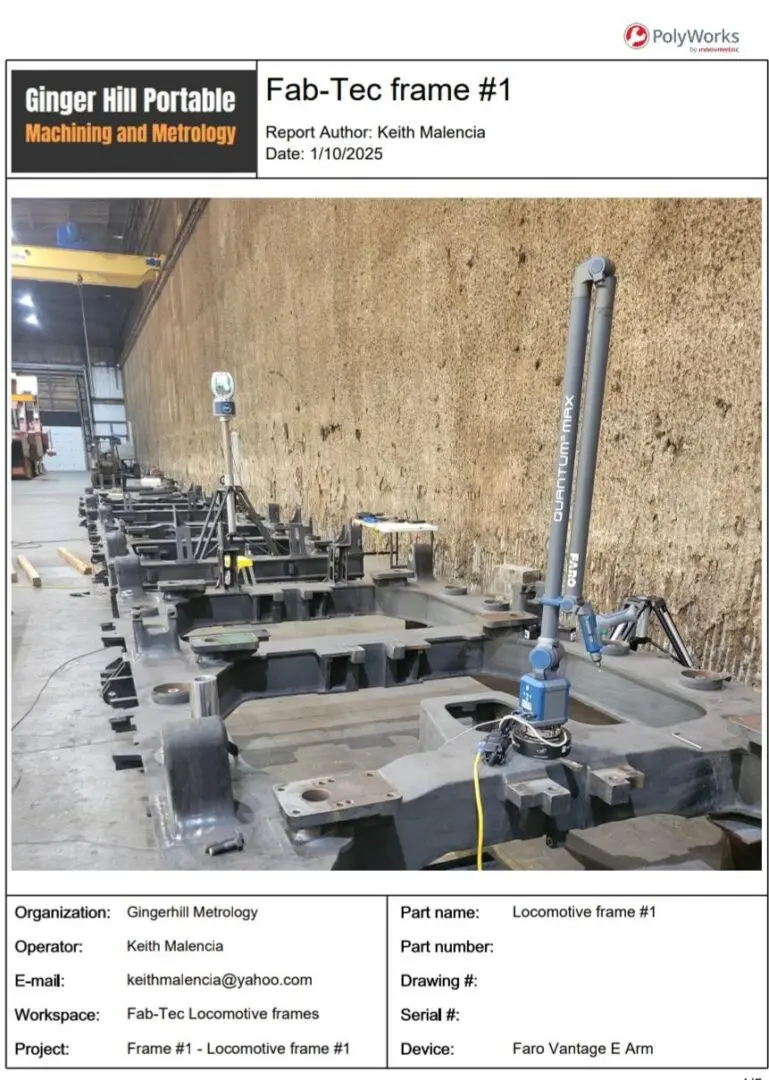
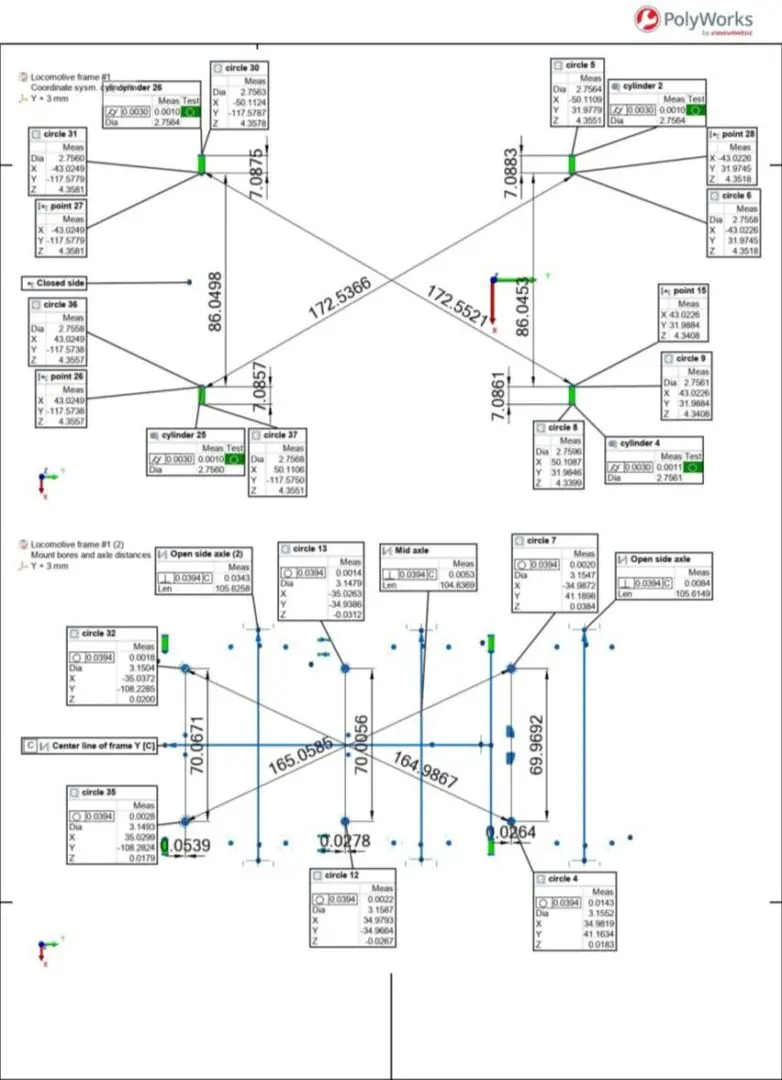
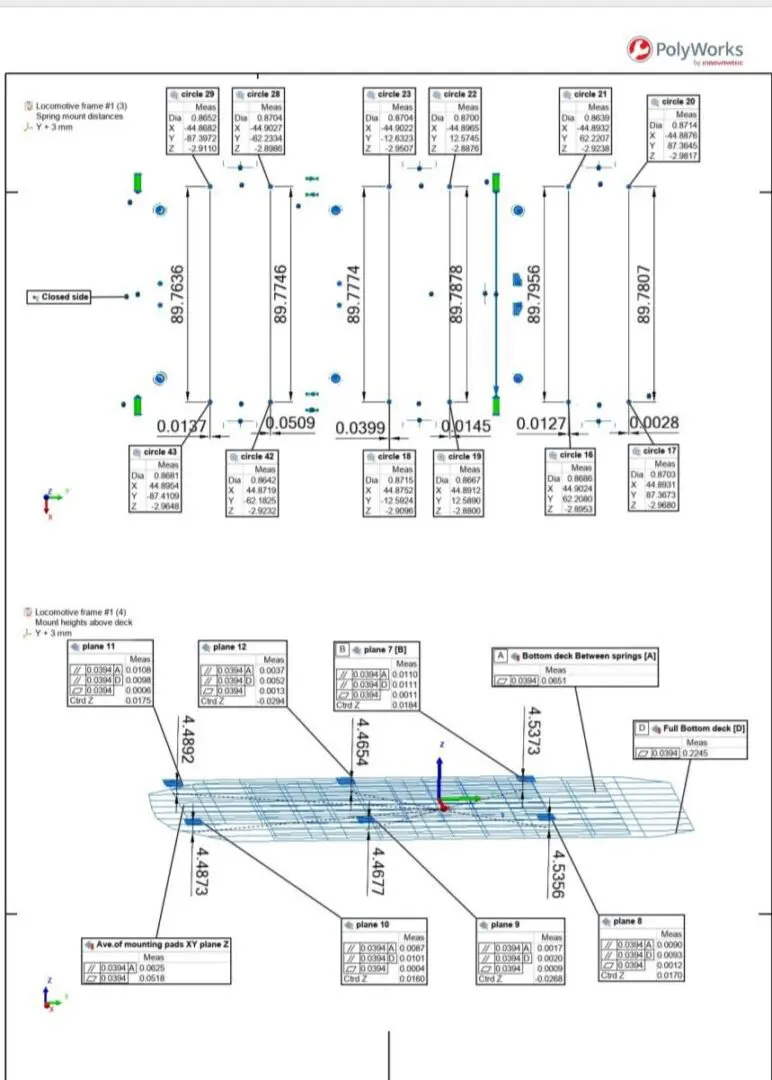
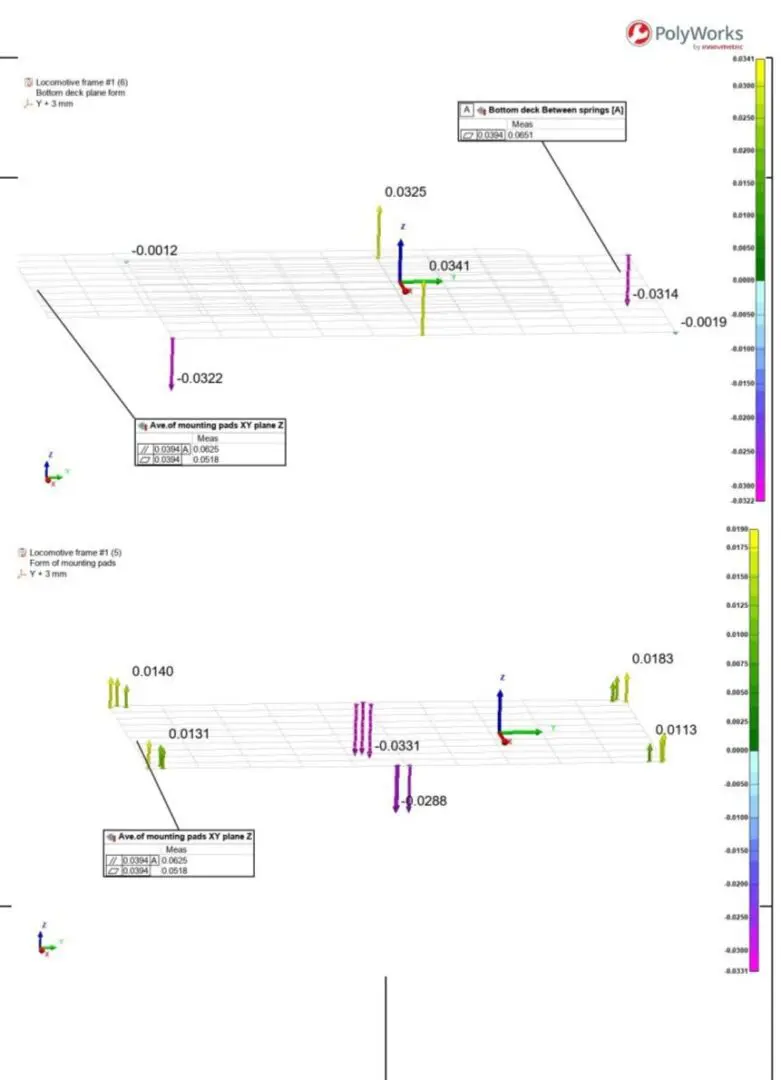
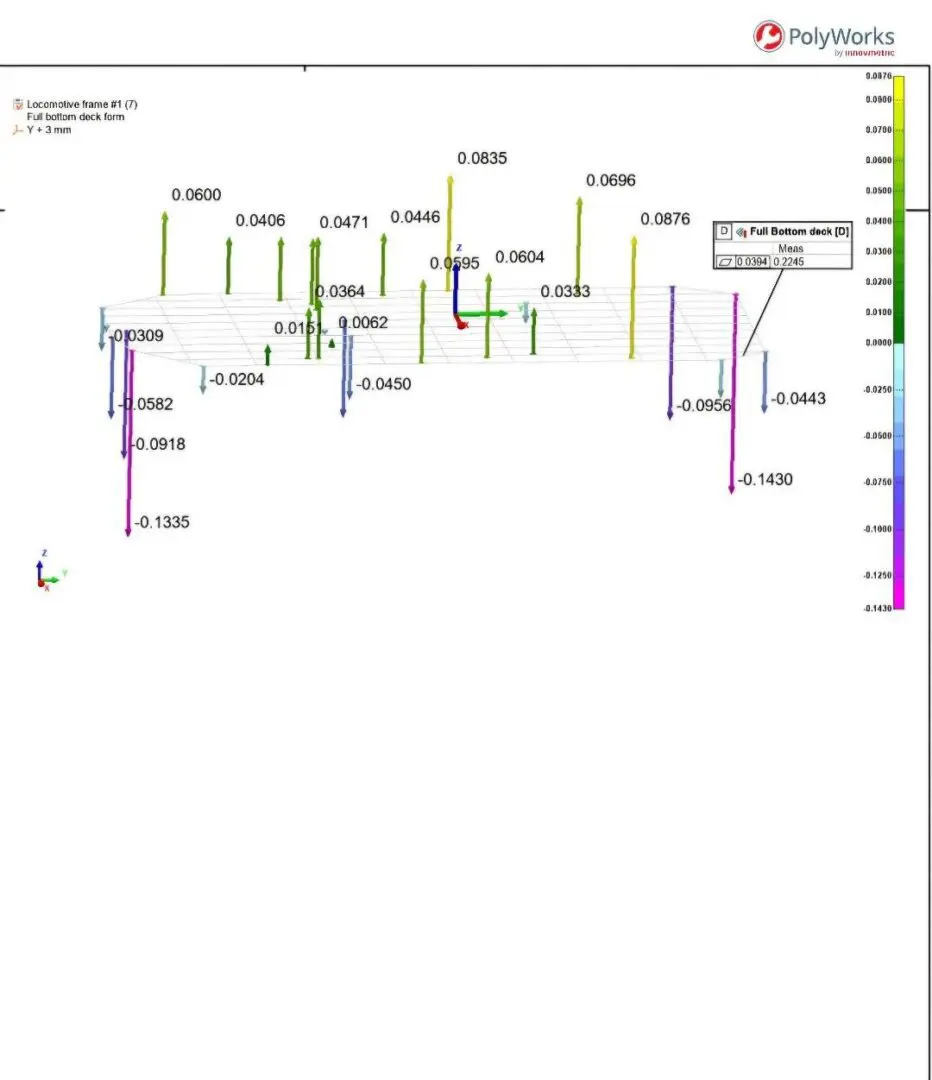
The Tracker and 4 Meter Arm were used to measure the features on these locomotive frames. The Polyworks report shows the deviations.
FARO® Laser Tracker
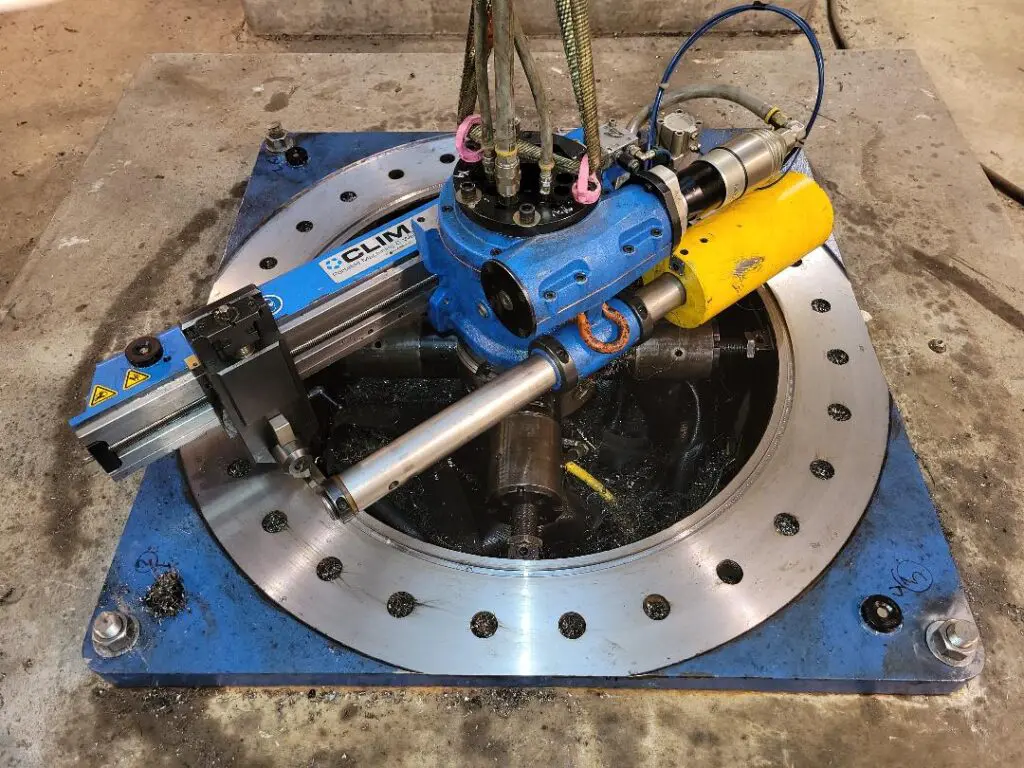
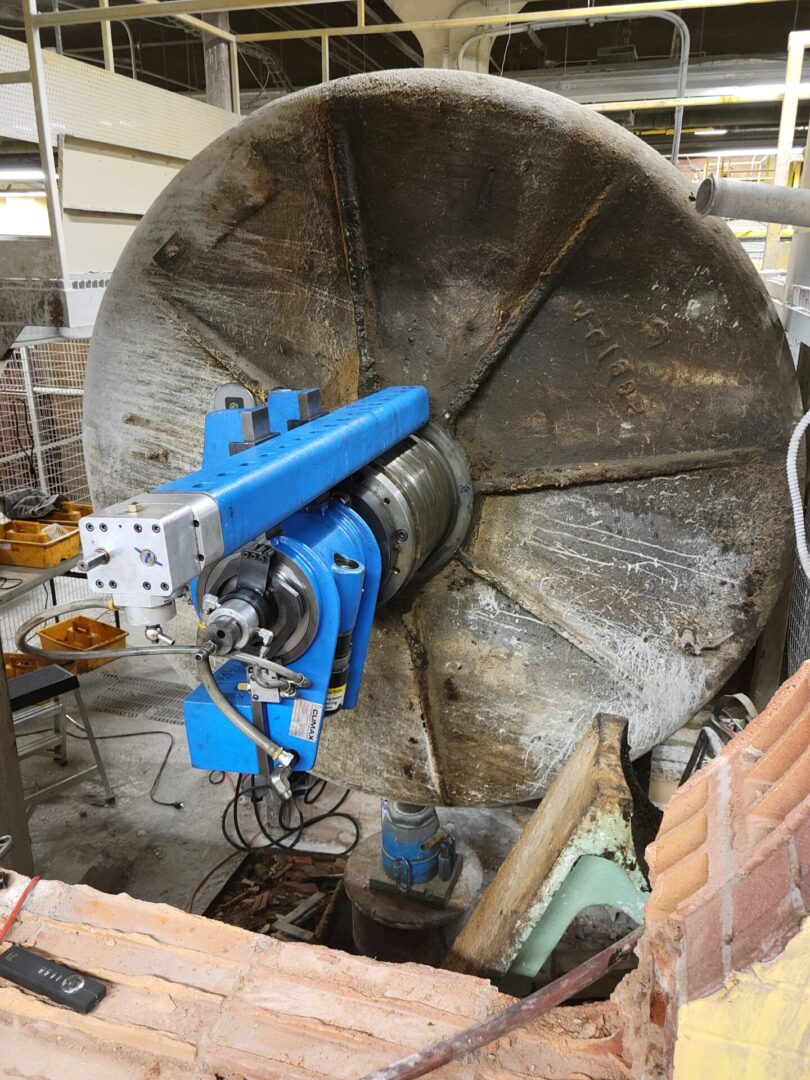
Critical measurements for an exact fit. This is a mounting plate inside of a cement plant in Baltimore, MD. Using the FARO Laser Tracker and the Climax LM6200, the mounting plate was measured and machined to tolerance of +.003 to -.003.
FARO® Laser Tracker with Tracker Arm
Bower RTG RG275 Foundation Drill. Measuring the features, align to datums, along with GD&T controls checking for parallelism, cylindricity, and perpendicularity. This drill was damaged on a job site and needed to be checked for repair. Reports of the as-found condition starting with the main house of the drill rig out through the boom control links and triangular transition. Also reported on the straightness of the connecting cylinders and main boom.
FARO® Laser Tracker
Shown here is a pump housing and cam shaft used in the gas well drilling industry. The bores in the housing were suspected of being out of align, however using the laser tracker and probe arm we found that it was the cam shaft the was out of alignment. Modern technology to find the problem, superior machining techniques to fix the problem.
FARO® Laser Tracker and 4 Meter Arm
Lake Lynn Hydro Generation Plant. The #3 turbine to generator shaft and bearings were measured to figure out a fix. Here are some pictures and reports showing the problems. The fix is on the way.
FARO® Laser Tracker
Horizonal milling machine at Crile Industrial. Measurement and alignment work. 1st Report, preliminary measurement taking a dynamic XZ plane reading. 2nd Report shows the as-found condition of the bed ways. 3rd Report shows the flatness of the bed ways and the perpendicularity to earth ground level along with the dynamic reading of the X travel in the as-left condition.
FARO® Laser Tracker and 4 Meter Arm
Veneer manufacturing in Fairfield Ohio. The bearing housings were worn and out of alignment on the veneer cutter. Using the FARO laser tracker and FARO track arm to check the alignment between the head stock and tail stock. The boring equipment was set in place, successfully aligned, and machined to SKF bearing specification.
FARO® Quantom Max Arm
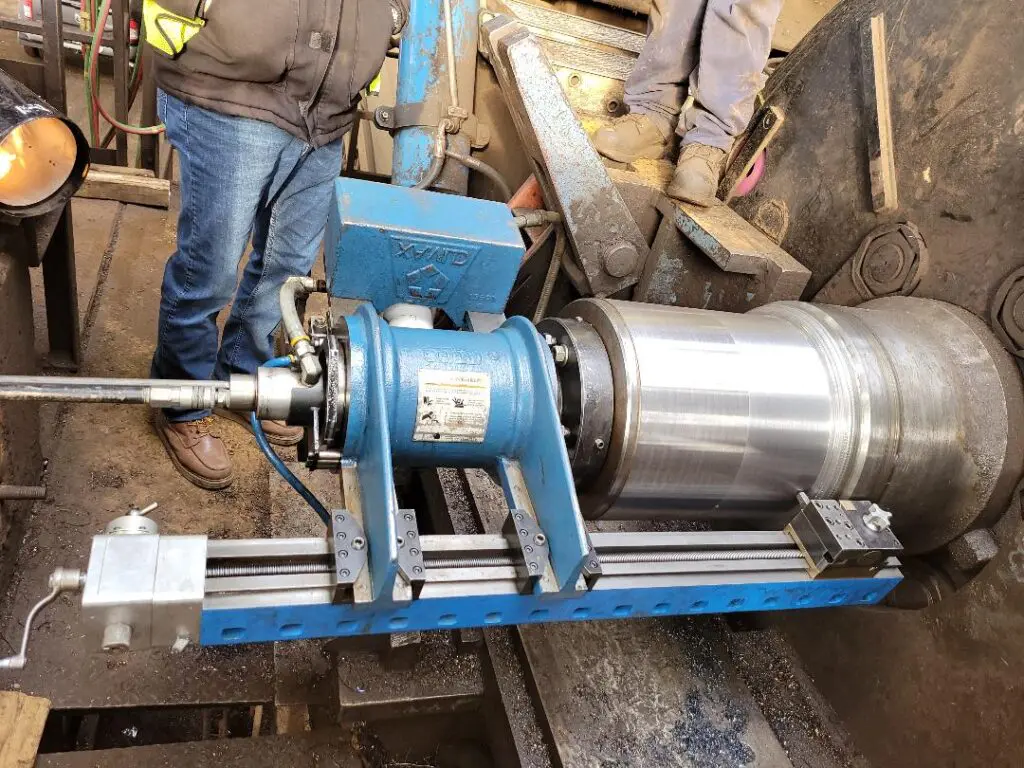
When alignment and precision are critical, you can trust the Quantum Max Arm and the Climax PL4000 to complete the job. This is a shaft used to move the cold drawn bars through the process. We weld built up the shaft and machined the shaft to the specified diameter. When something can not be removed, we can repair in place.
FARO® 4 Meter Arm
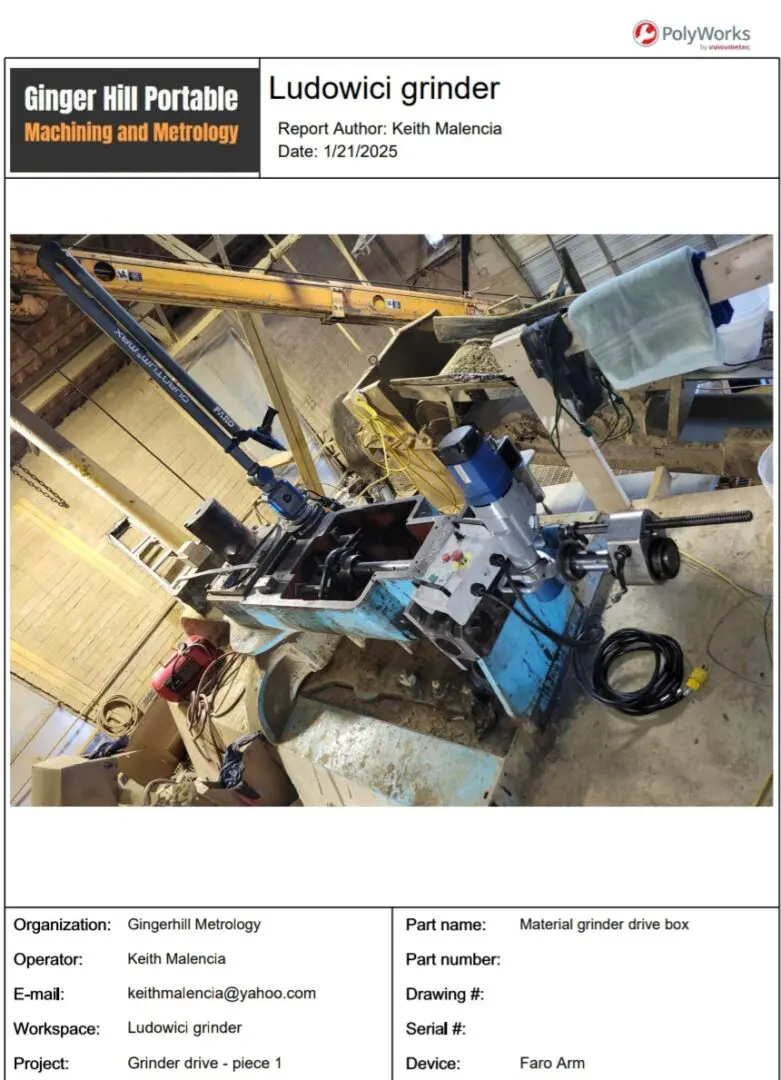
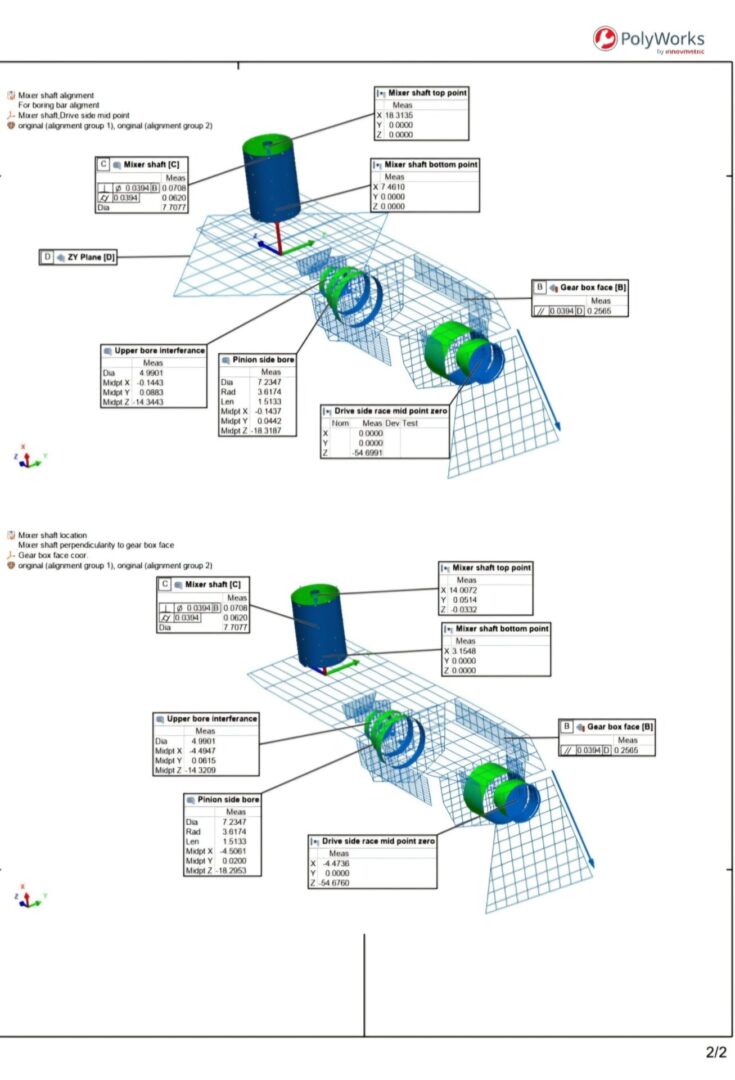
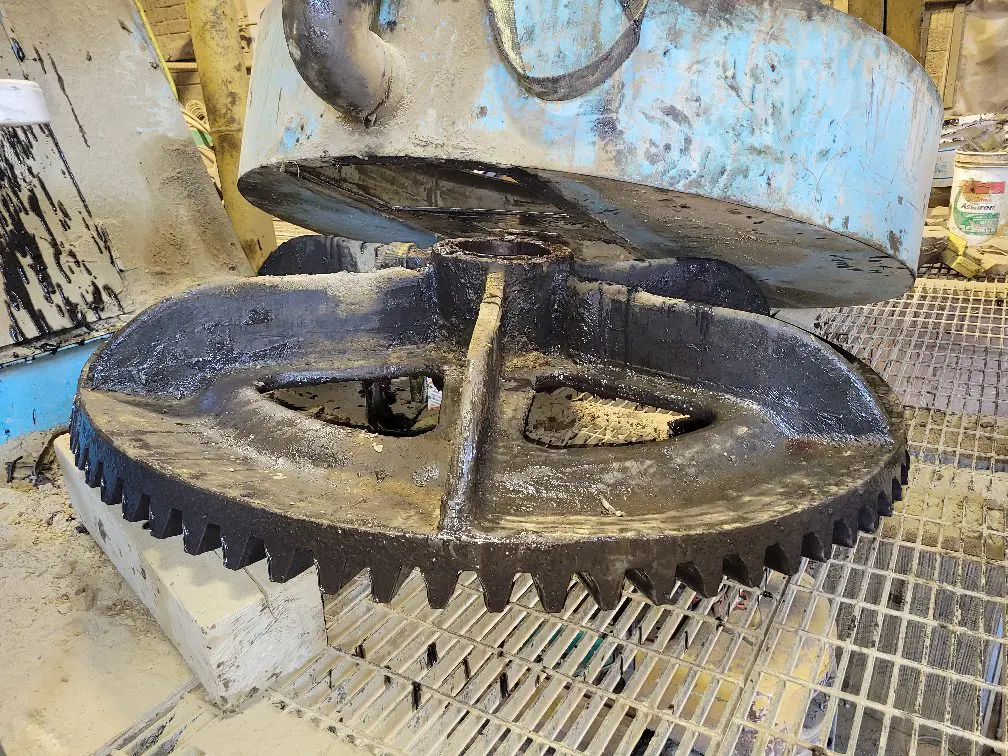
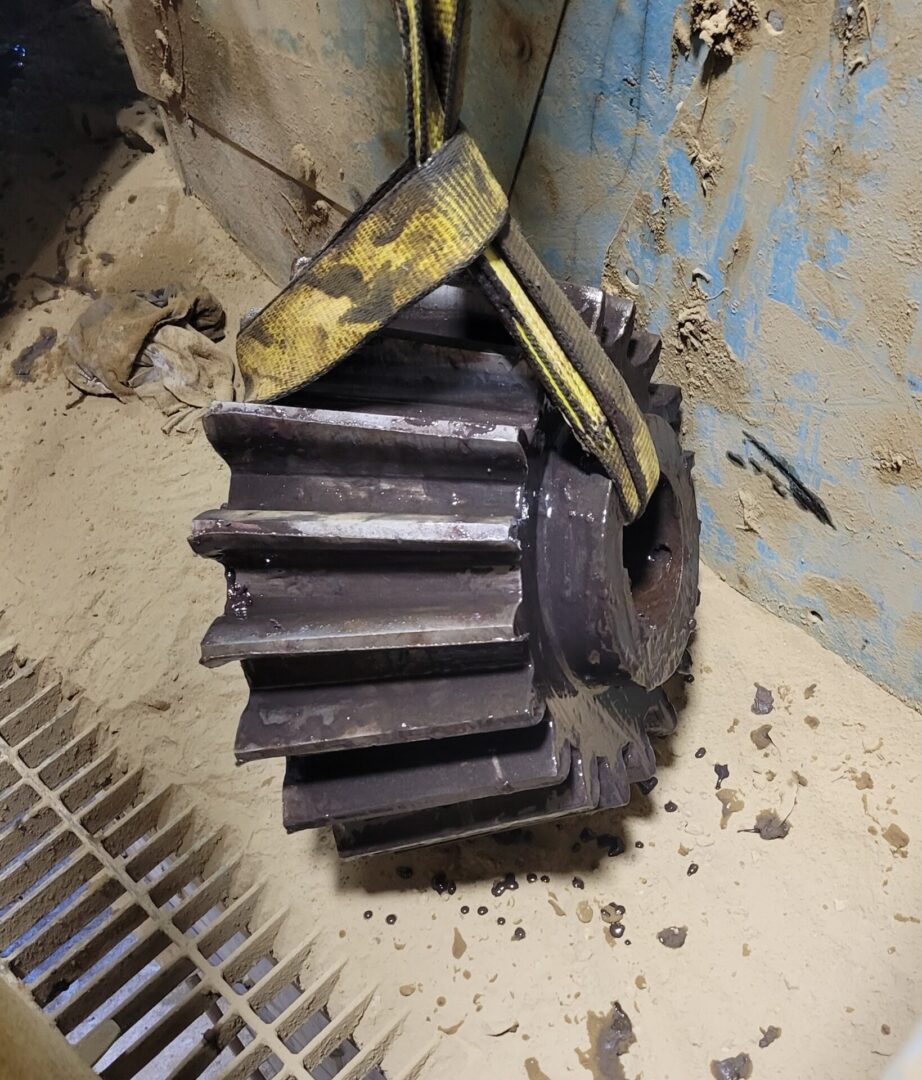
Clay tile roofing manufacturer Ludowici in New Lexington, Ohio. The material grinding gearbox needed the shaft bores aligned and machined. Along with the Polyworks report, here is a look at the pinion gear that sits inside the gearbox, and the bull gear that sits on the vertical shaft that was used for aligning the boring machine.
Featured Work
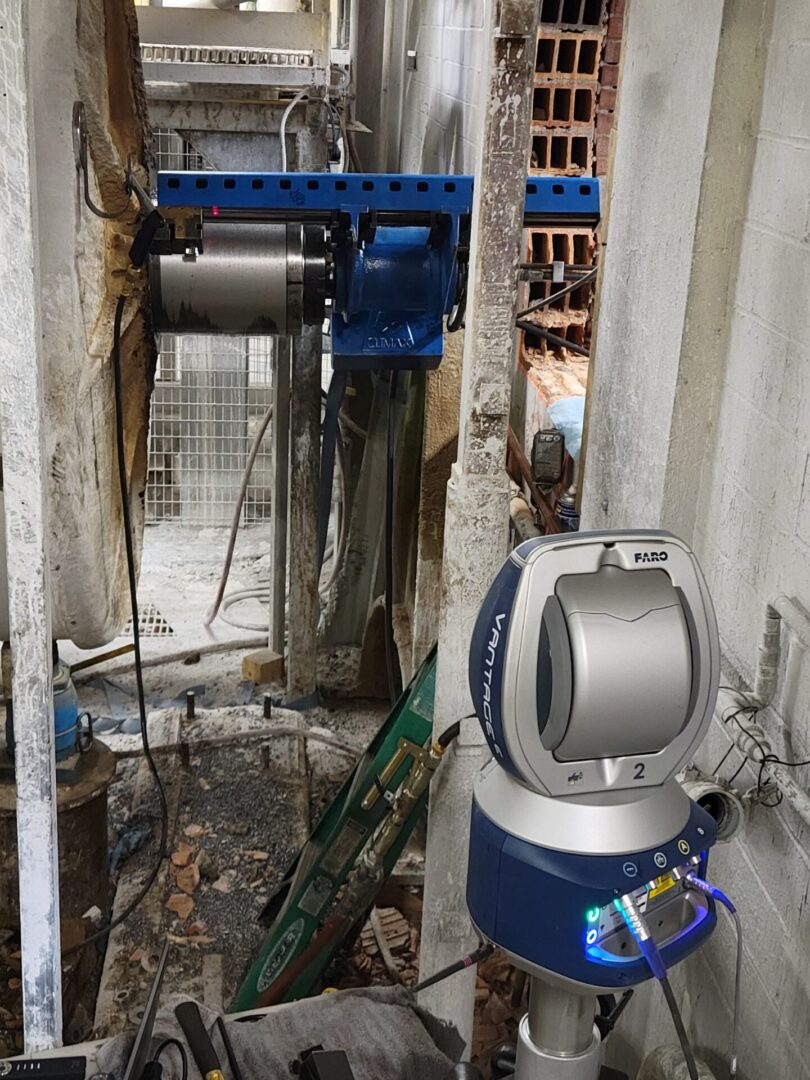
Measuring the alignment of the rear journal of a ball mill
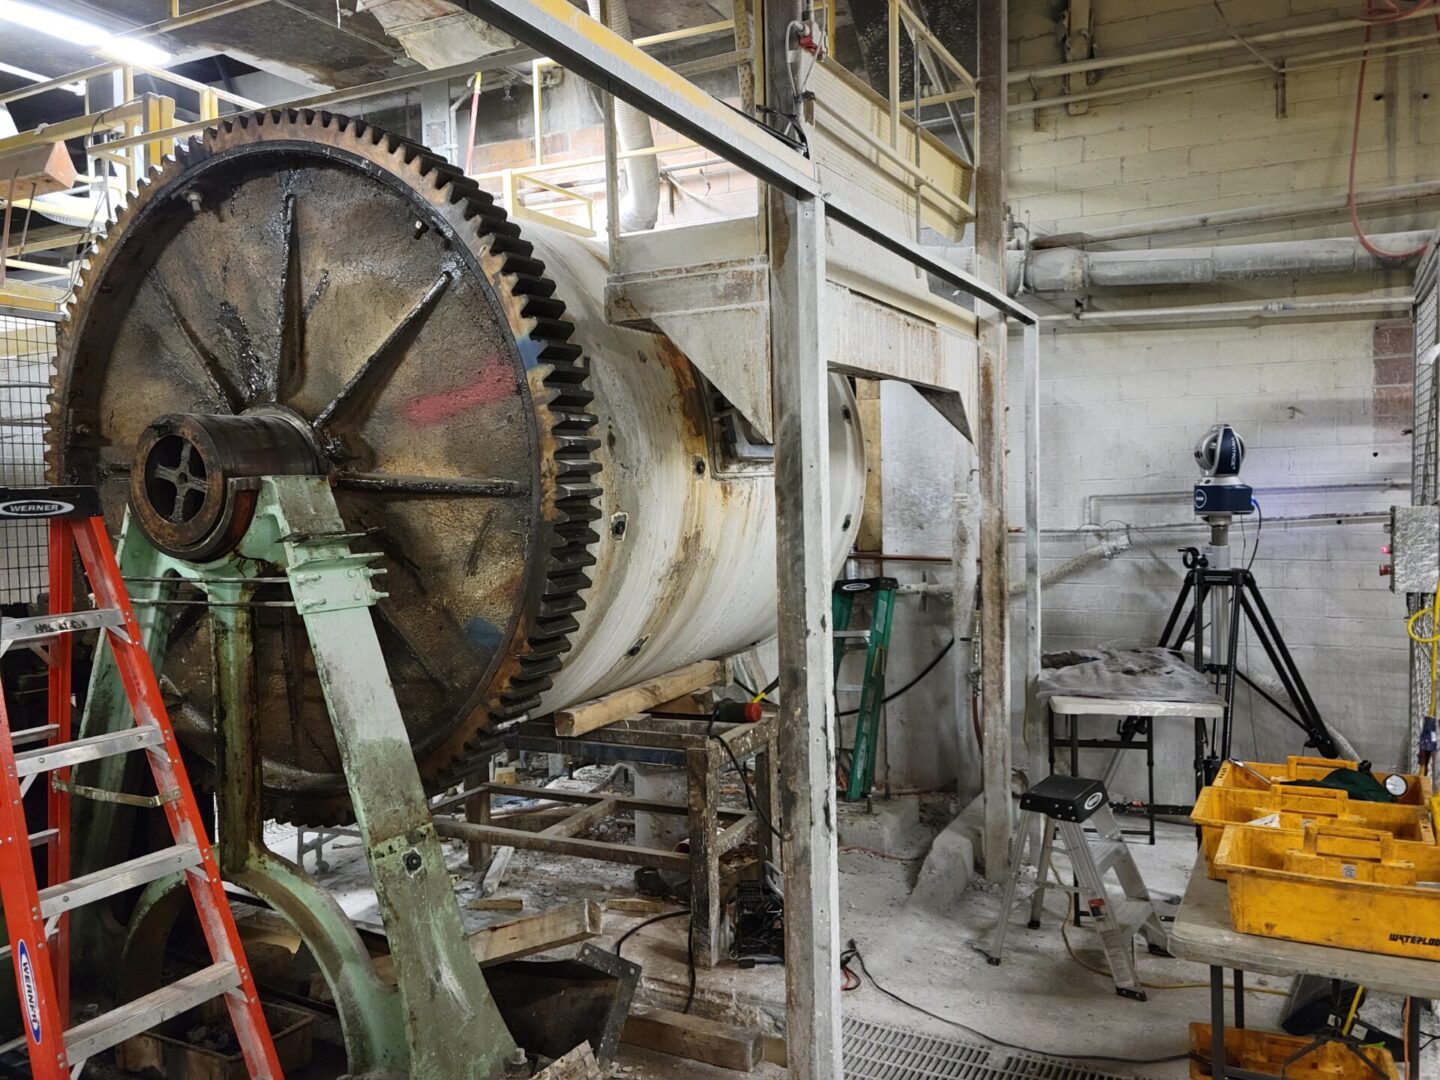
Measuring the alignment from both front and rear sides of the ball mill
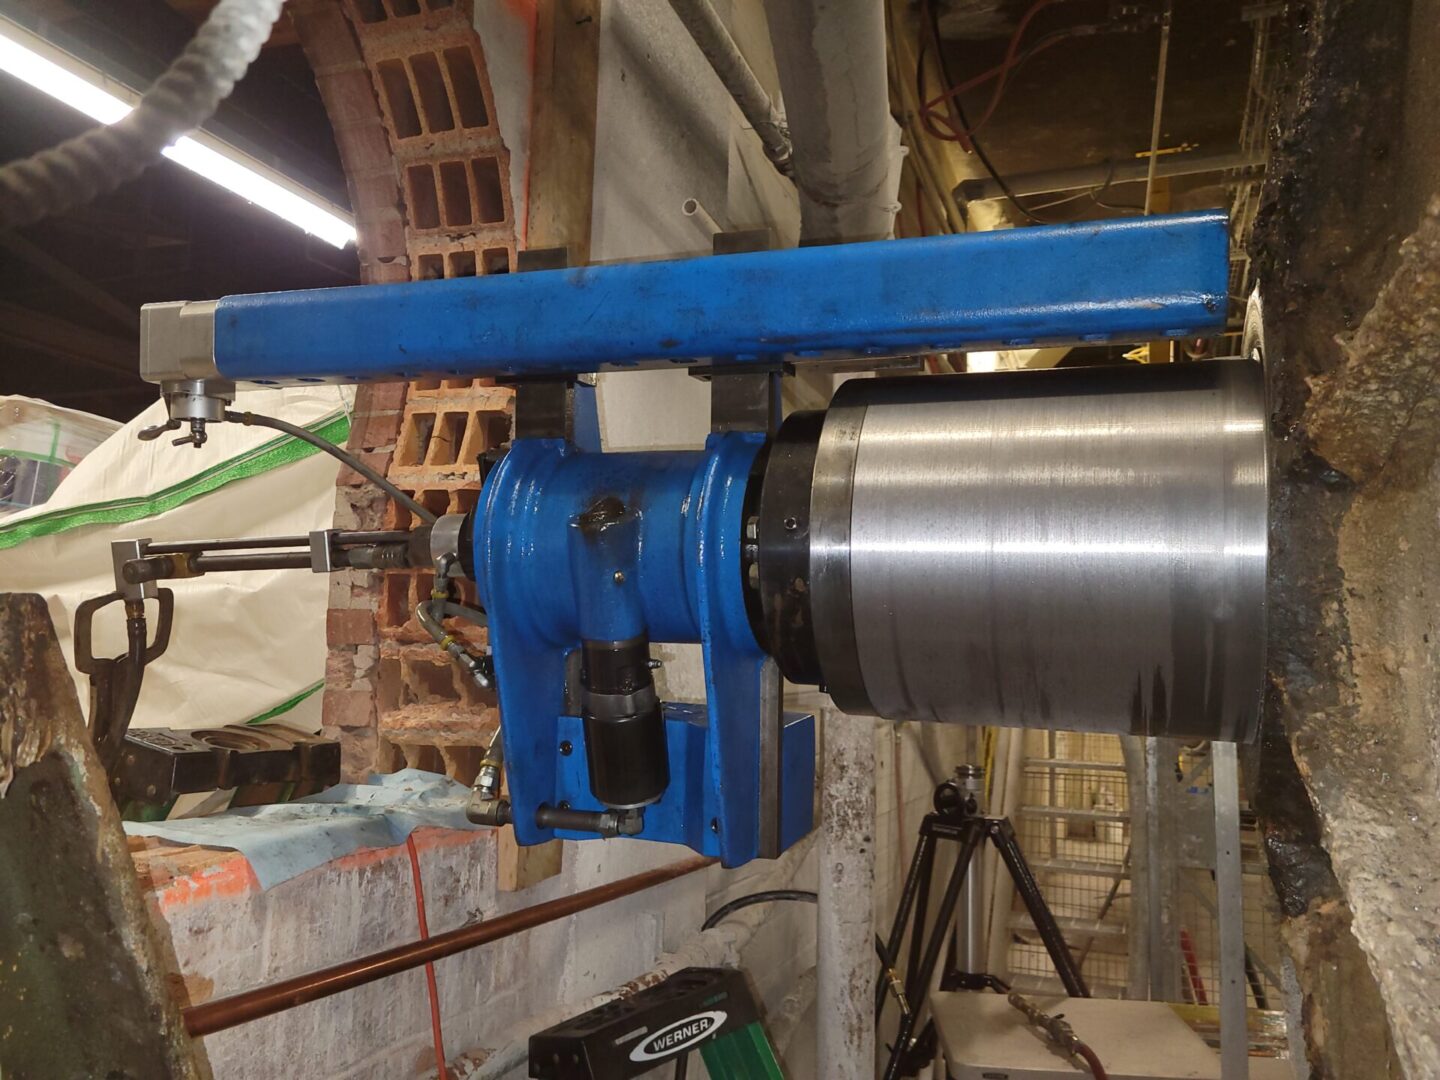
Machining the rear journal to align with the front journal
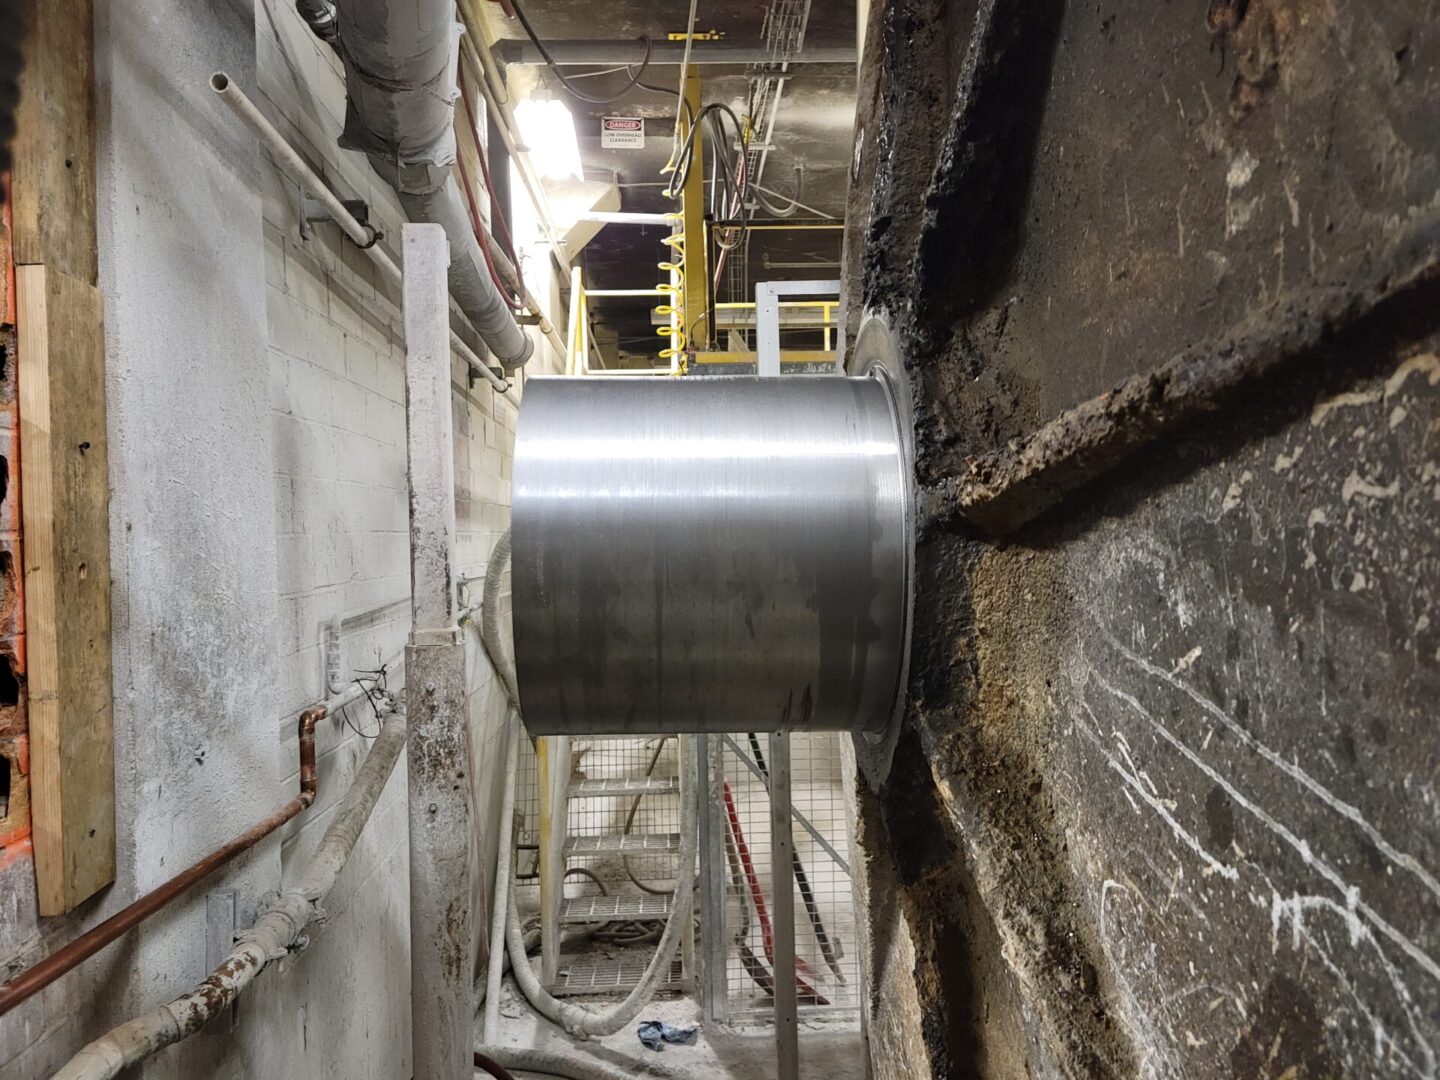
The finished journal on the rear side
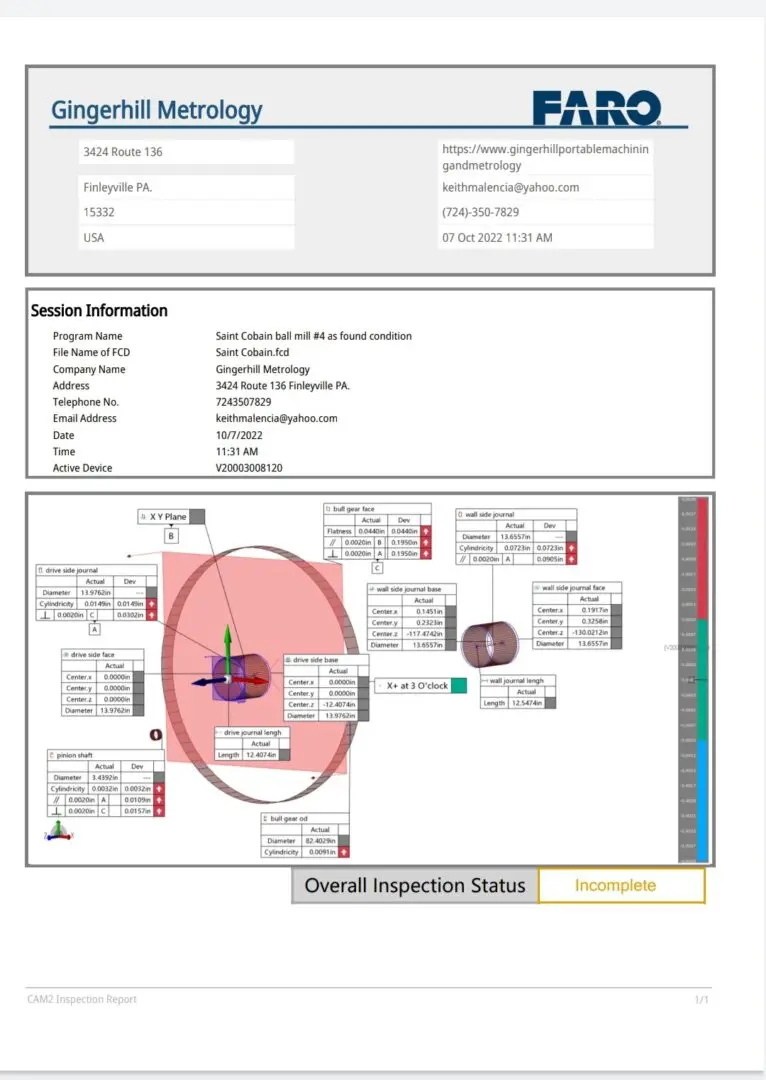
FARO report showing the alignment of the journals
New Featured Work
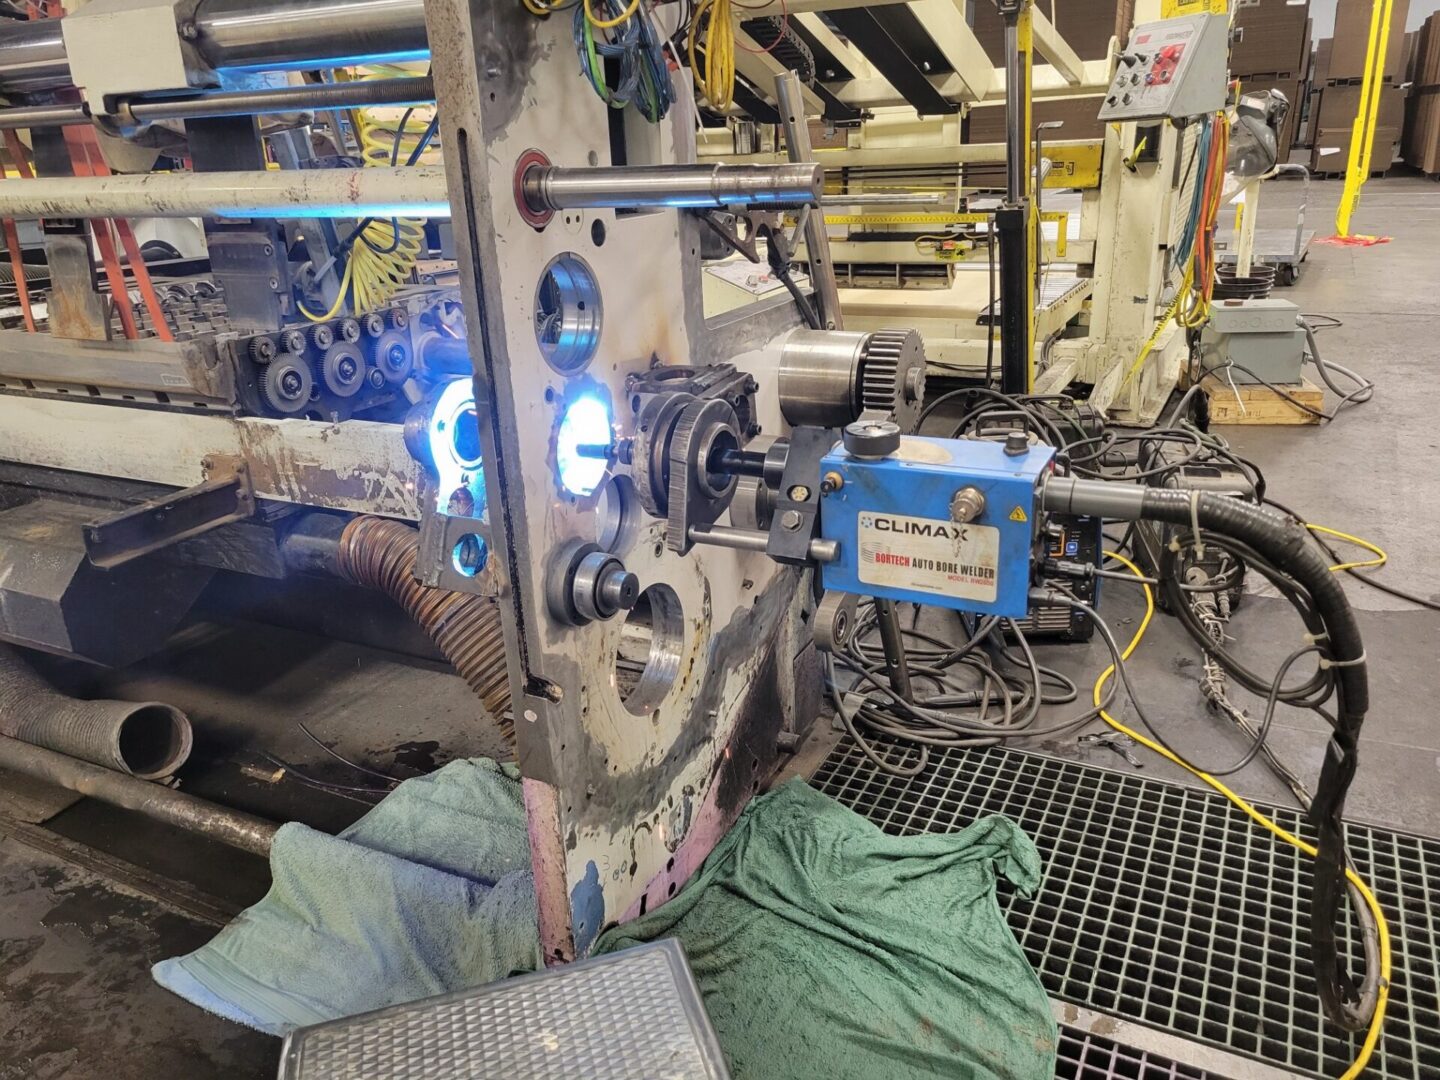
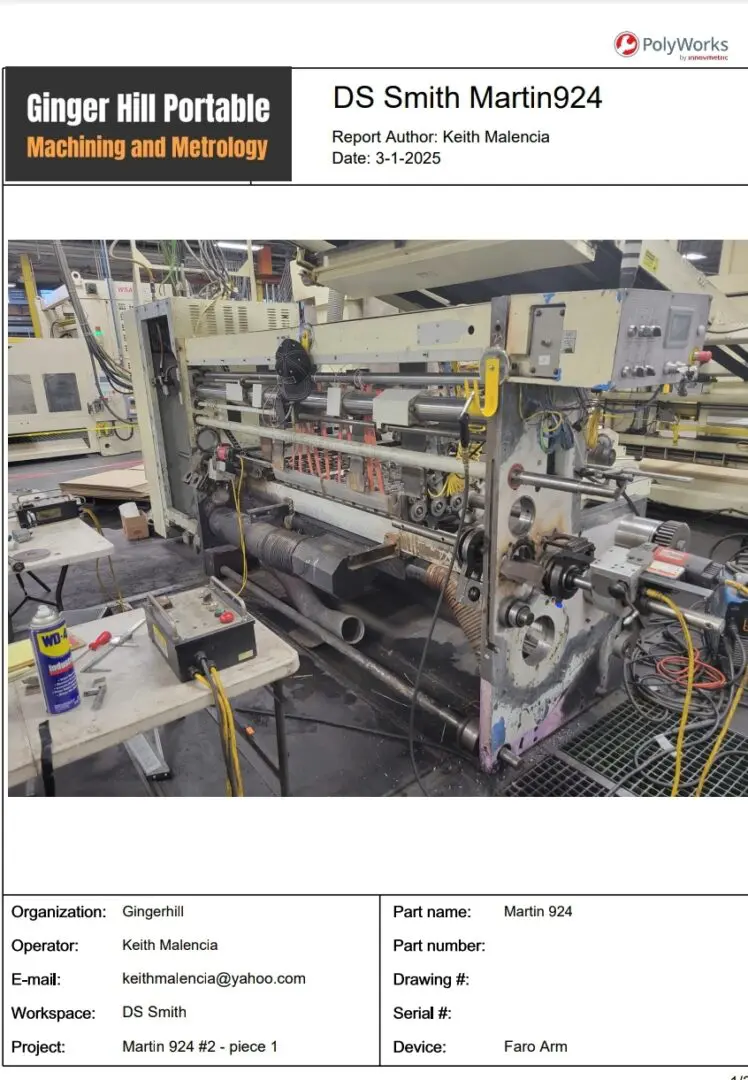
North American Paper and Packaging Division of DS Smith. Weld build up of the bores in the rolling mill on the Martin 924.
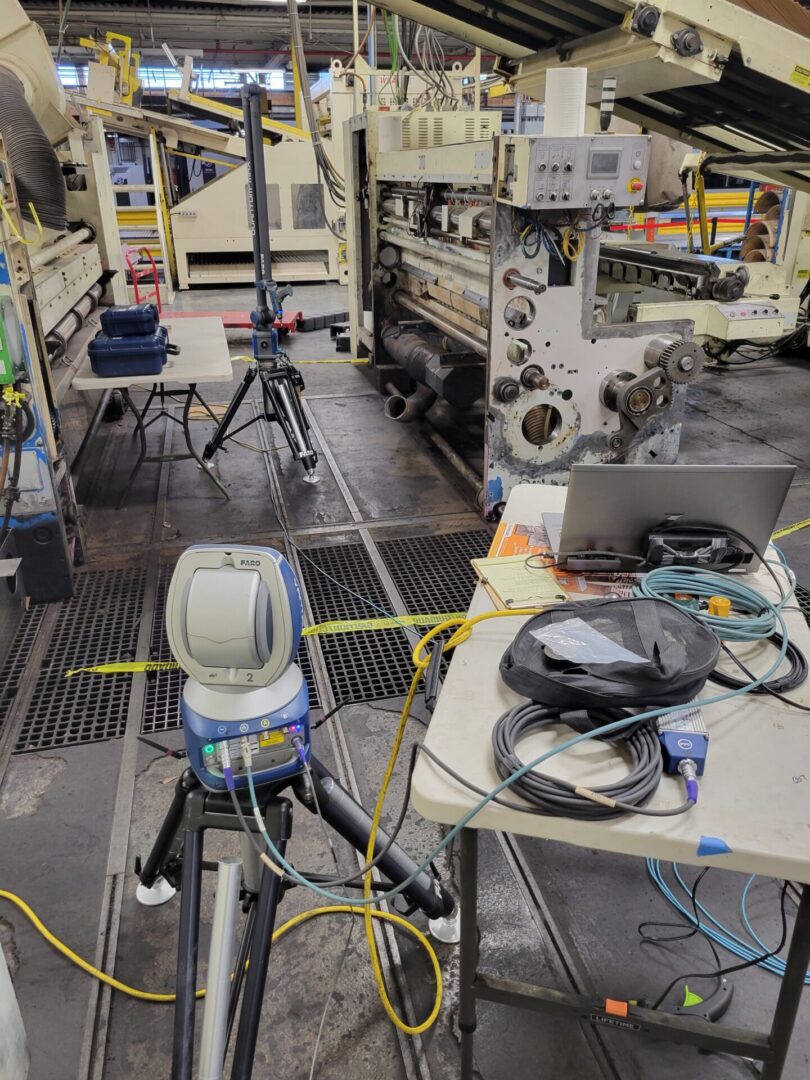
Measuring the alignment using the Faro Laser Tracker and 4 Meter Arm
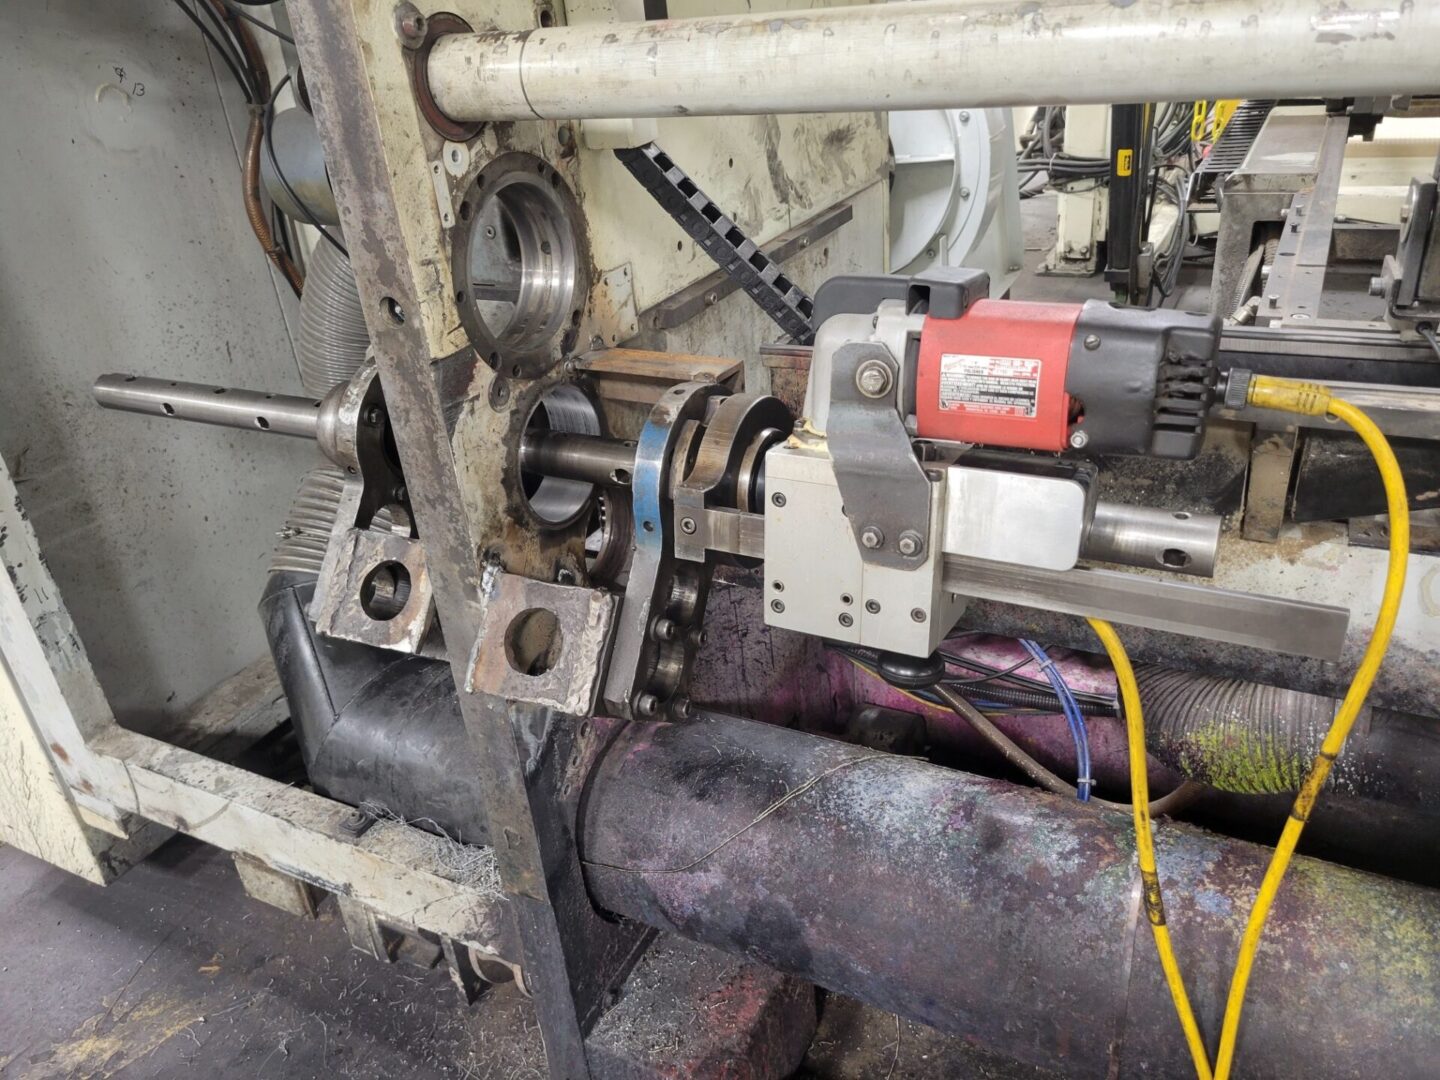
Boring equipment is set and both sides of the mill were bored to precision fit the bushings.
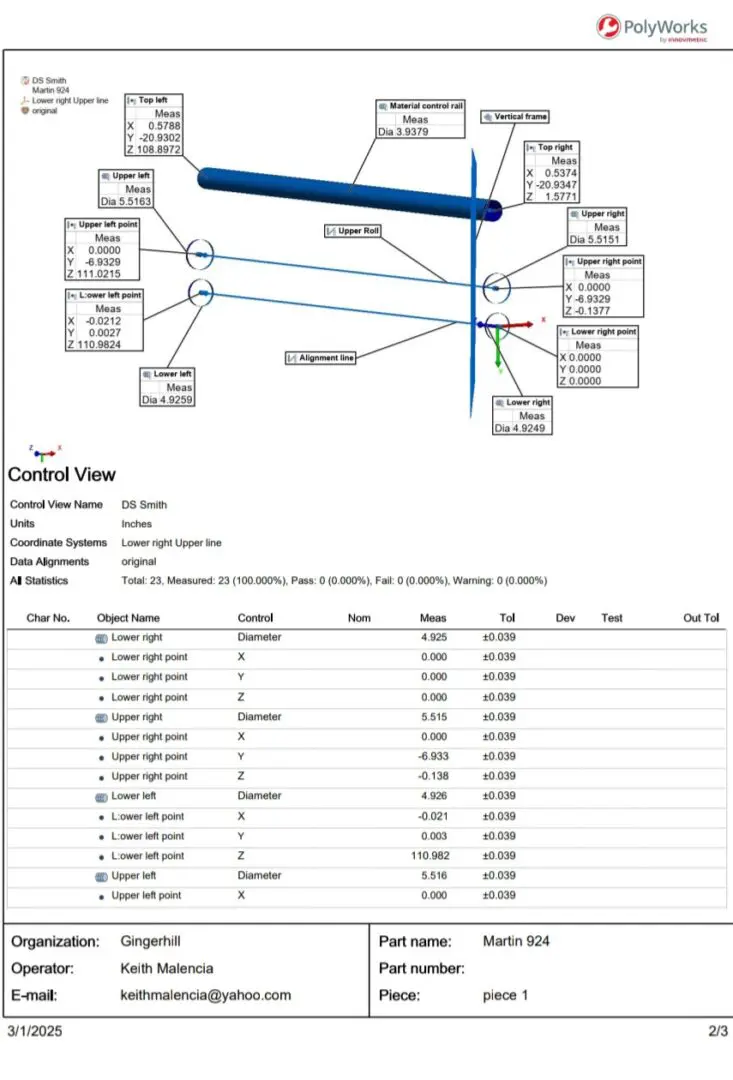
Polyworks report showing the alignment of the bores.
New Featured Work
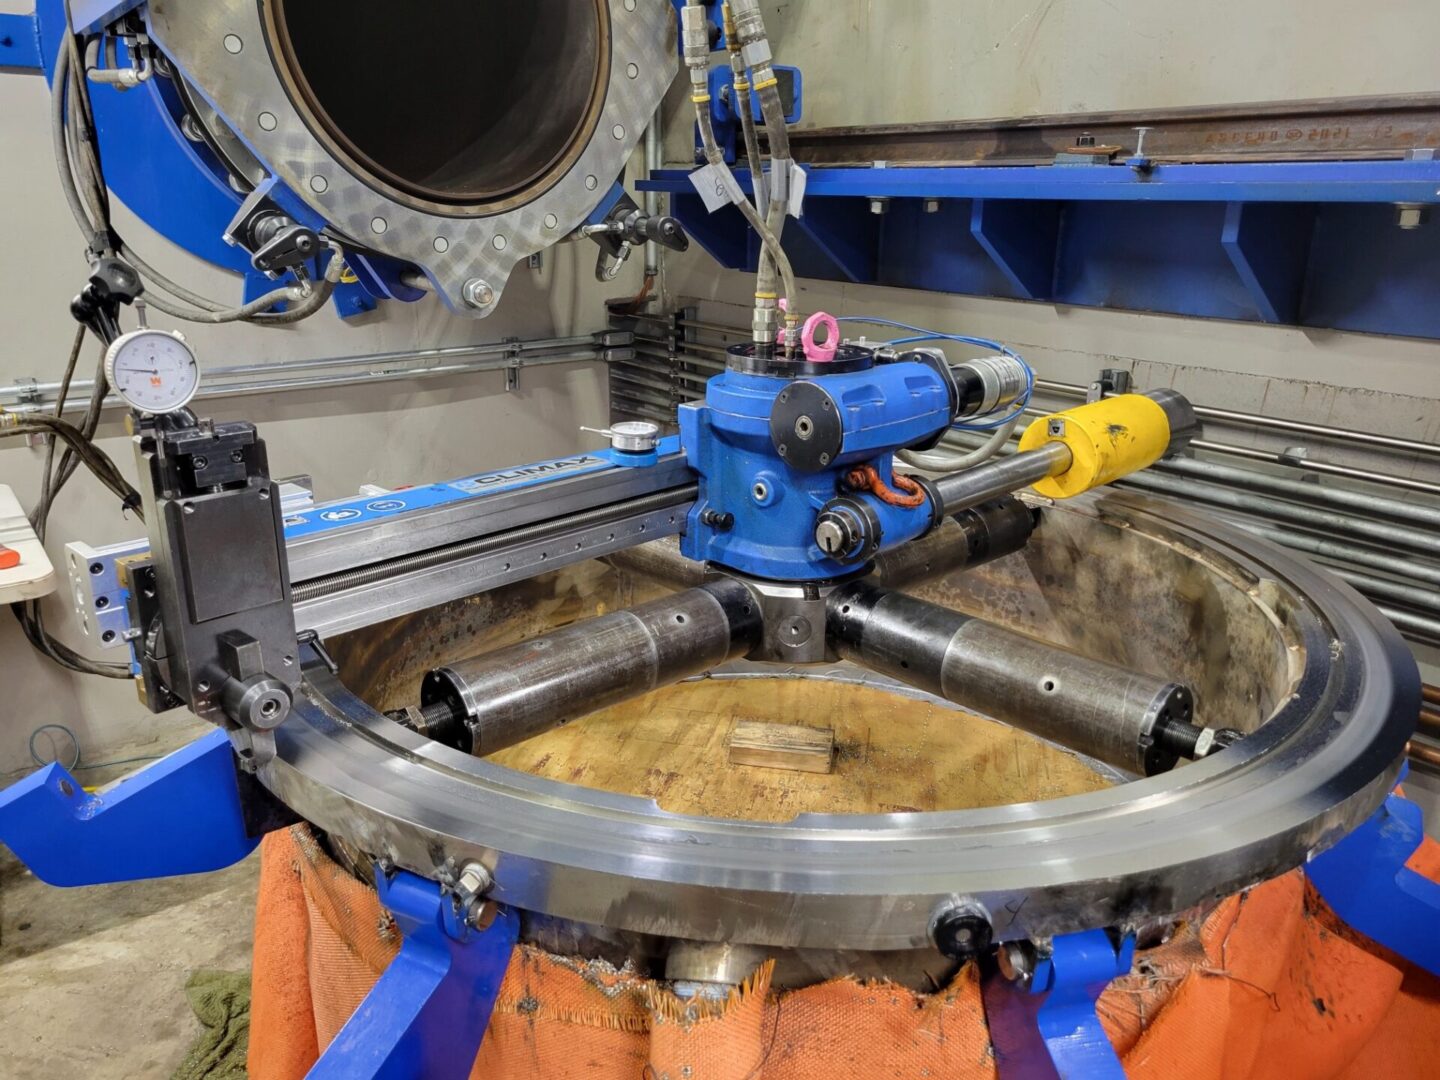
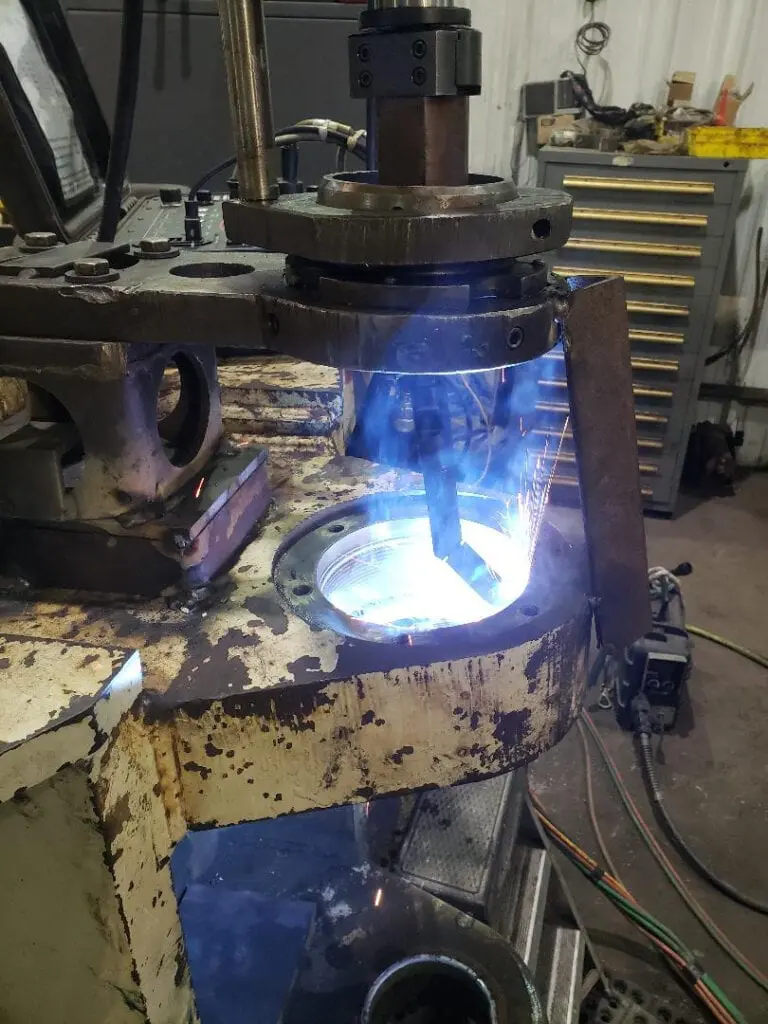
Using the Climax FF6300 single point to machine the flange on a titanium furnace
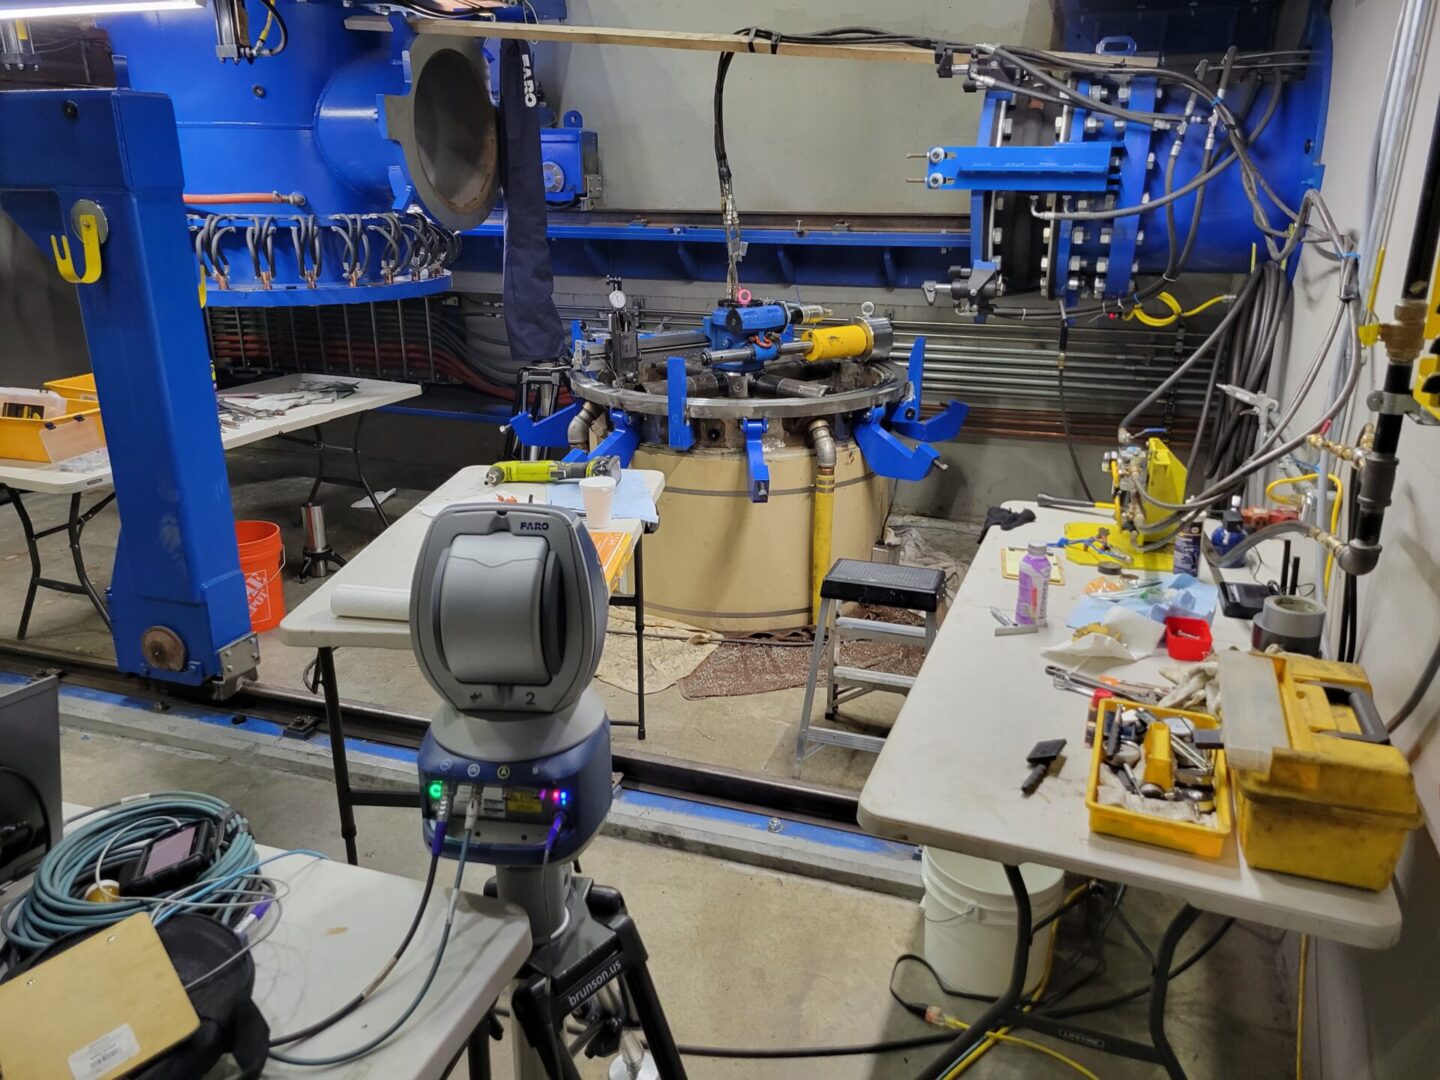
The FARO Laser Vantage Tracker was used to check all aspects of the machining process
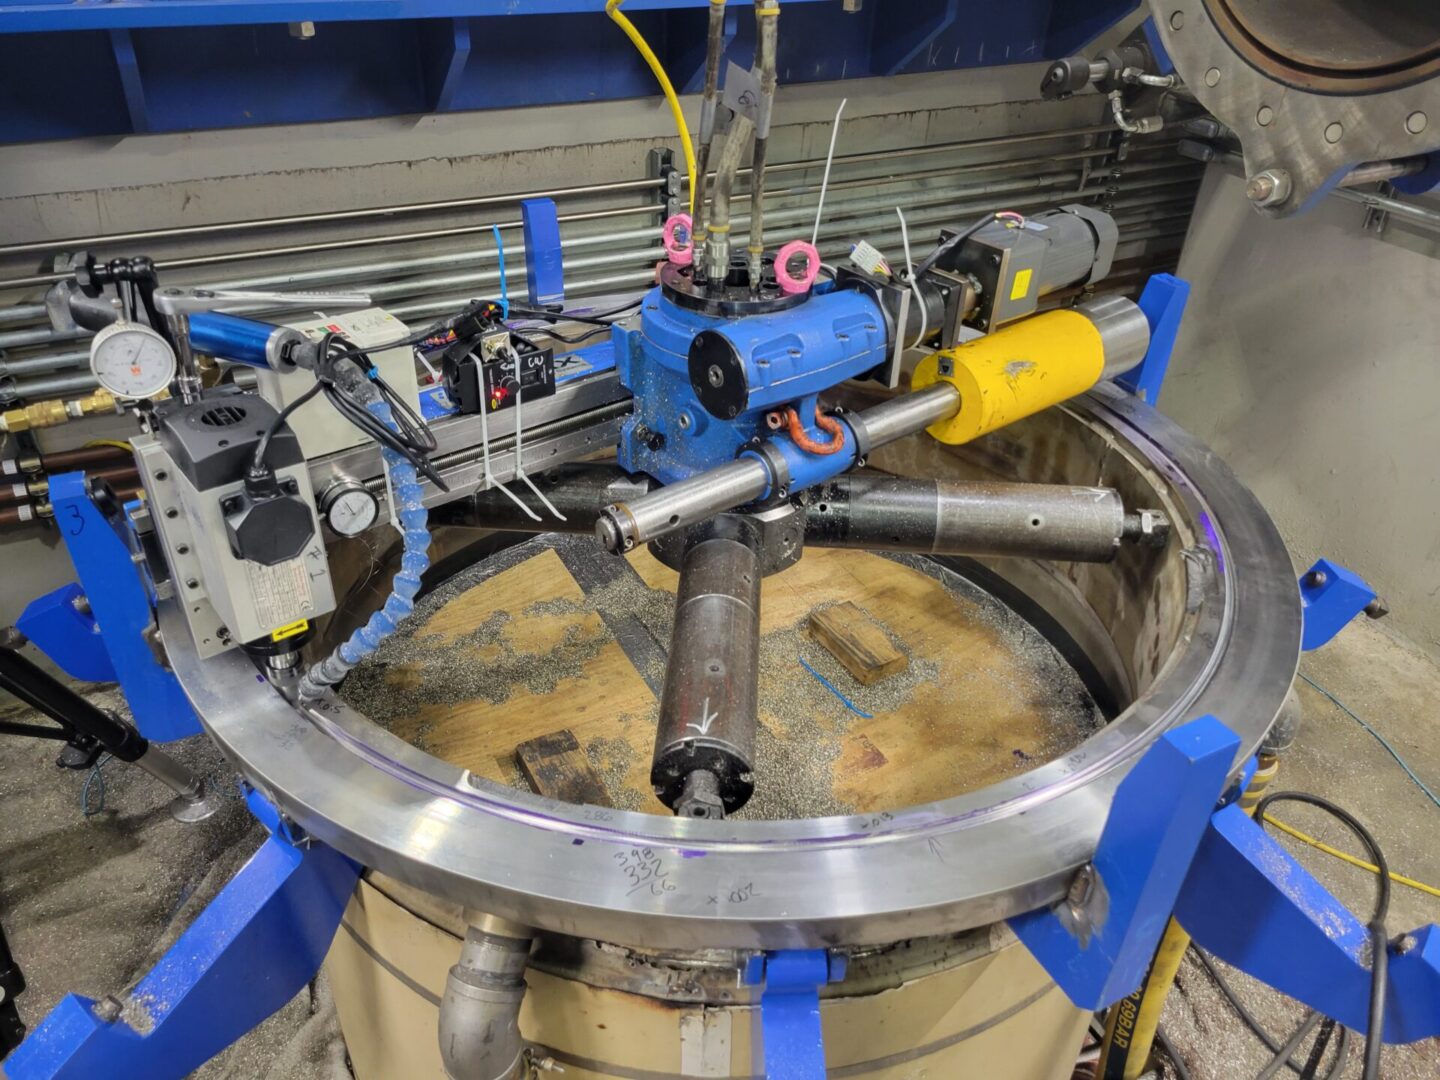
The FF6300 using the milling capability to finish the O Ring groove in the flange surface
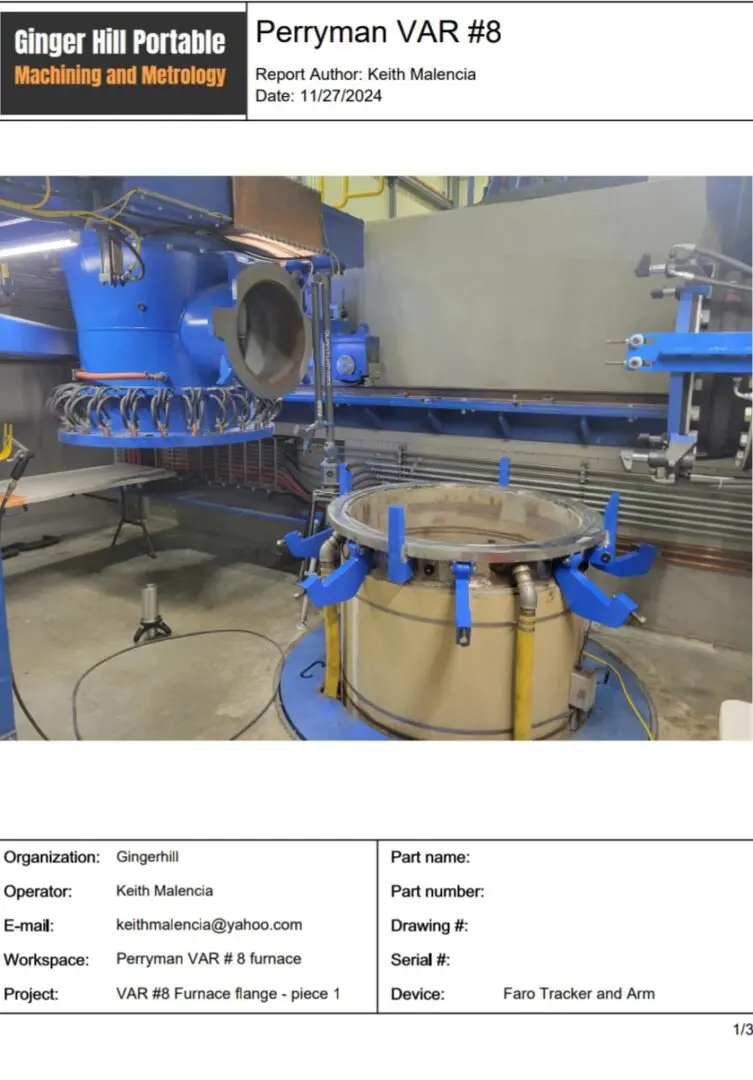
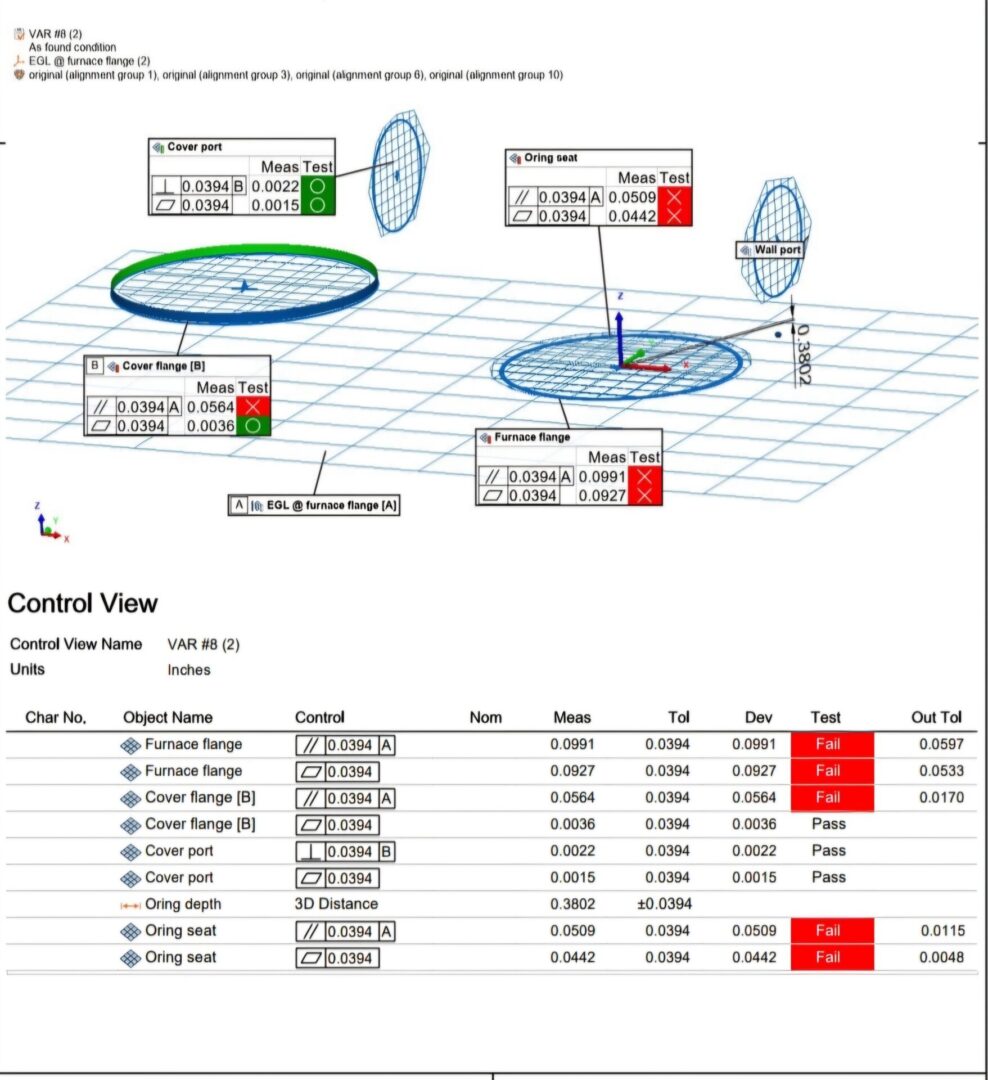
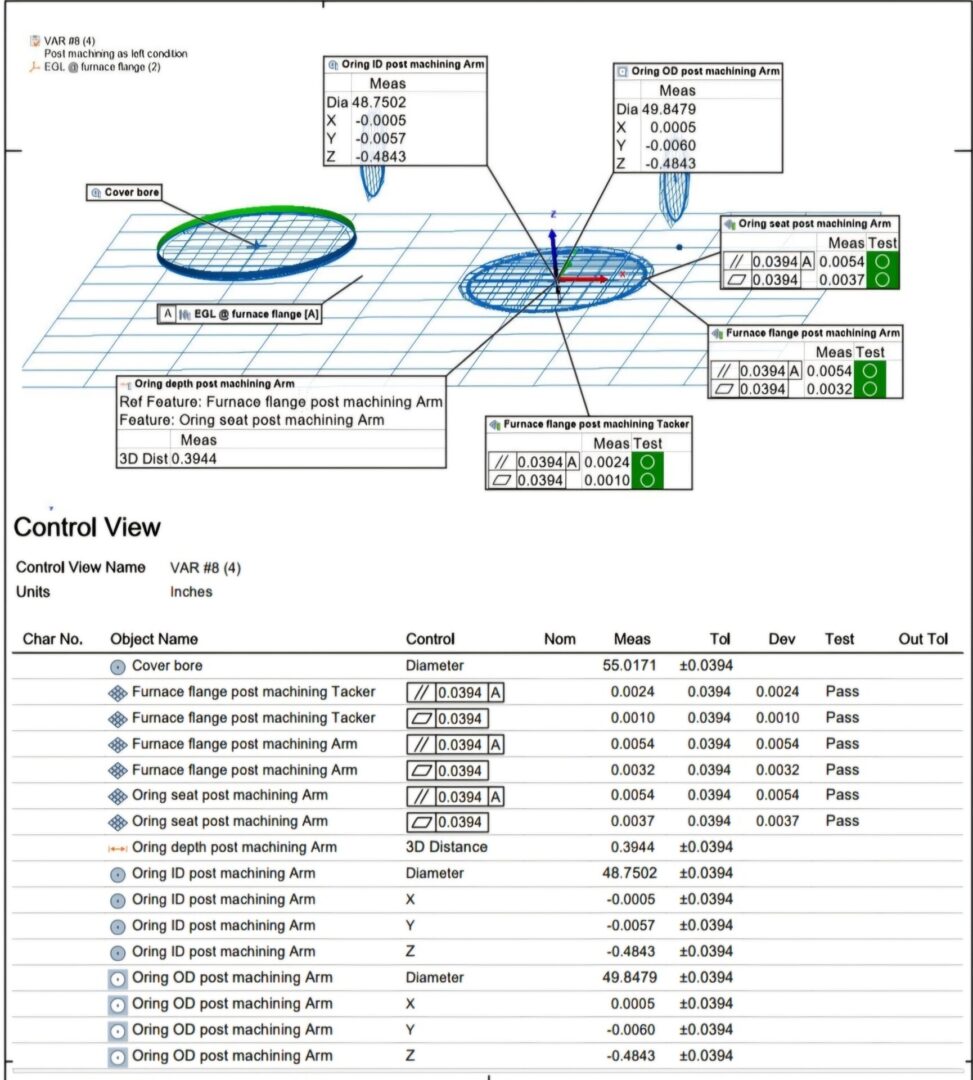
Polyworks Reports for the furnace flange as-found and as-left condition
When alignments are Critical
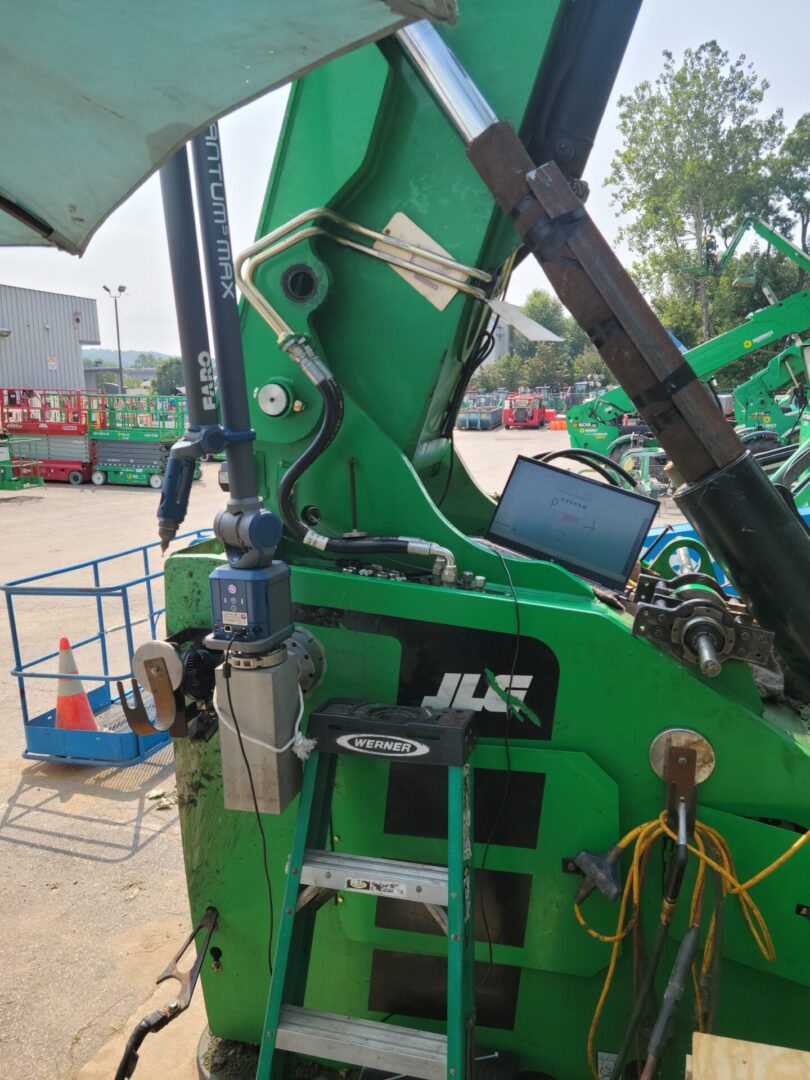
SkyTrak Telehandler alignment work using the FARO arm
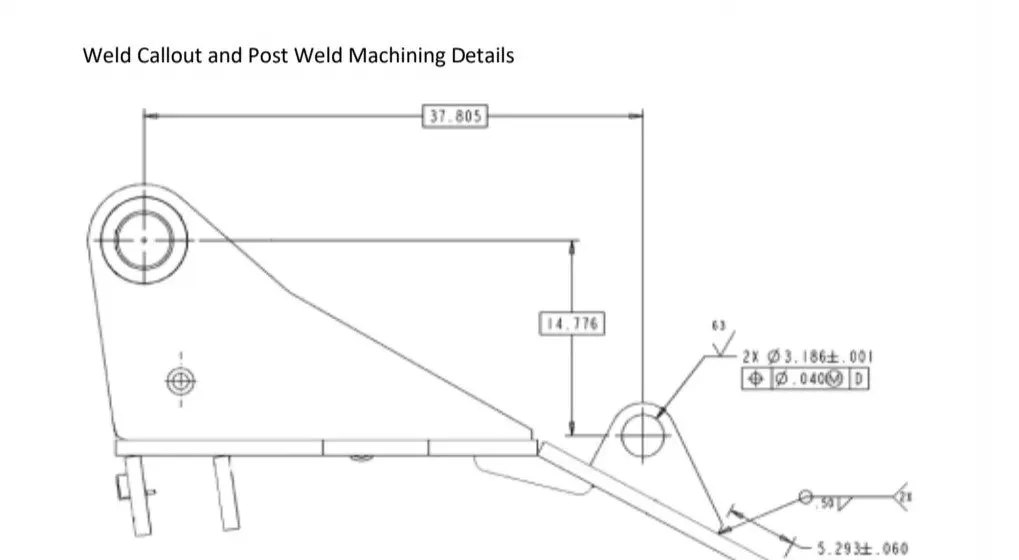
Drawing of Specifications
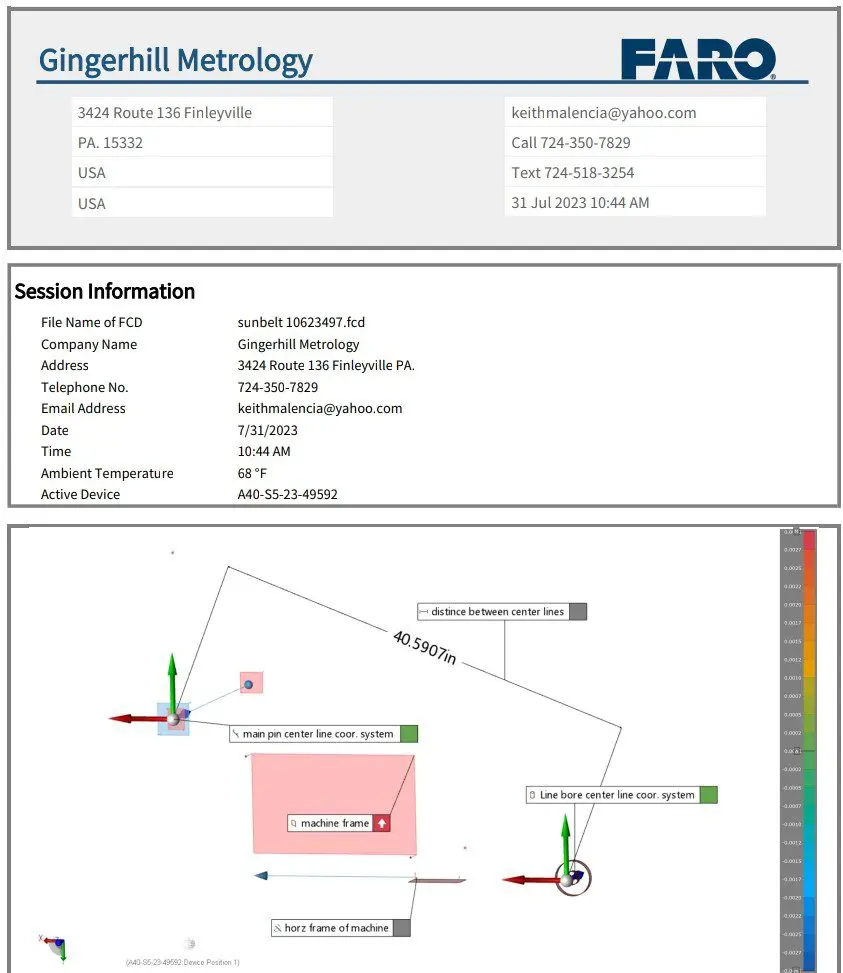
Report showing the as-left dimentions
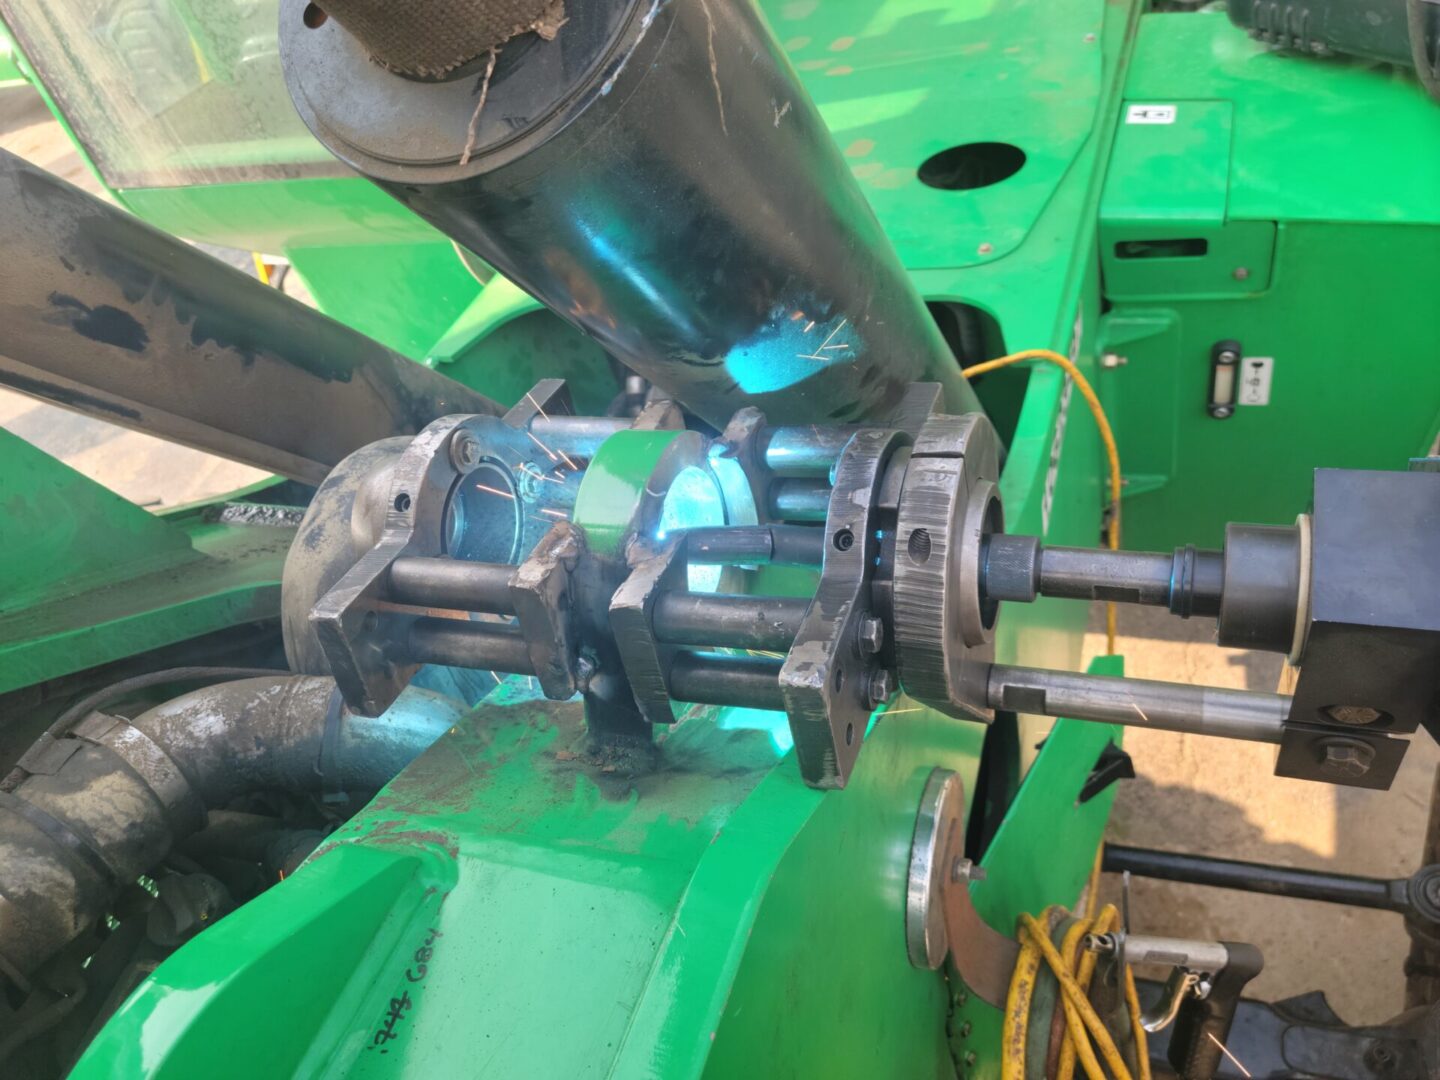
Weld build up of the cylinder mount bore
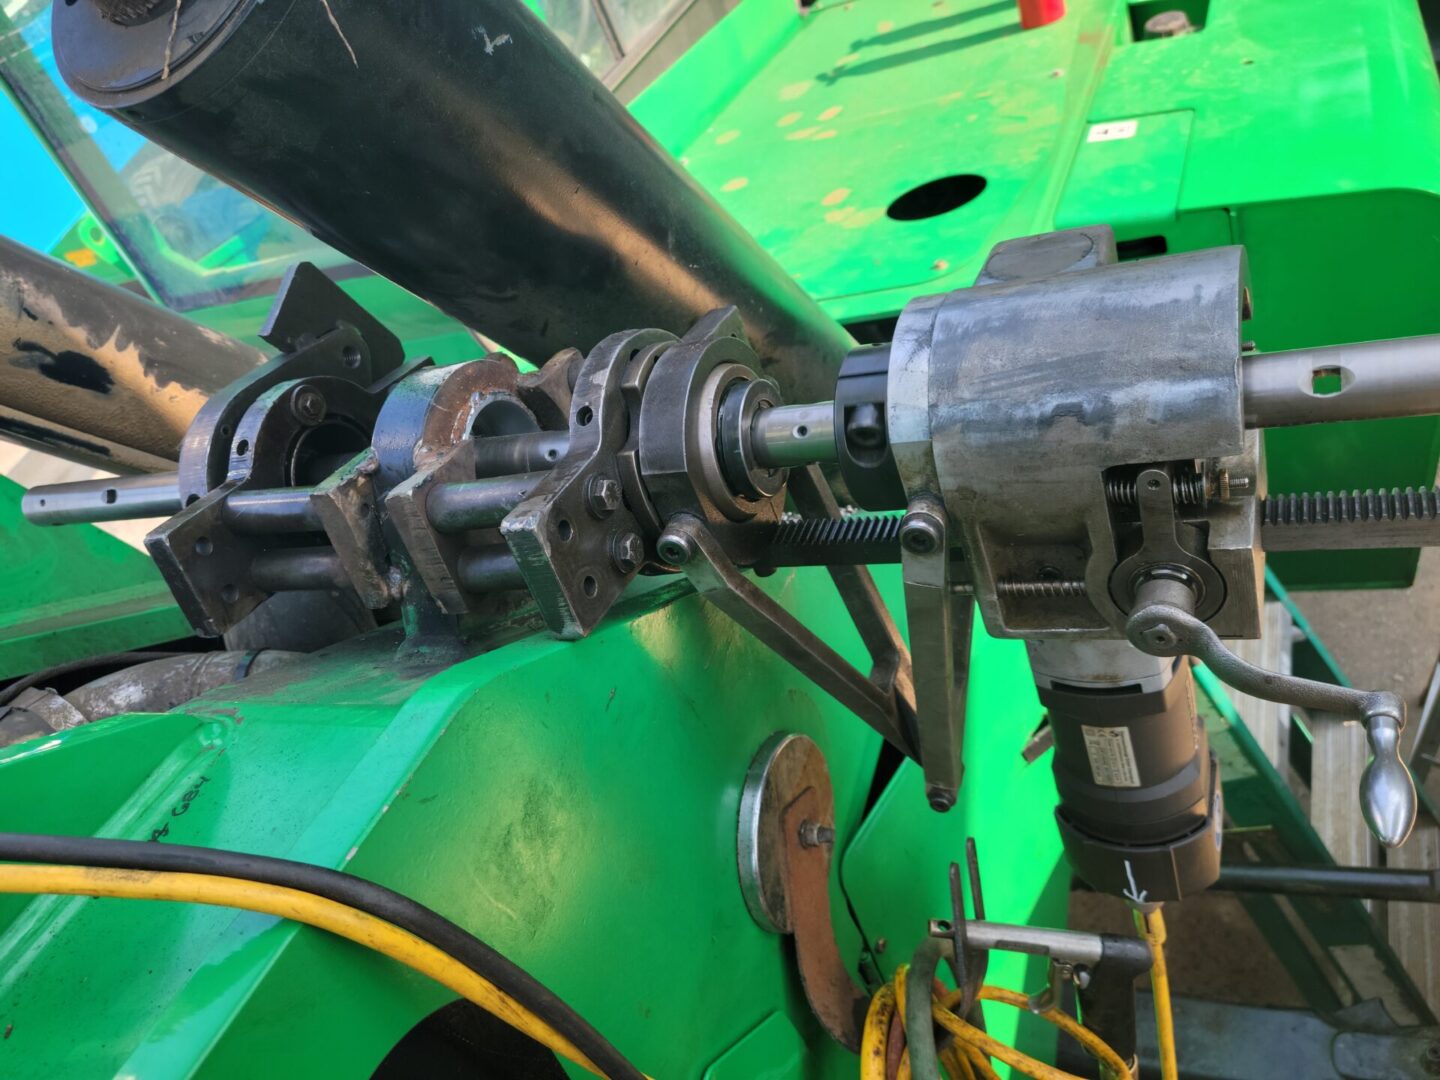
Machining bore to size
Measurement work on Fab-Tec locomotive frames.
Metrology and Machining Working Together

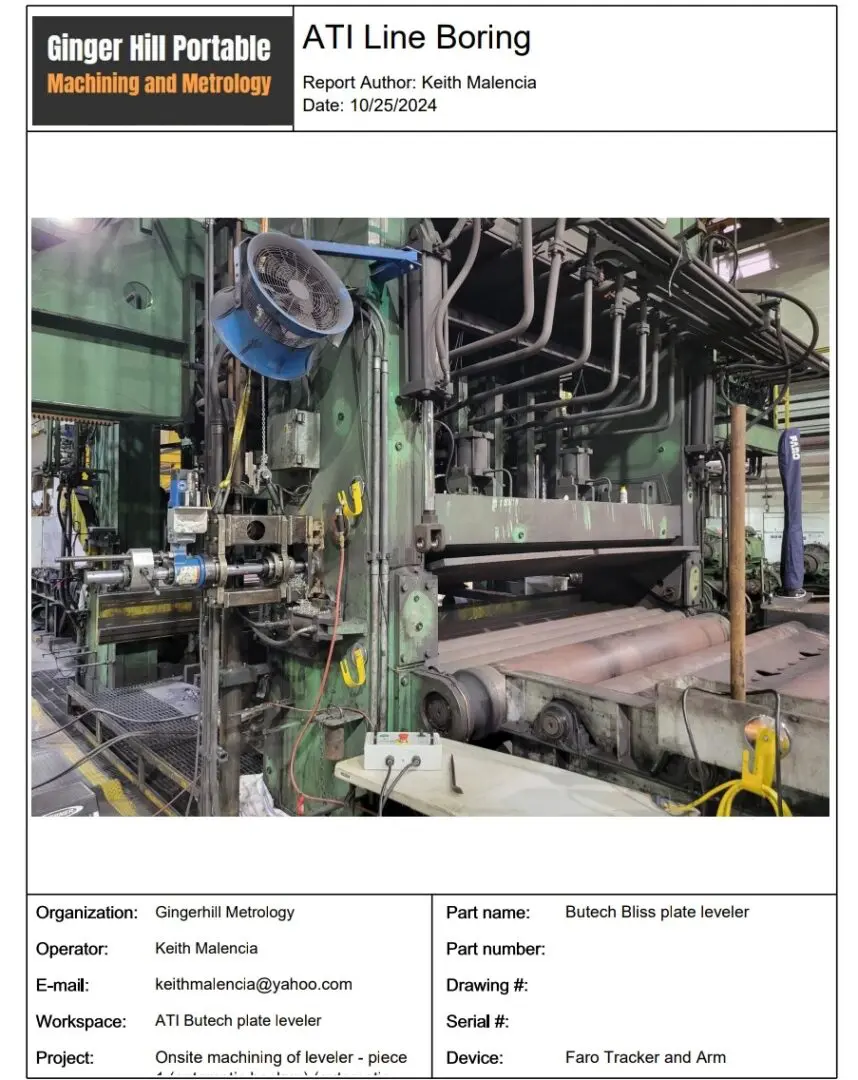
ATI Steel Facility in Washington, PA - Entry Pinch Rollers - Oversizing the bores

Machining bore to size

Fabricated mounts used for using the boring equipment

Using the FARO 4 Meter Arm for alignment of the boring equipment
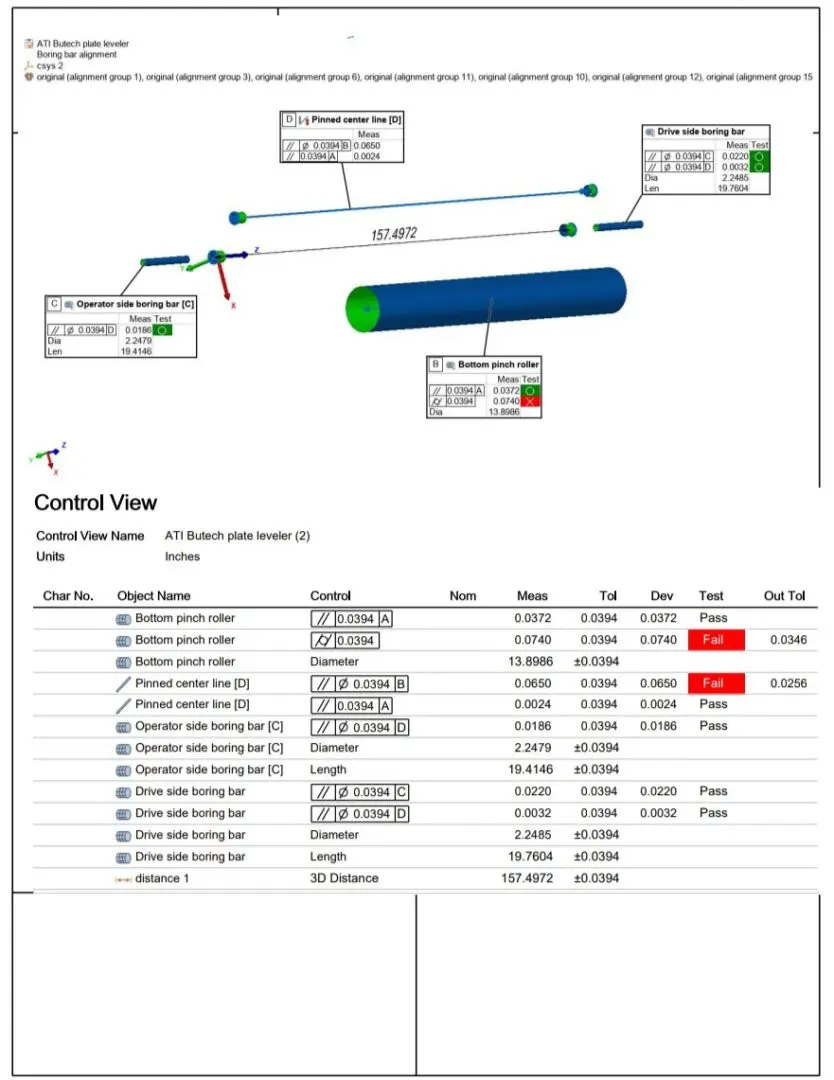
Complete Polyworks Report
Back to Basics
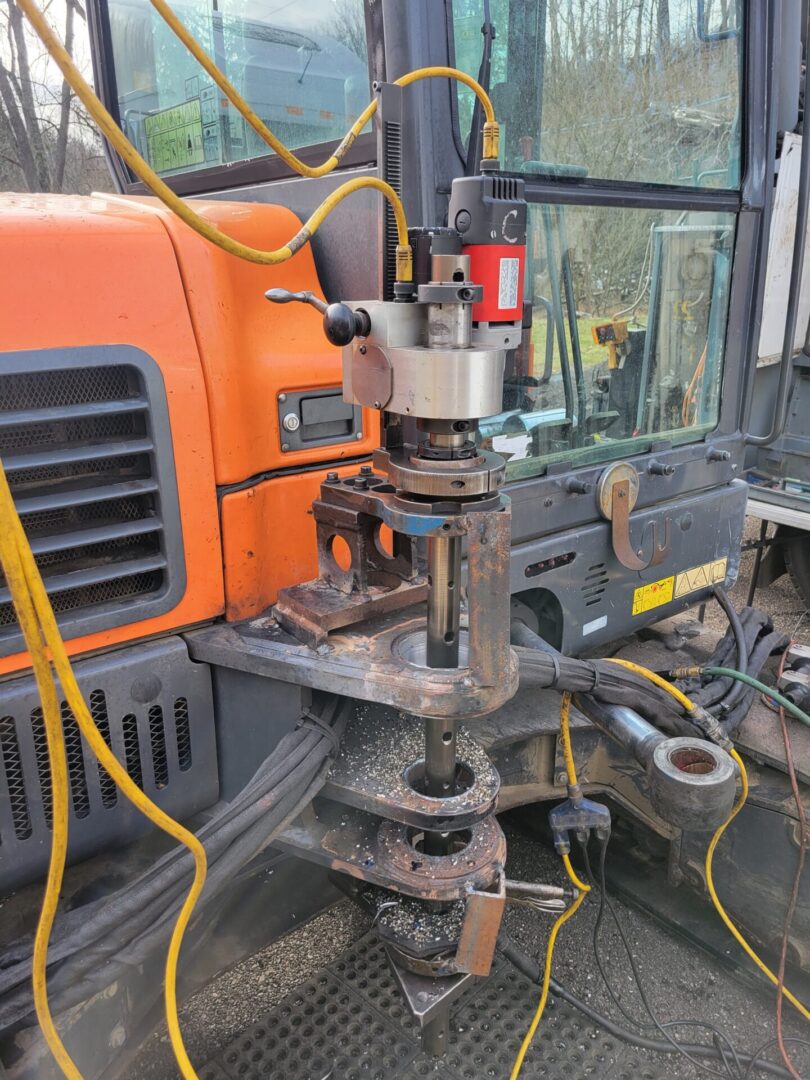
Where our portable machining started. Line boring.
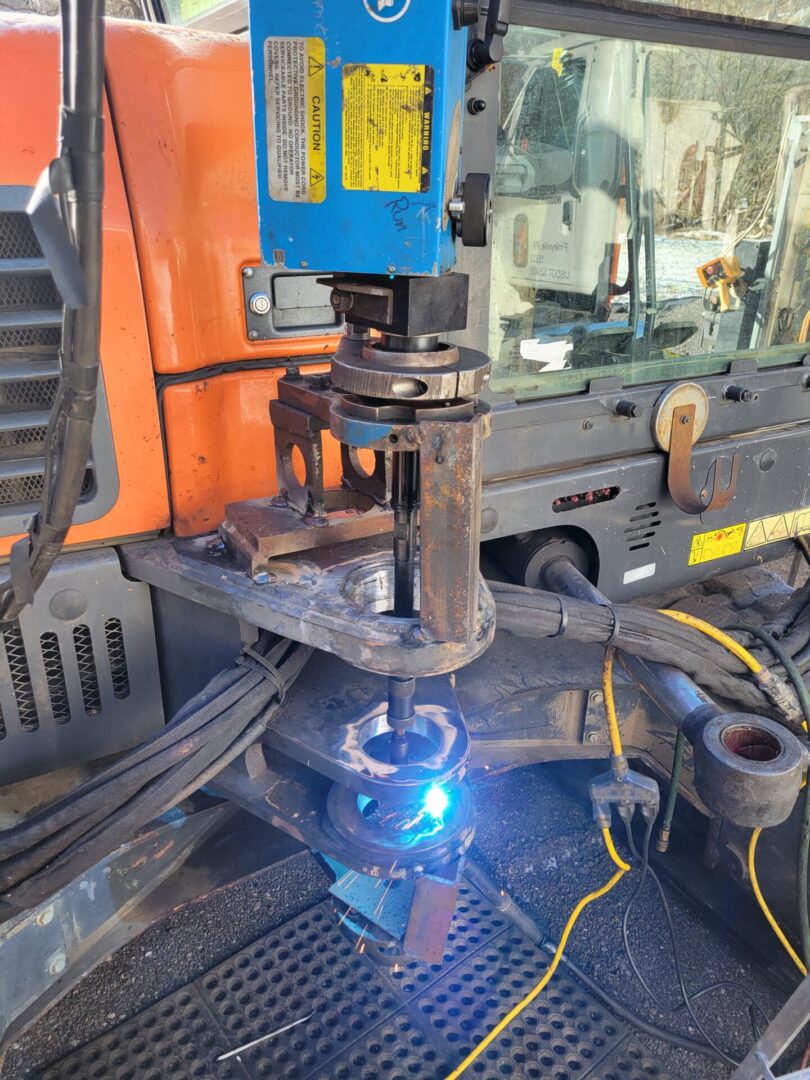
Weld build up of the main boom pin on a mini excavator.
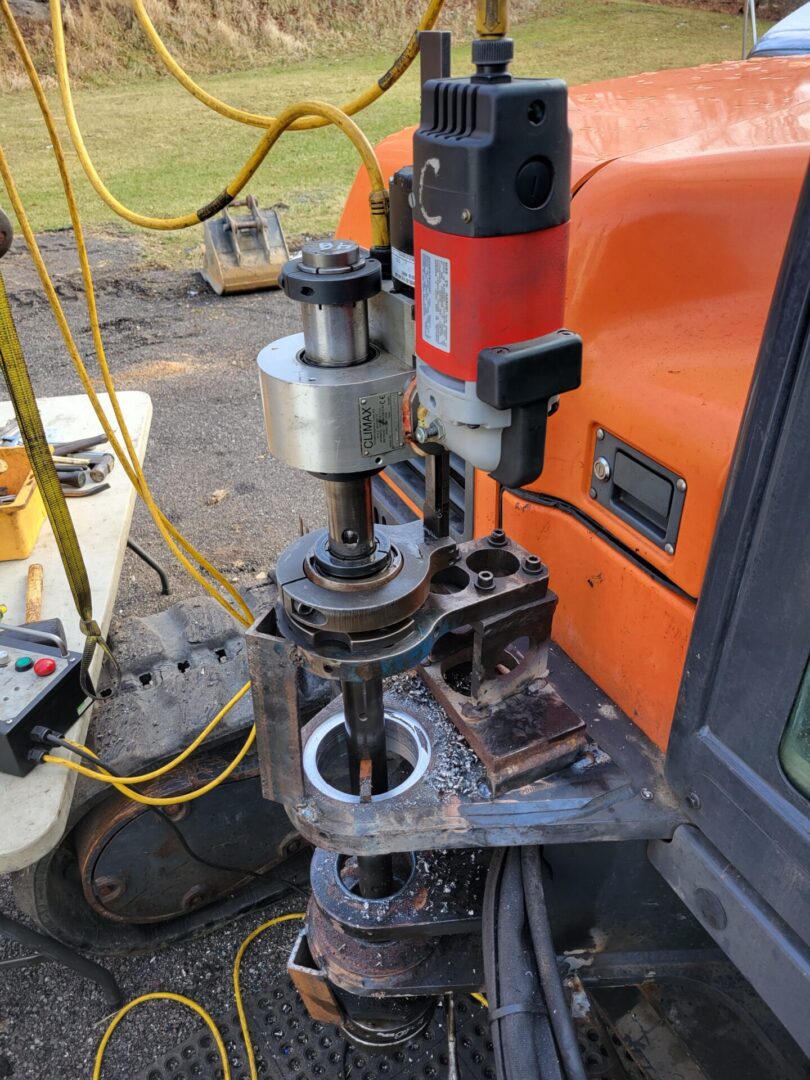
Close to the finish of machining the bore. Another precision fit.
More Featured Work
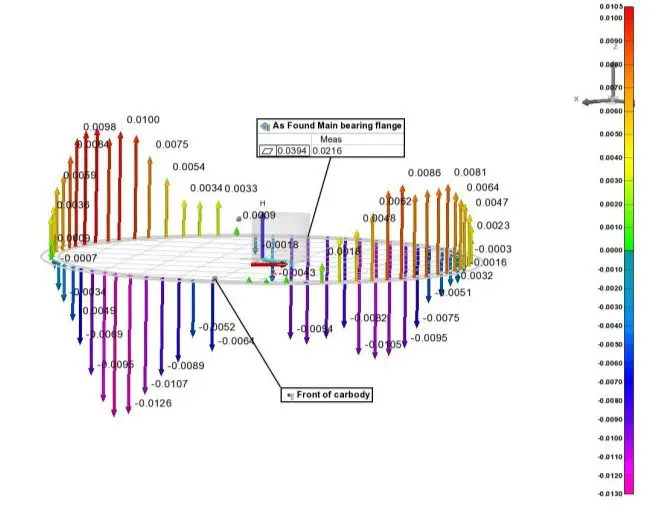
Measurement file on a Linkbelt 348 Crawler Crane car-body flange, Carver Company shipyard in Coeymans, NY
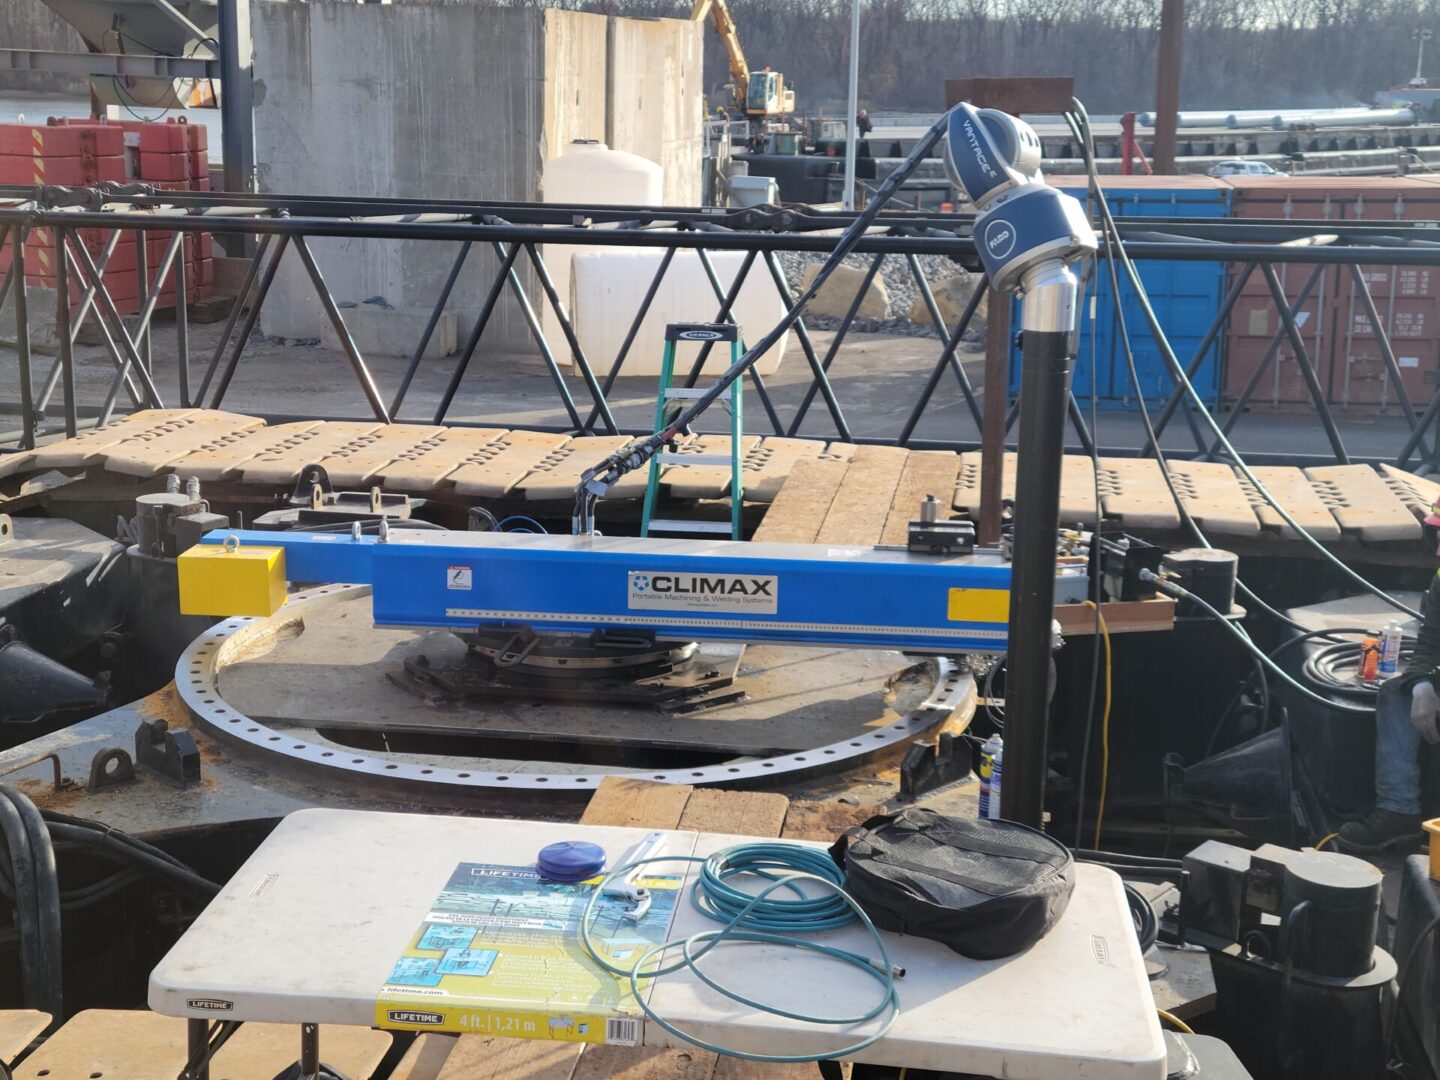
Climax FF8200 set up and aligned using the FARO Laser Tracker
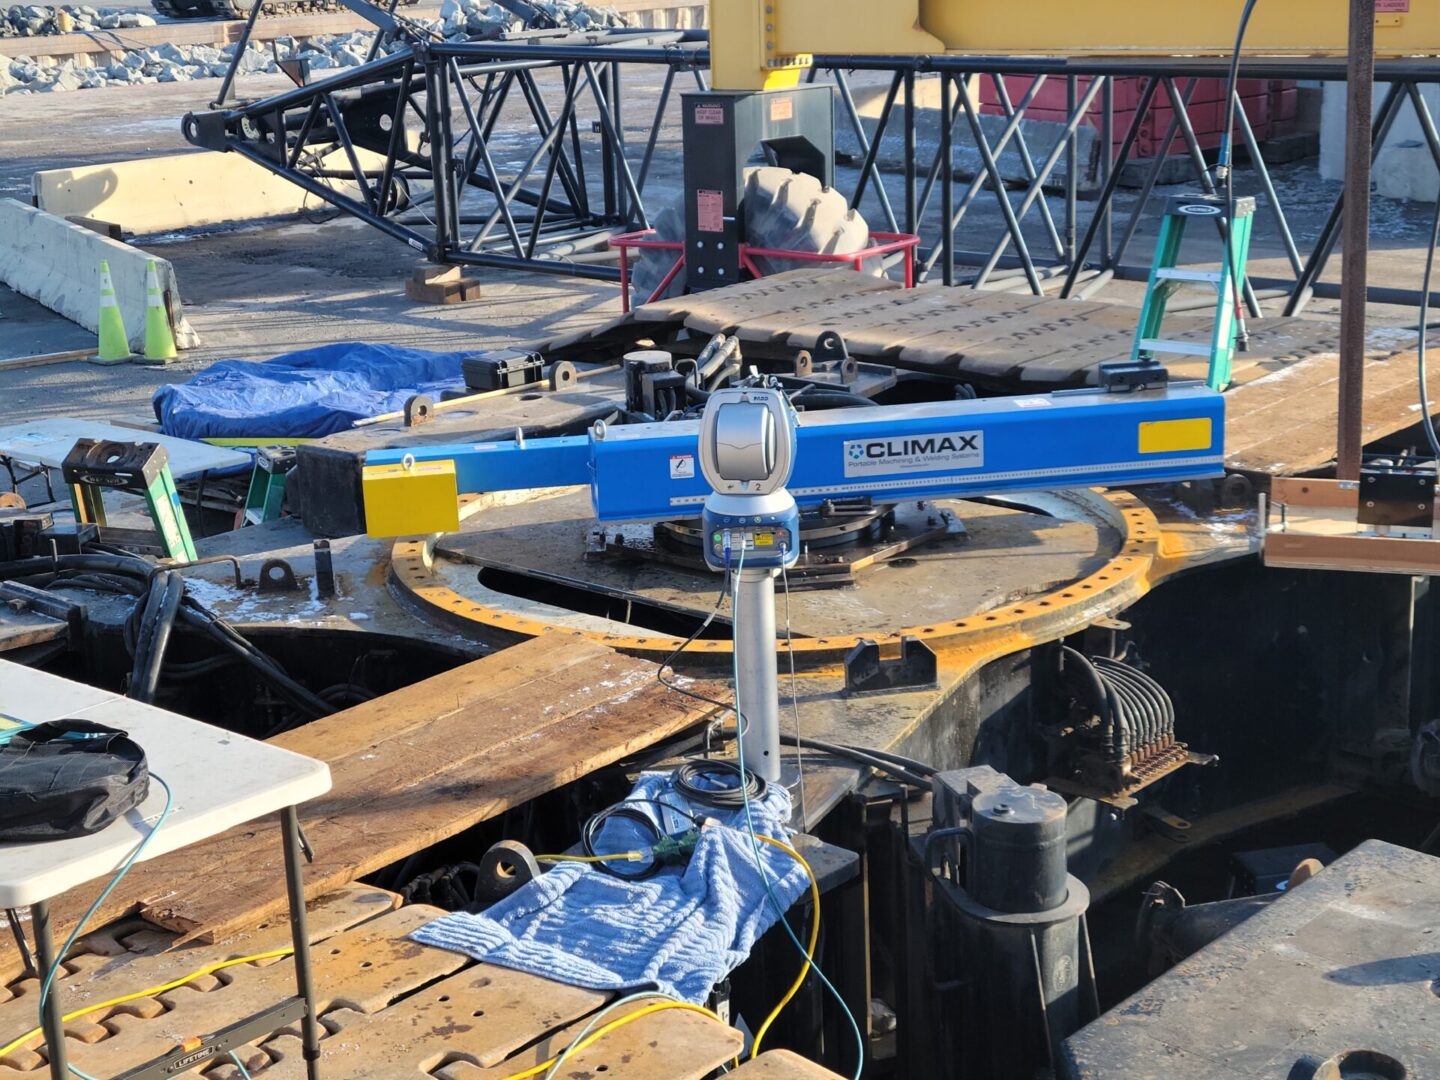
Milling of the car-body flange to manufacturer specs
More Featured Work
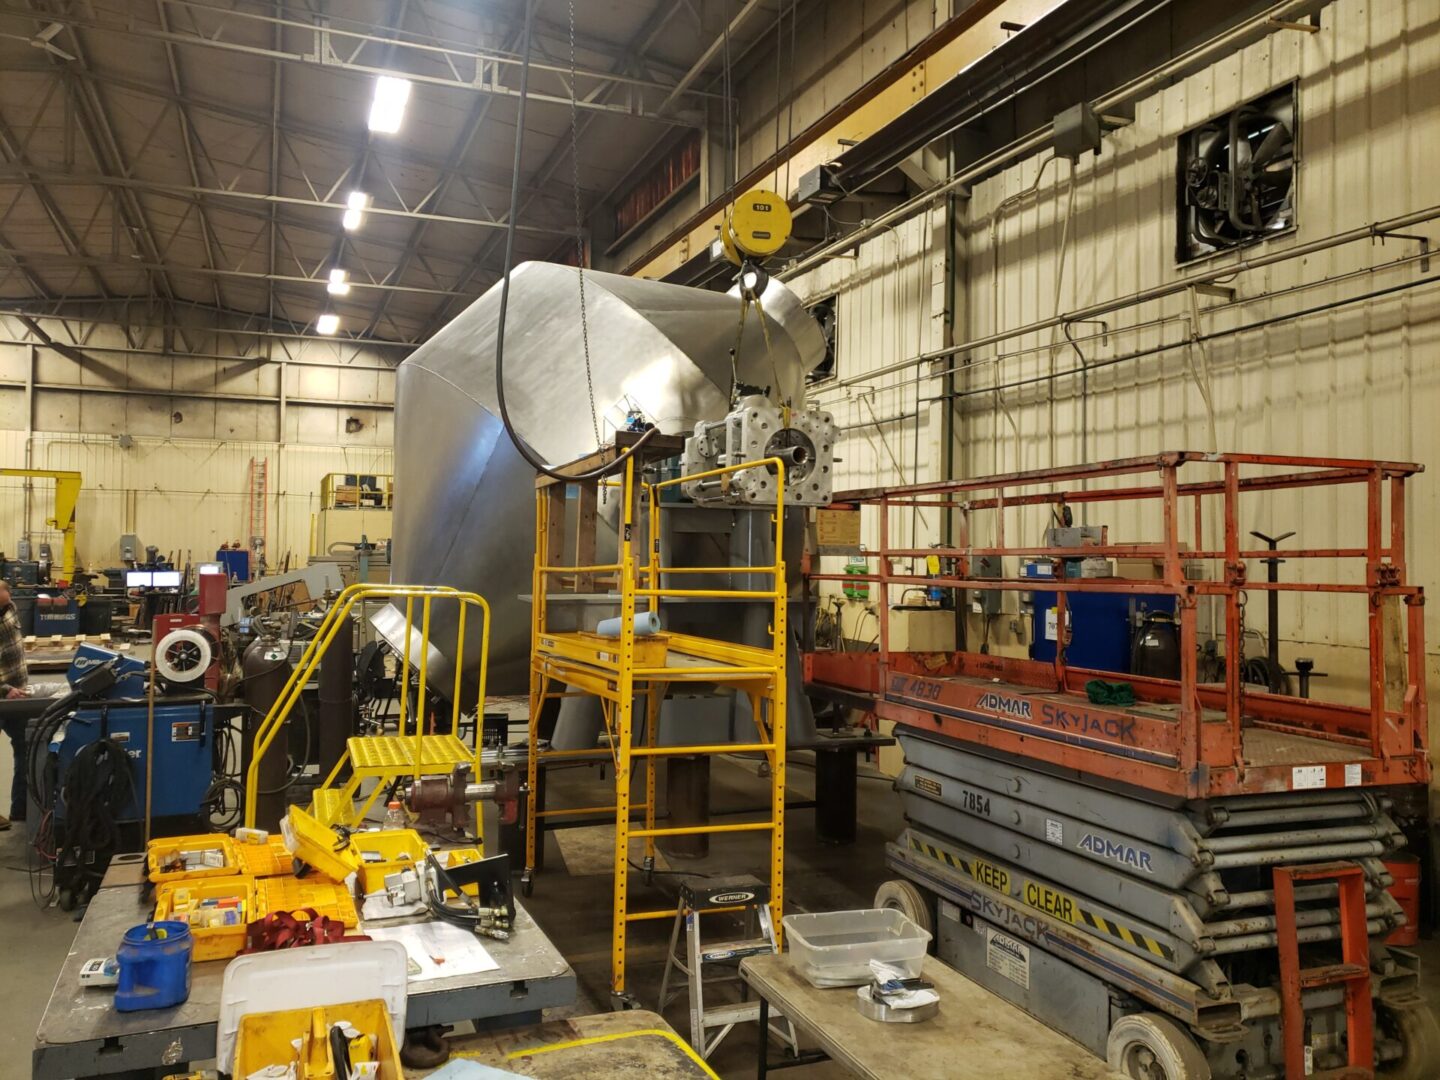
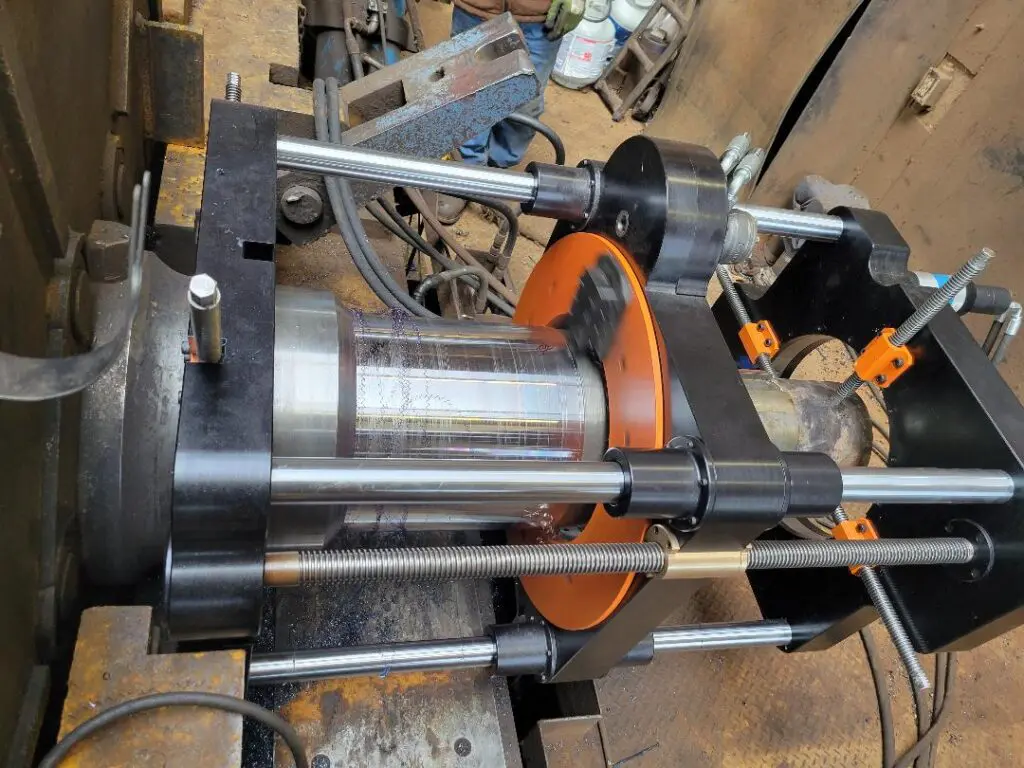
This is a tumbler used in the pharmaceutical industry. During manufacturing the shaft was not properly sized. Rather than starting over, we were called to turn the shaft down to the specified diameter.
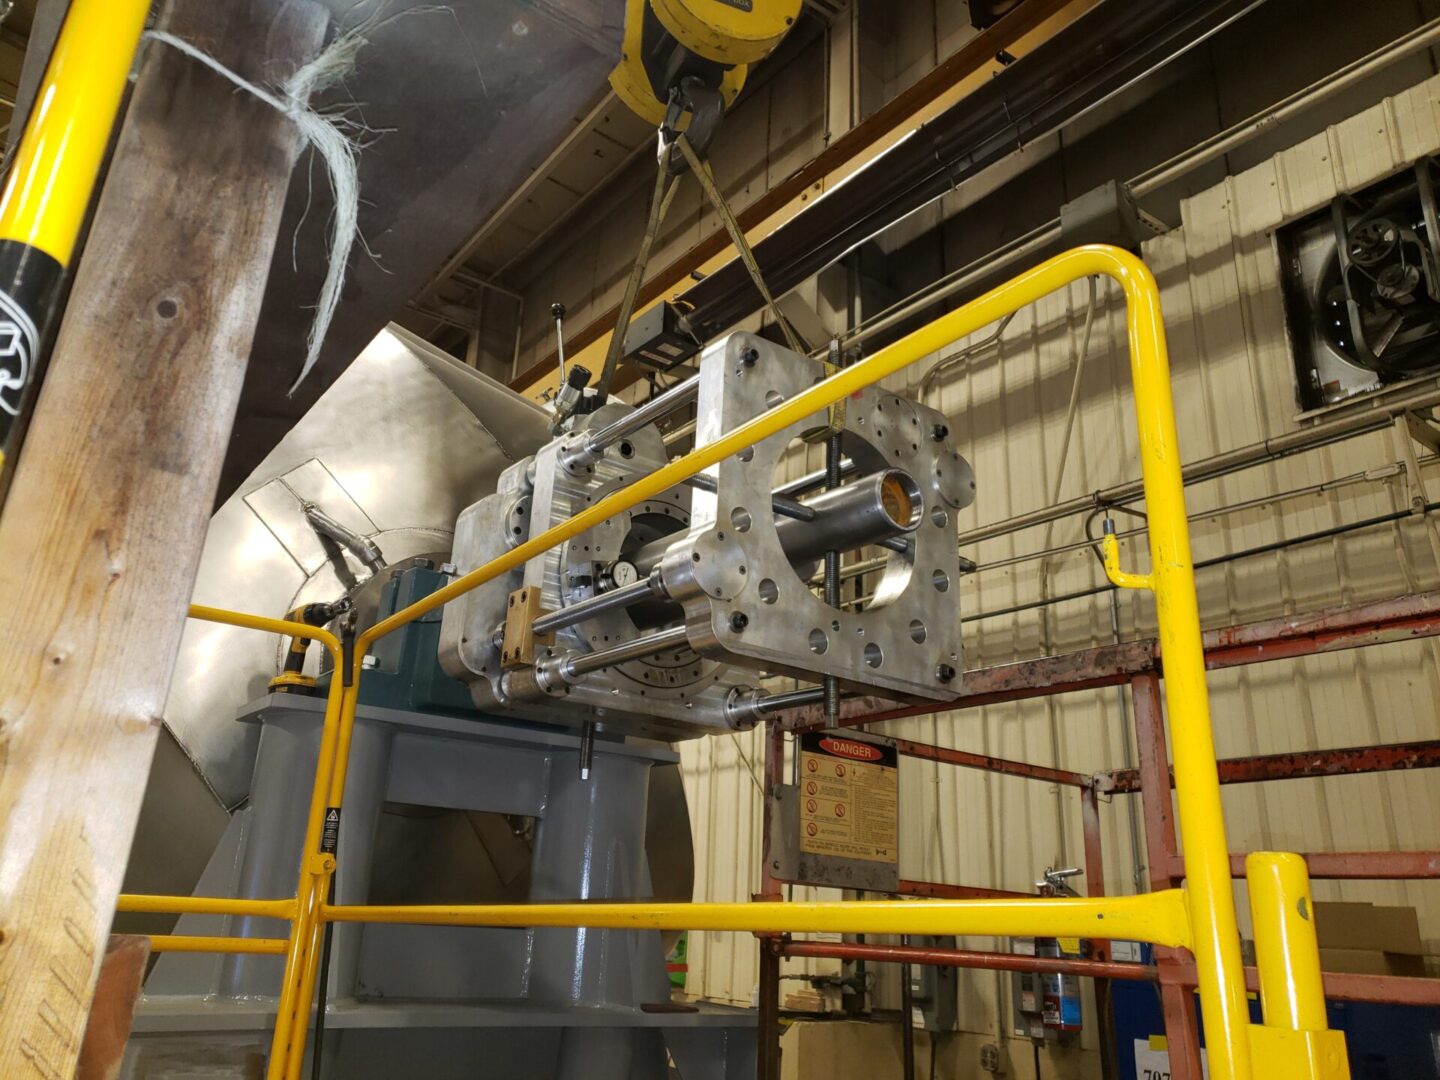
Using the York In Line Turning 1000 machine, the shaft was machined to specification.
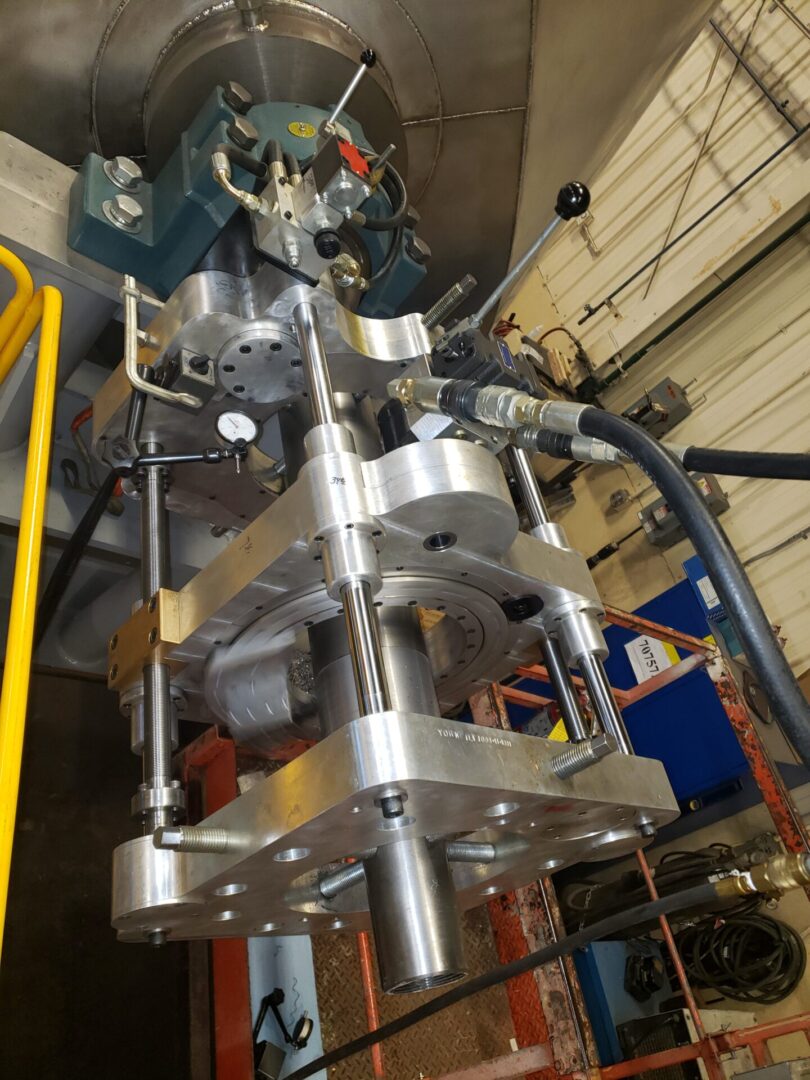
Close up view of the ILT 1000 machining the shaft.
More Featured Work

This shaft was totally worn and unusable. The shaft could not be removed, so the solution was to repair it in place.
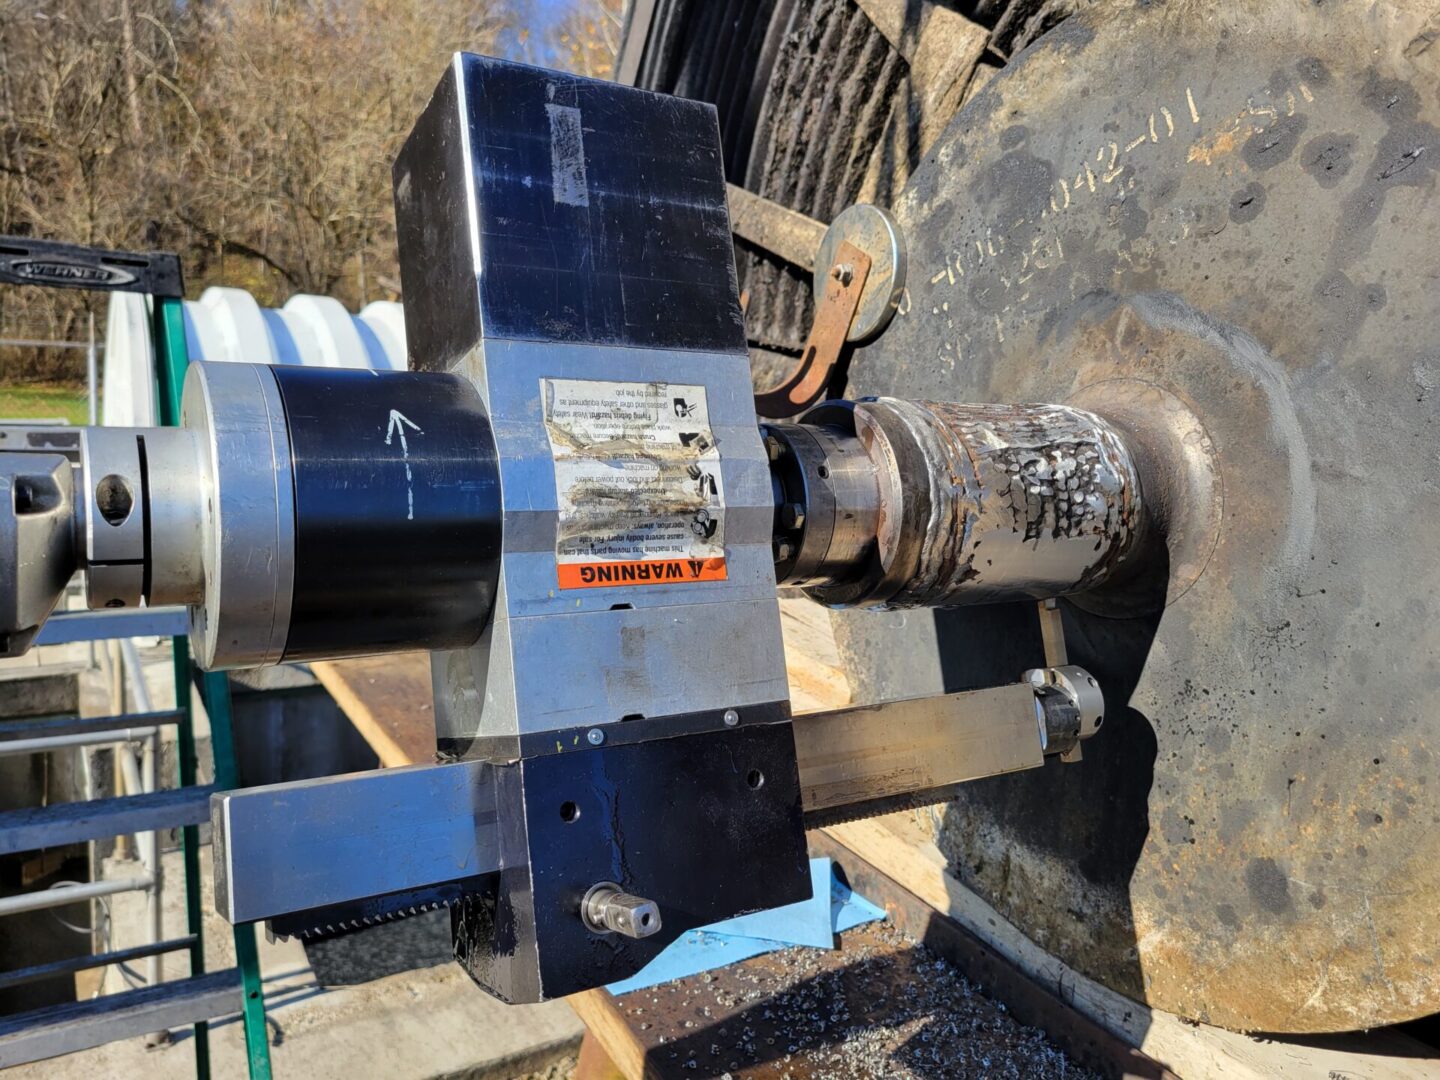
The shaft was built up with weld and then machined to size right on site.


Using the Climax PL2000, the shaft was brought to specification.
More Featured Work
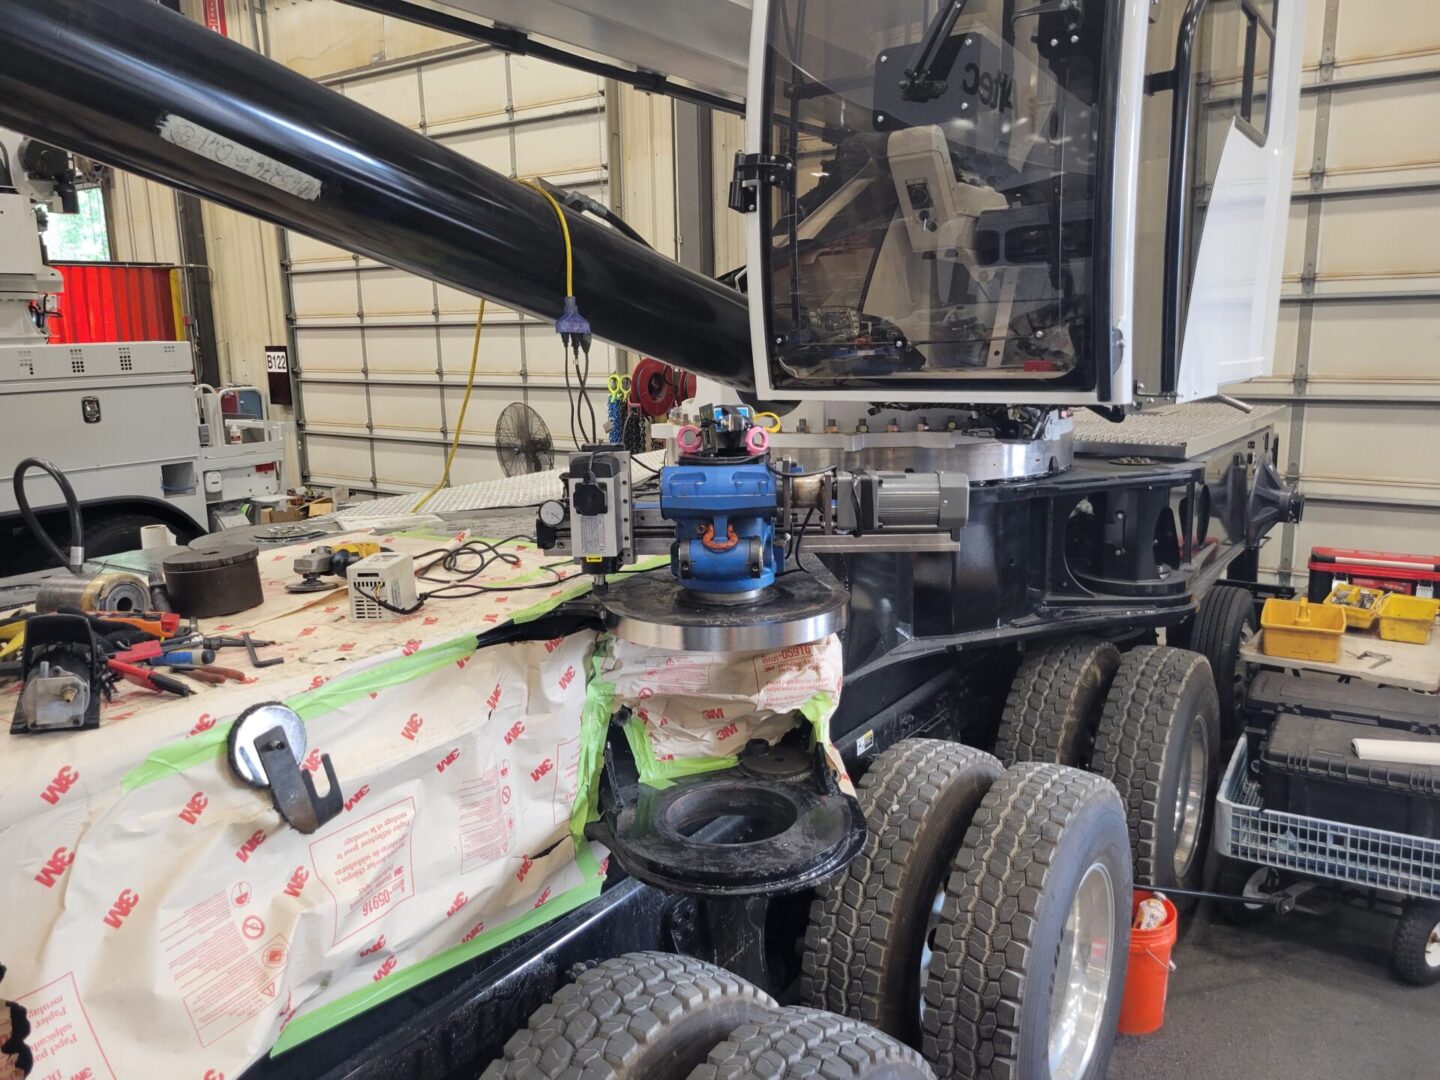
Altec factory in VA, 65 ton mobile crane outrigger pivot surface.
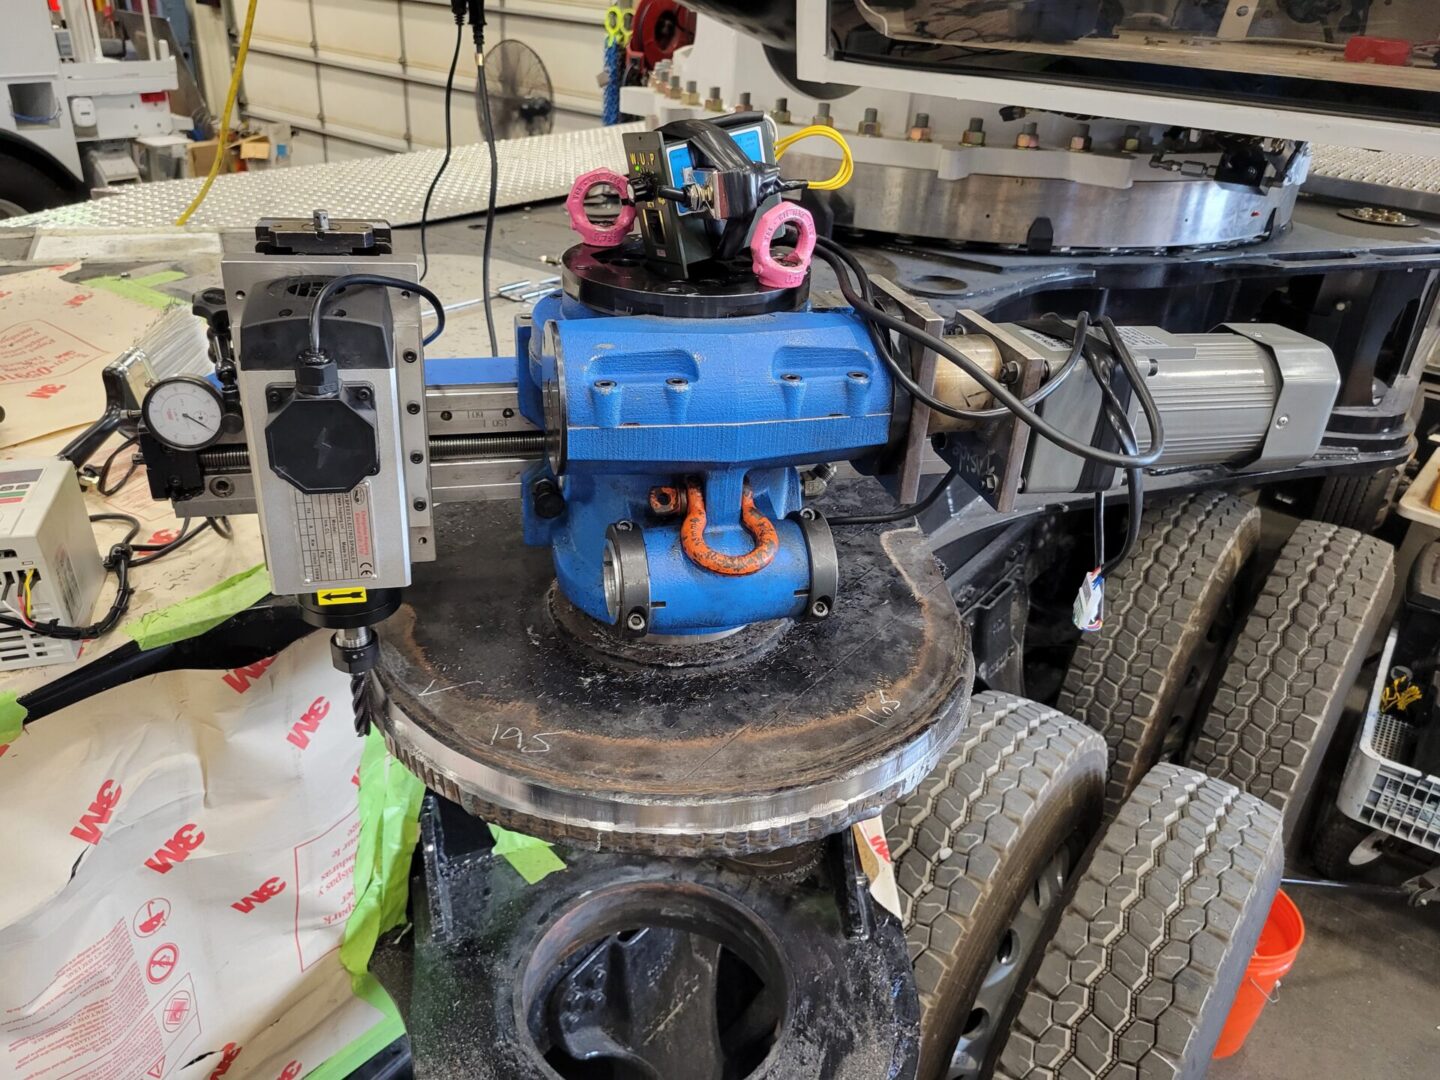
Machining of the outer surface using a FF6300 single point flange facer modified with a milling option.
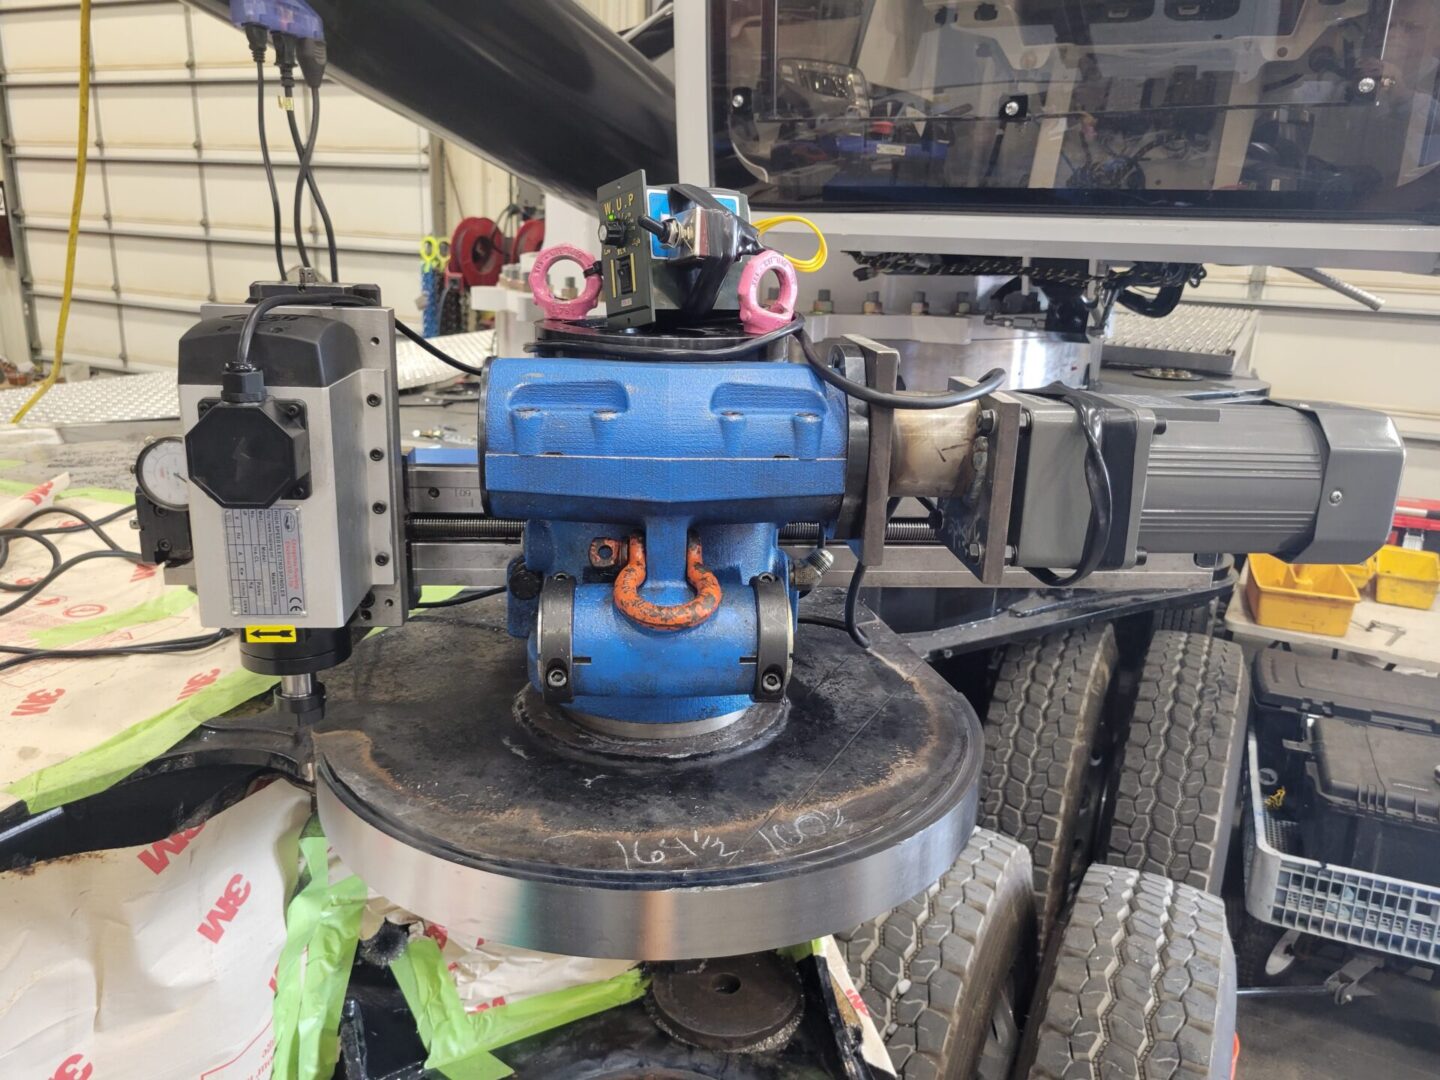
Alignment and measurement for the machining was done with the Faro Laser Tracker and 4 meter Faro arm.
Specialty Featured Work
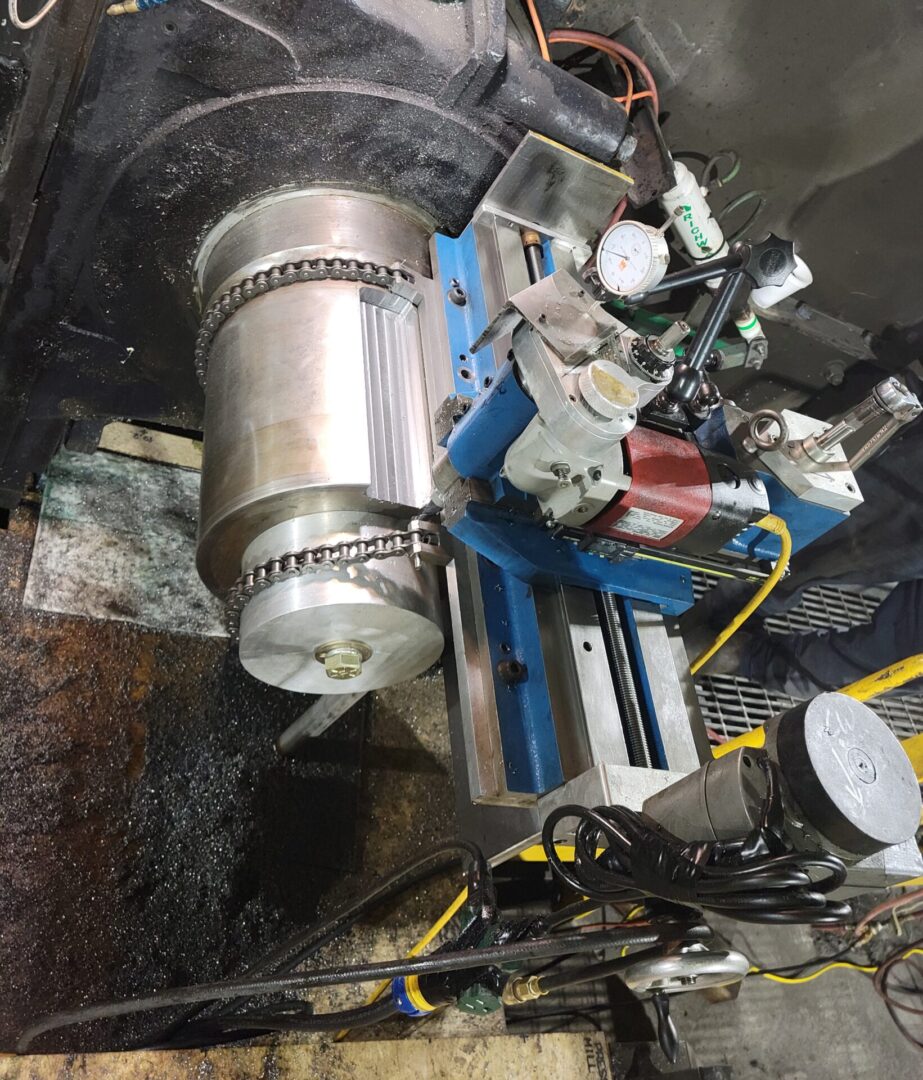
Custom fixture designed to hold the portable milling machine
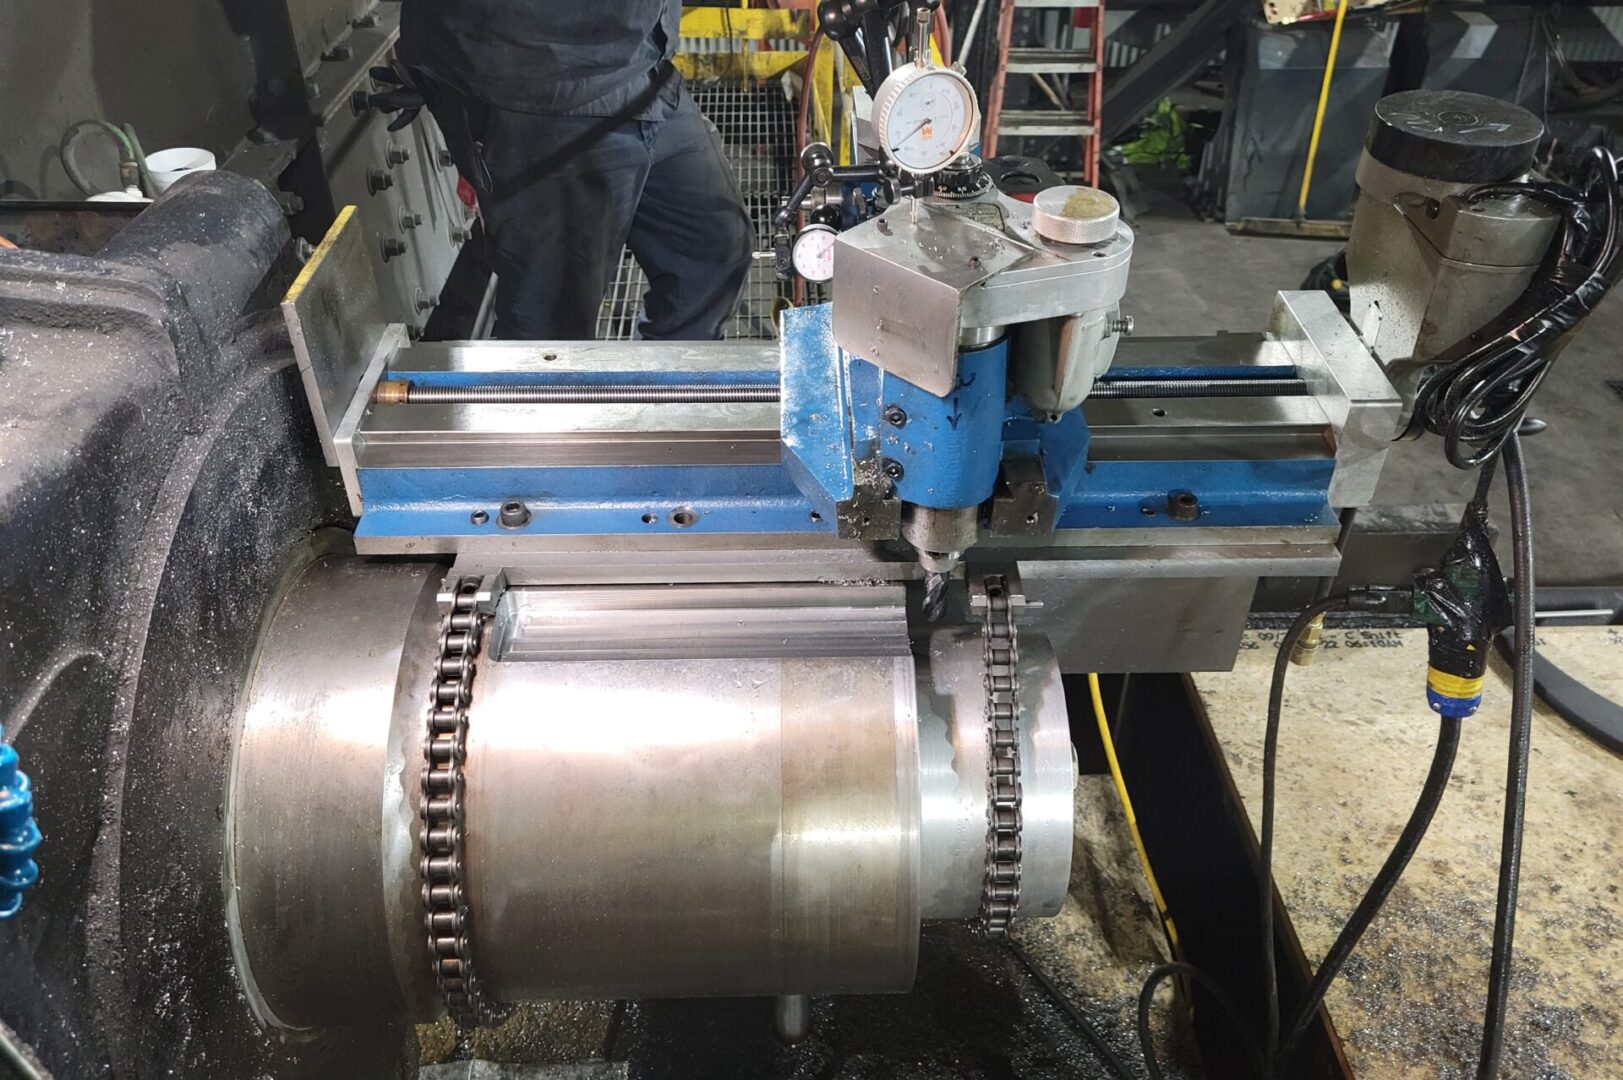
Cutting a 12" keyway in a 13" journal at Arch Resources, WV
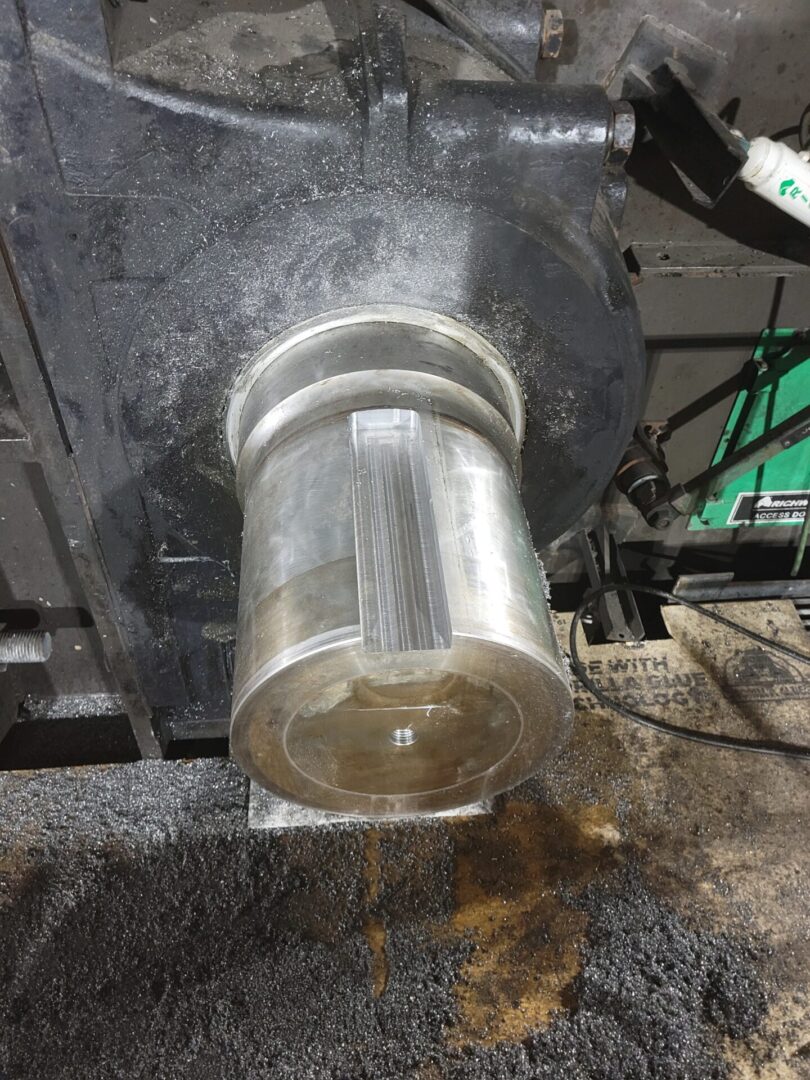
Finished keyway
More Featured Work
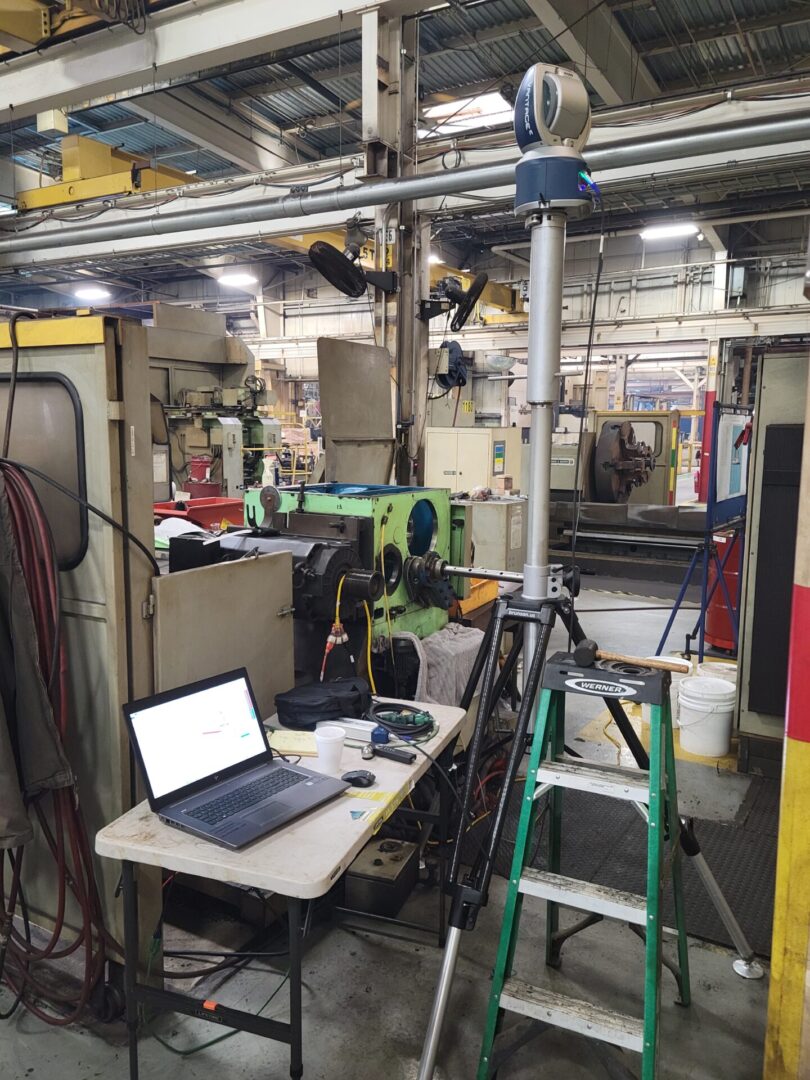
Binns & Berry Lathe - Aligning and over sizing of the head stock bore
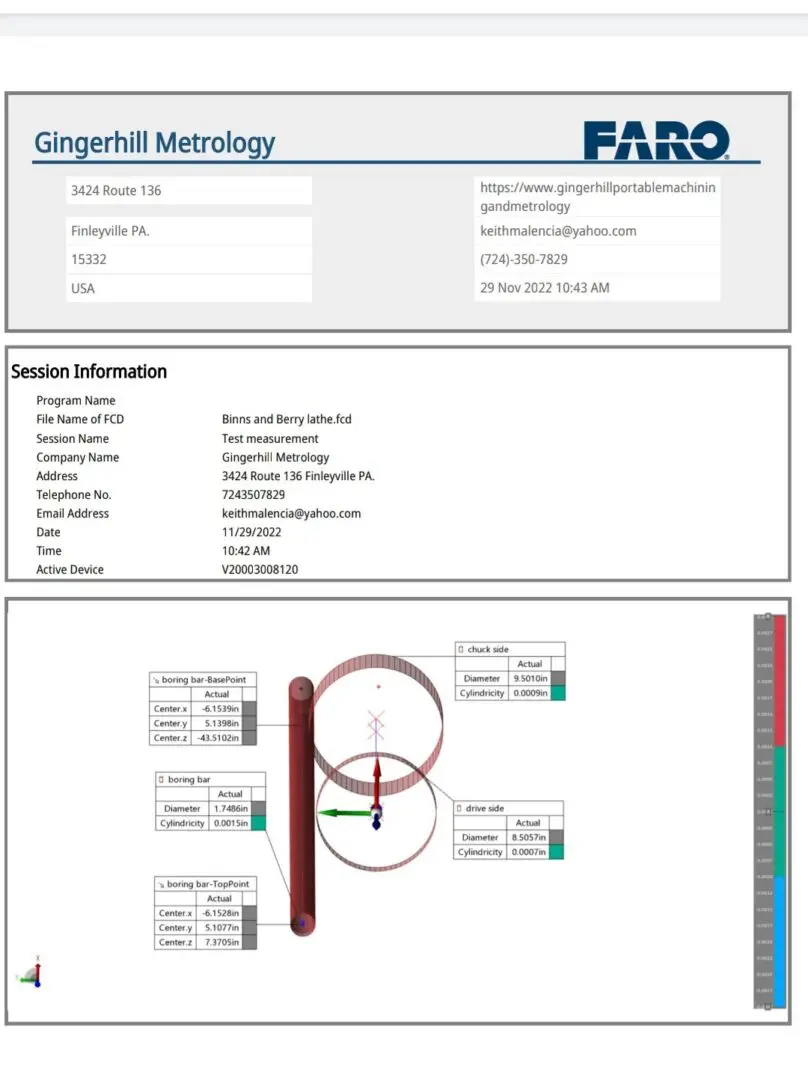
FARO report of the alignment of the head stock to the spindle
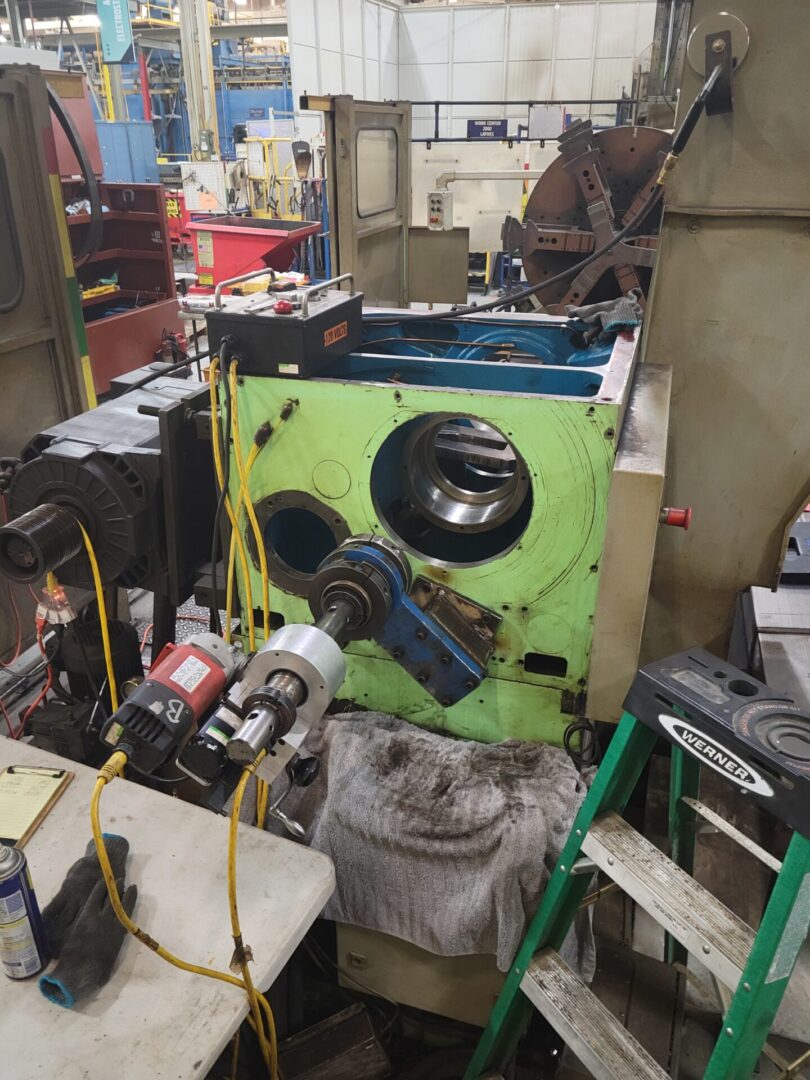
Machining to oversize the worn bore to fit the new bearing size
Latest Featured Work
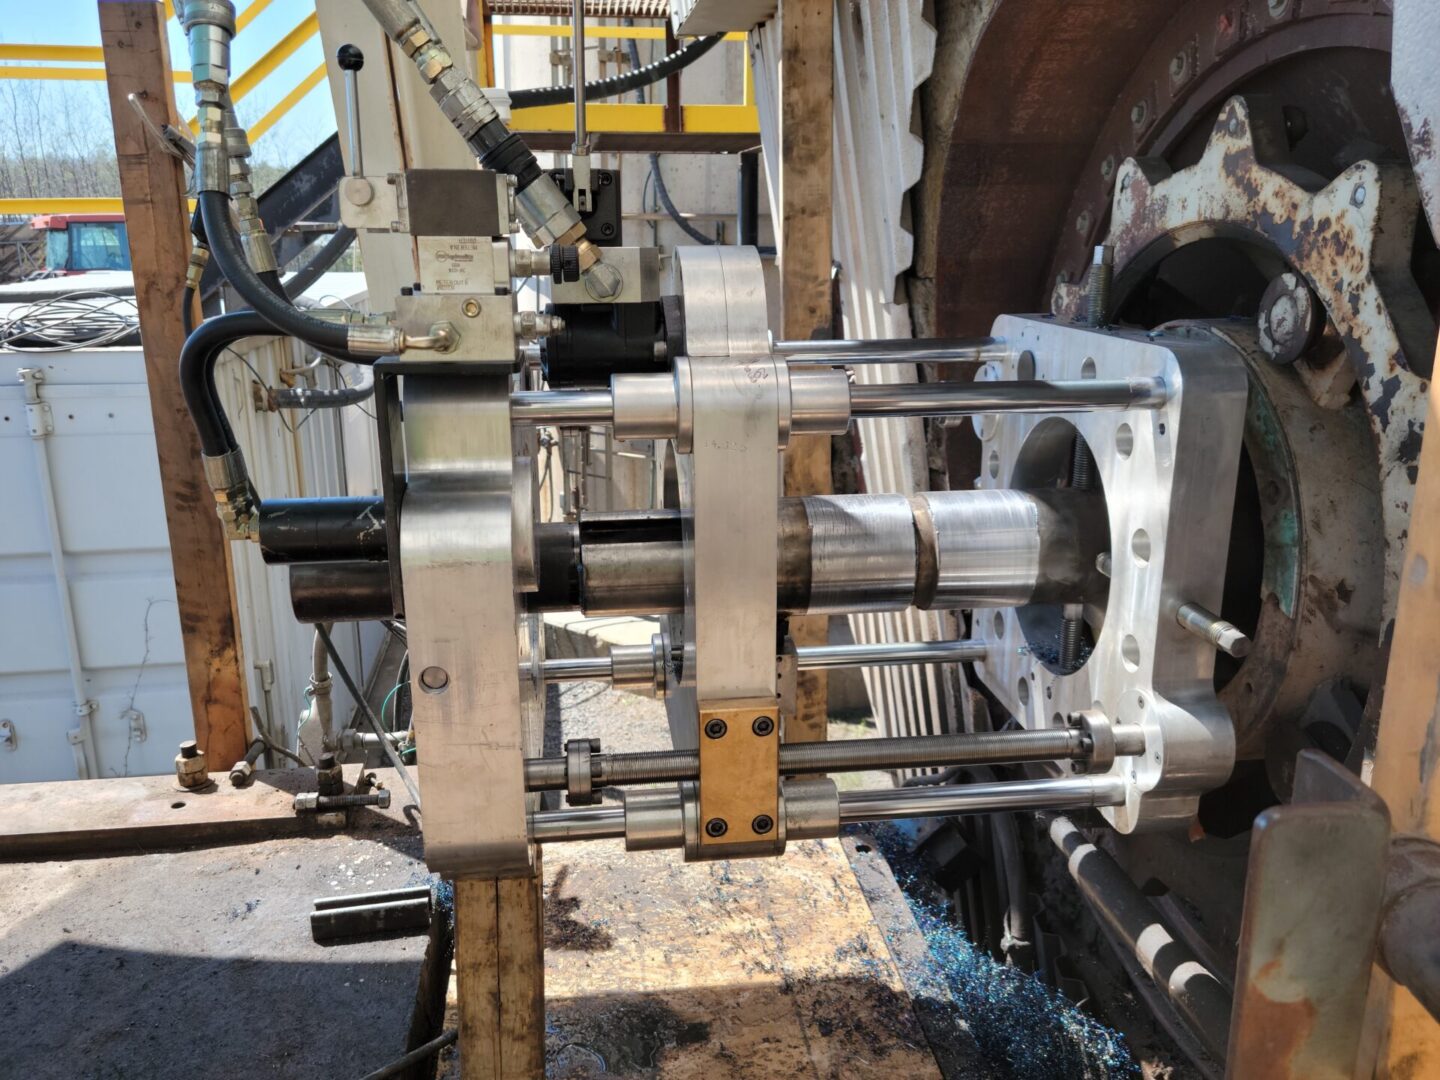
Worn fan journal inside of a power plant, weld build up and machined to size.
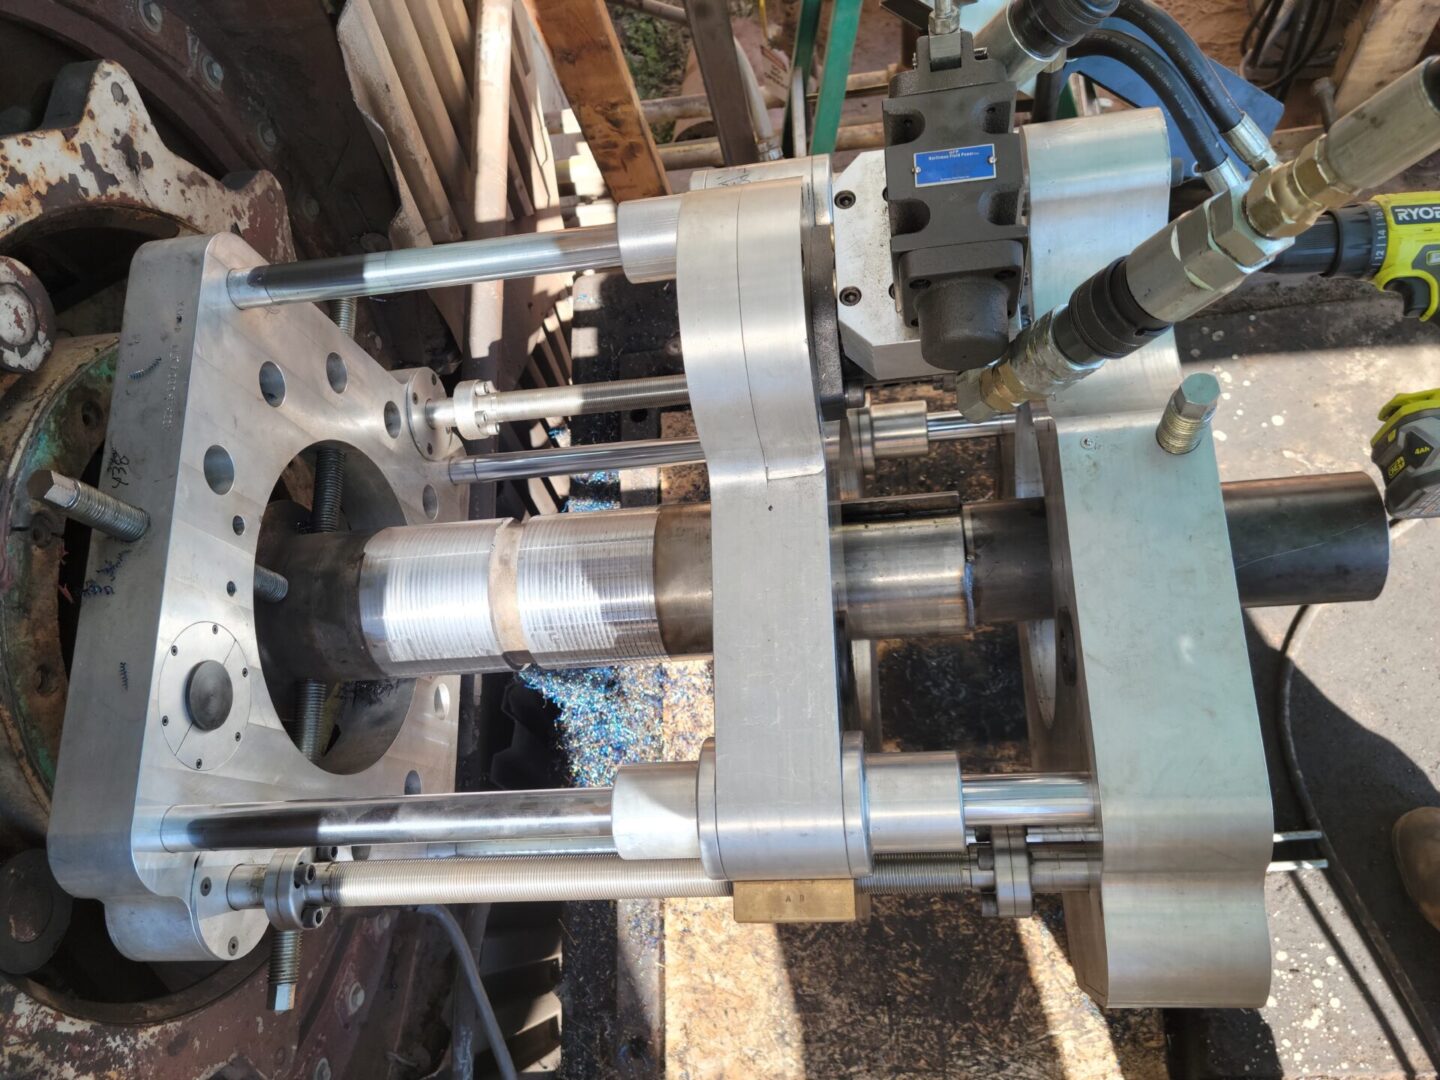
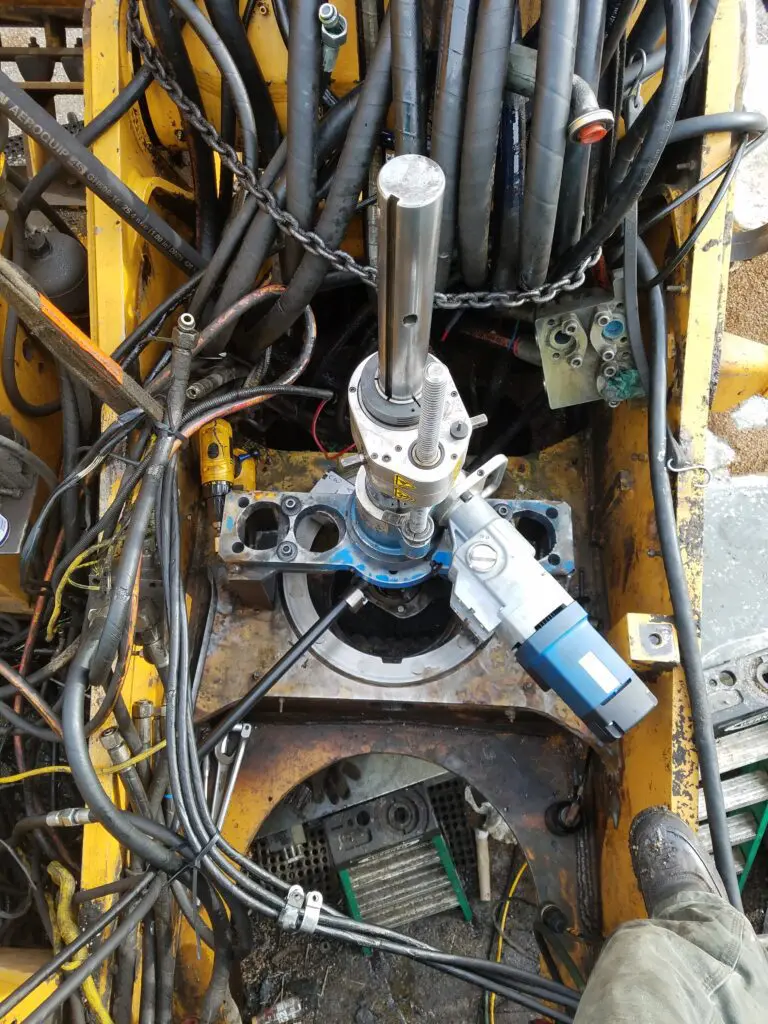
Top view of the In Line Turning machine working on the fan journal.
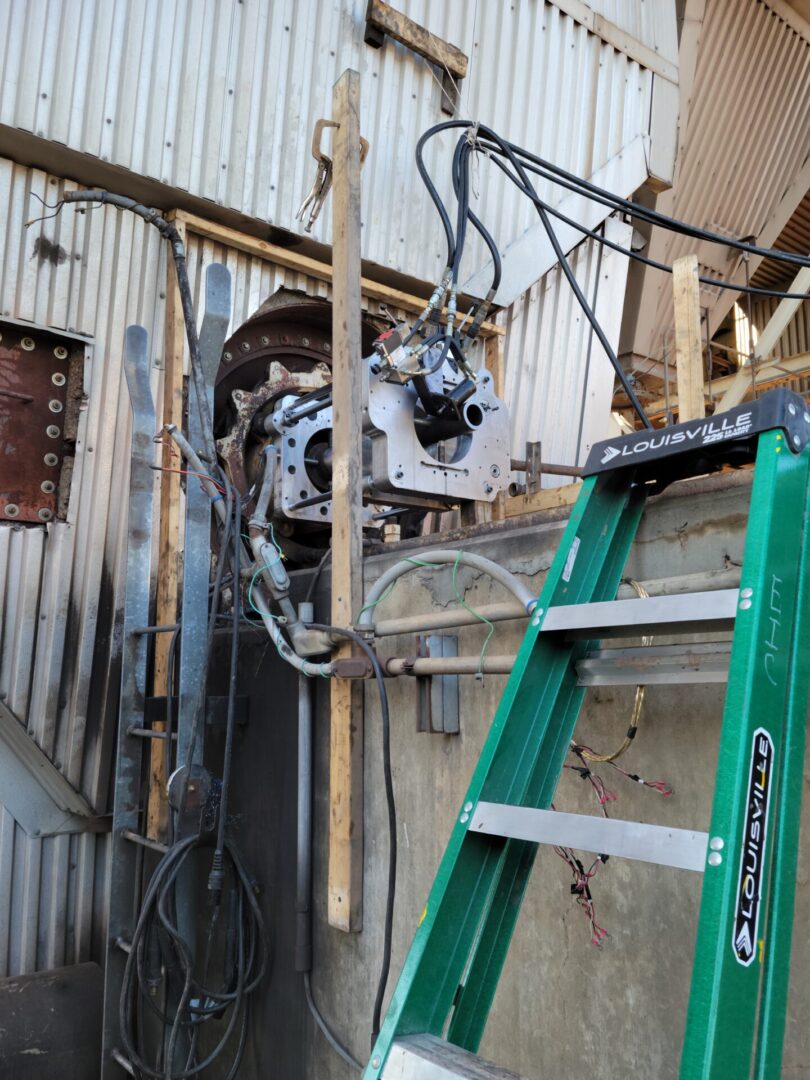
Special mounting and adaptors are made for each job so the work progresses smoothly and accurately.
What We Do
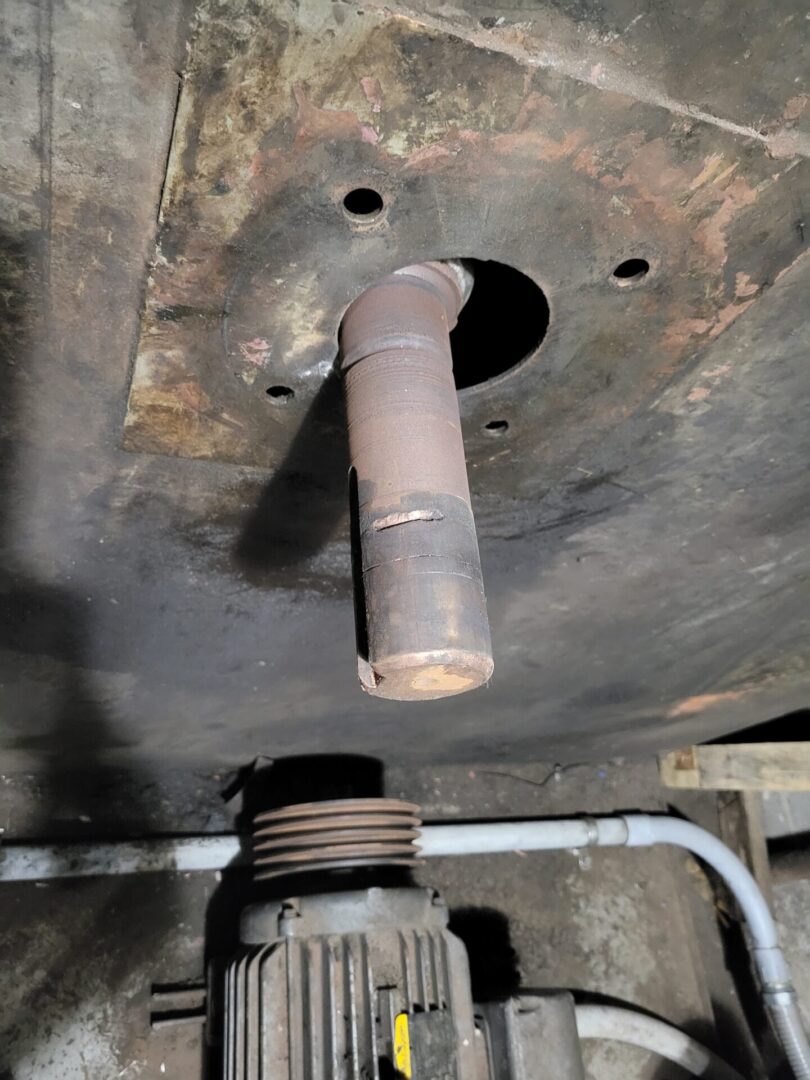
Shaft on an air handler inside a plant manufacturing electrical connectors for the aerospace industry.
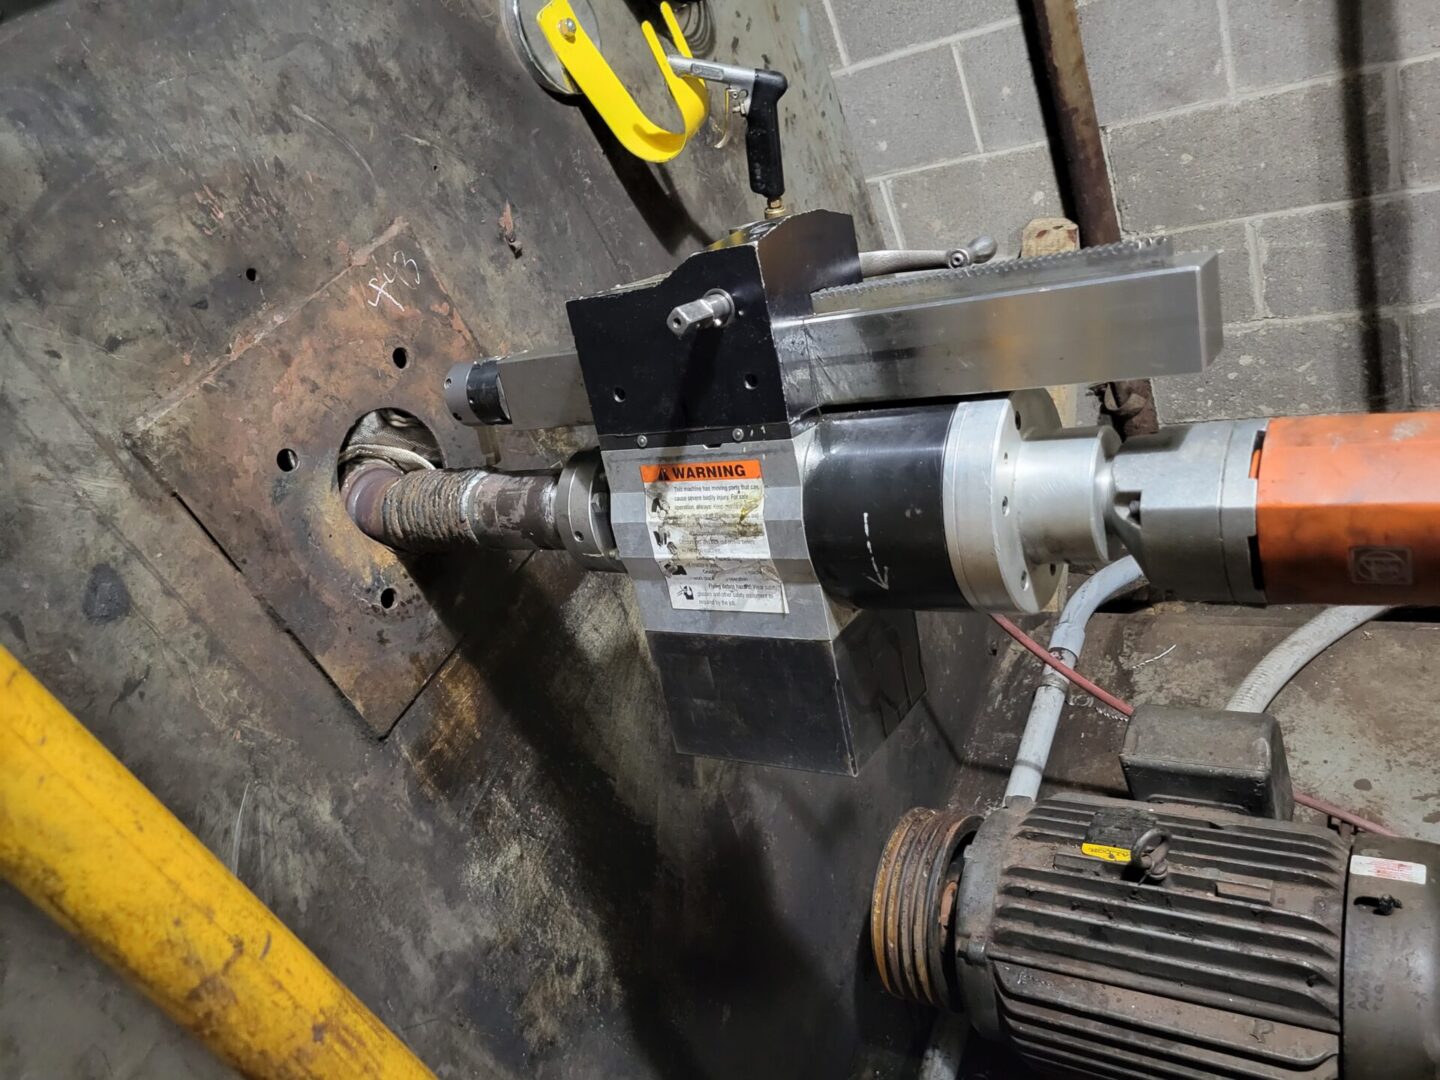
The process of weld build up on the shaft, and using the Climax PL2000 to machine the shaft.
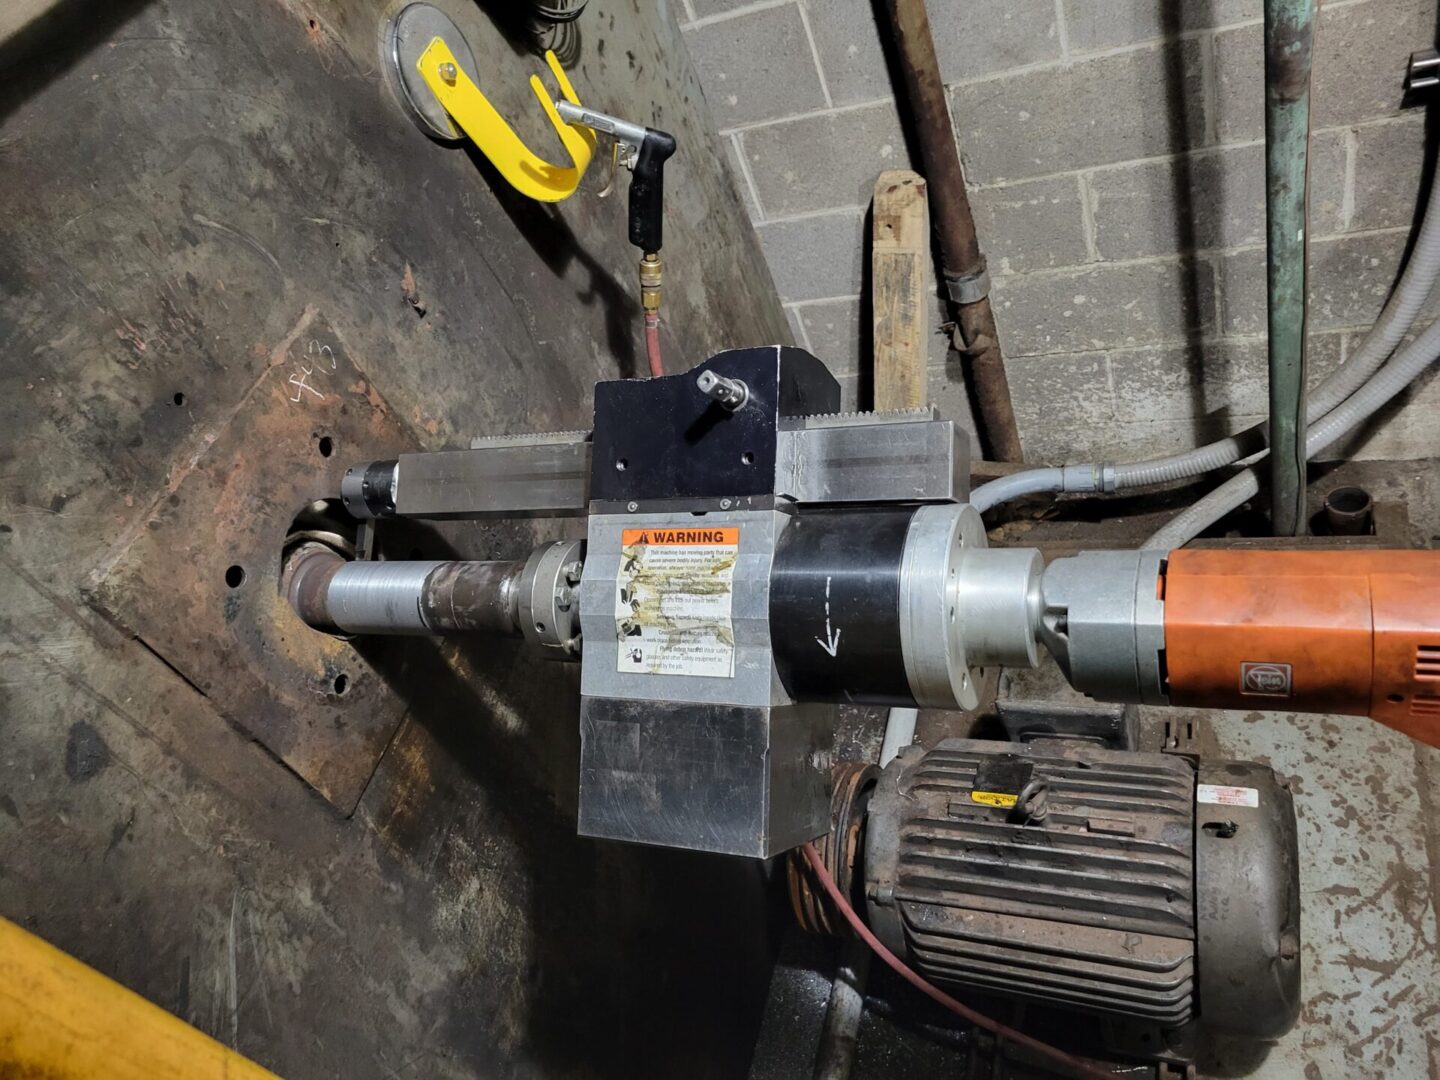
Near the finish of machining the shaft to size.
More of What We Do
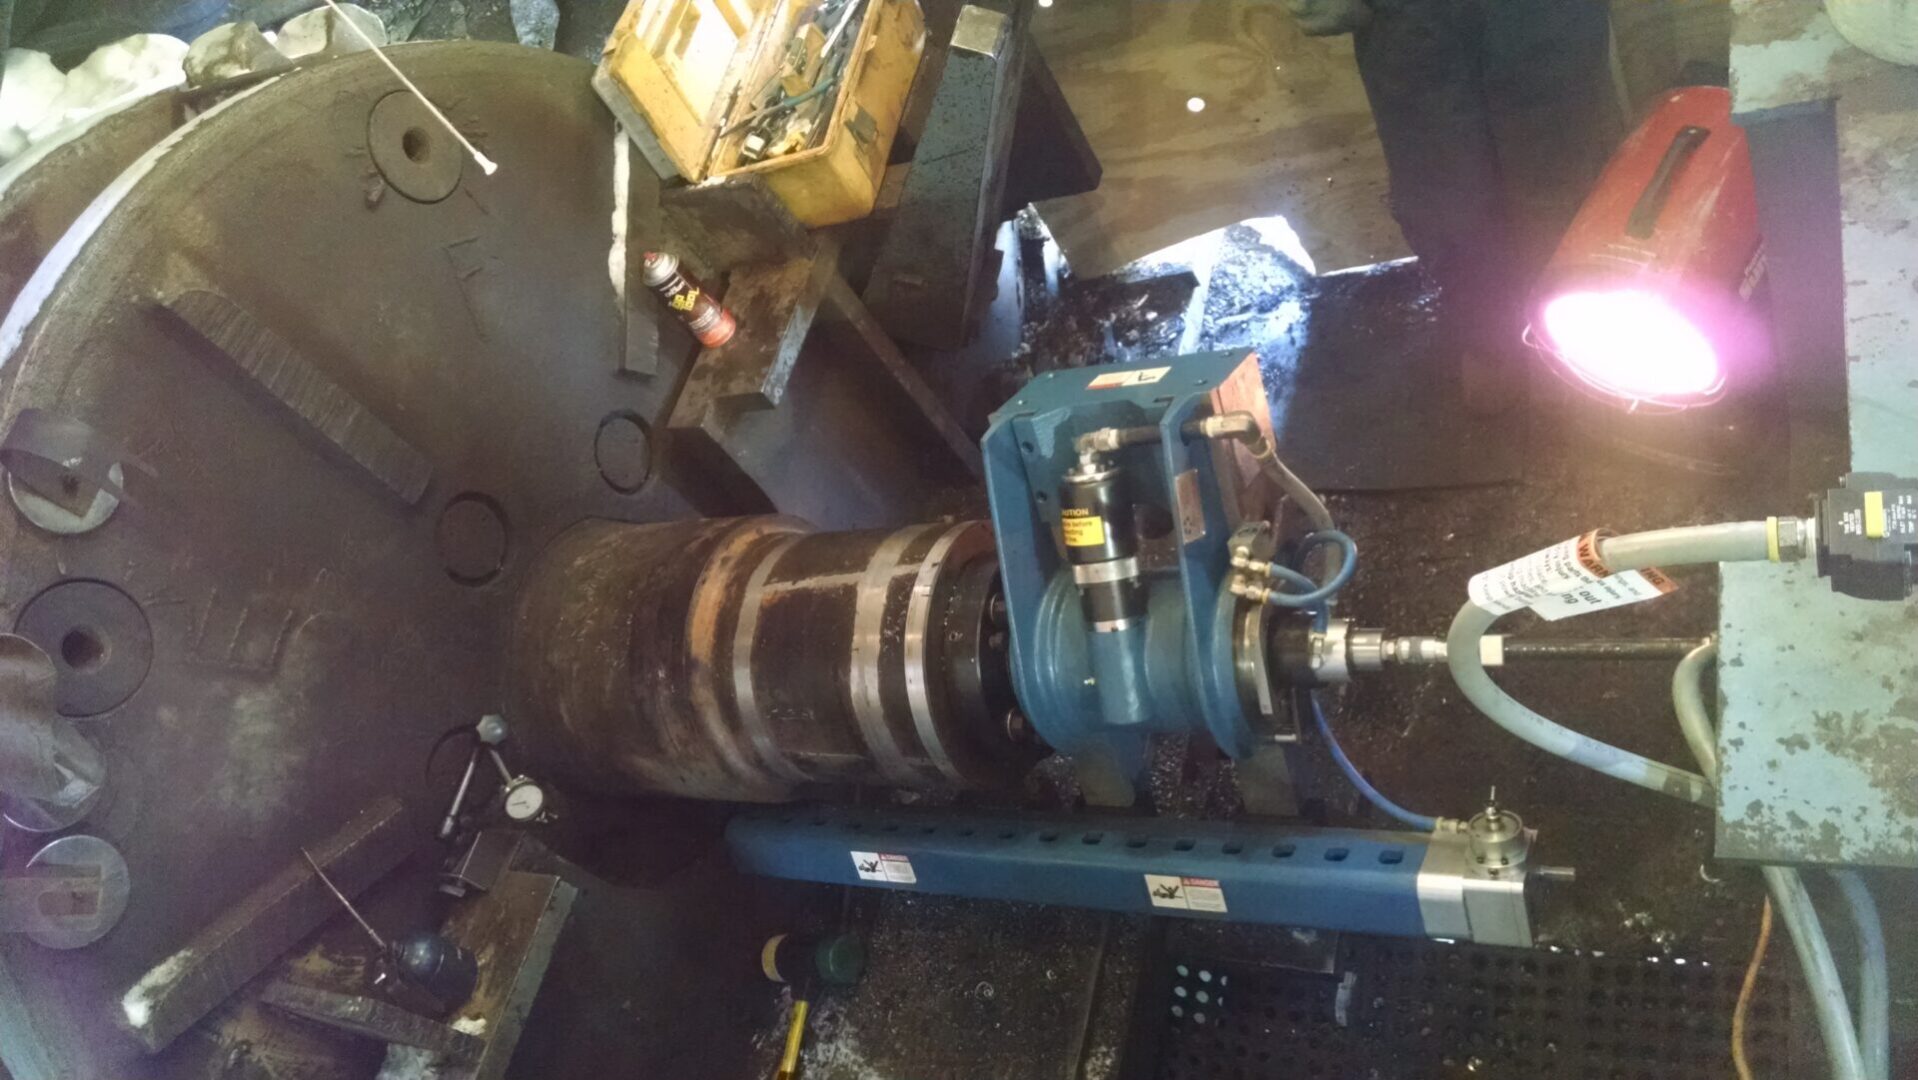
Portable Lathe refurbishing a journal at a shredding plant
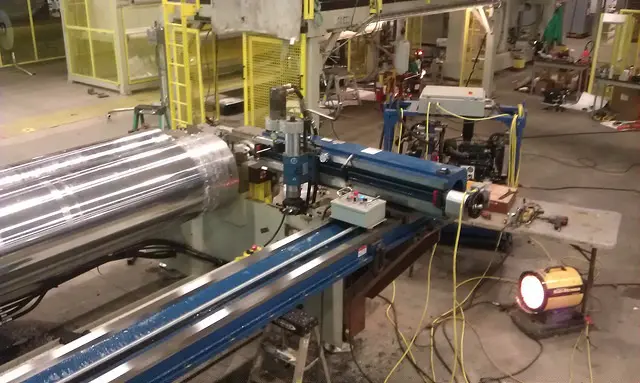
Portable Milling inside a metal processing facility
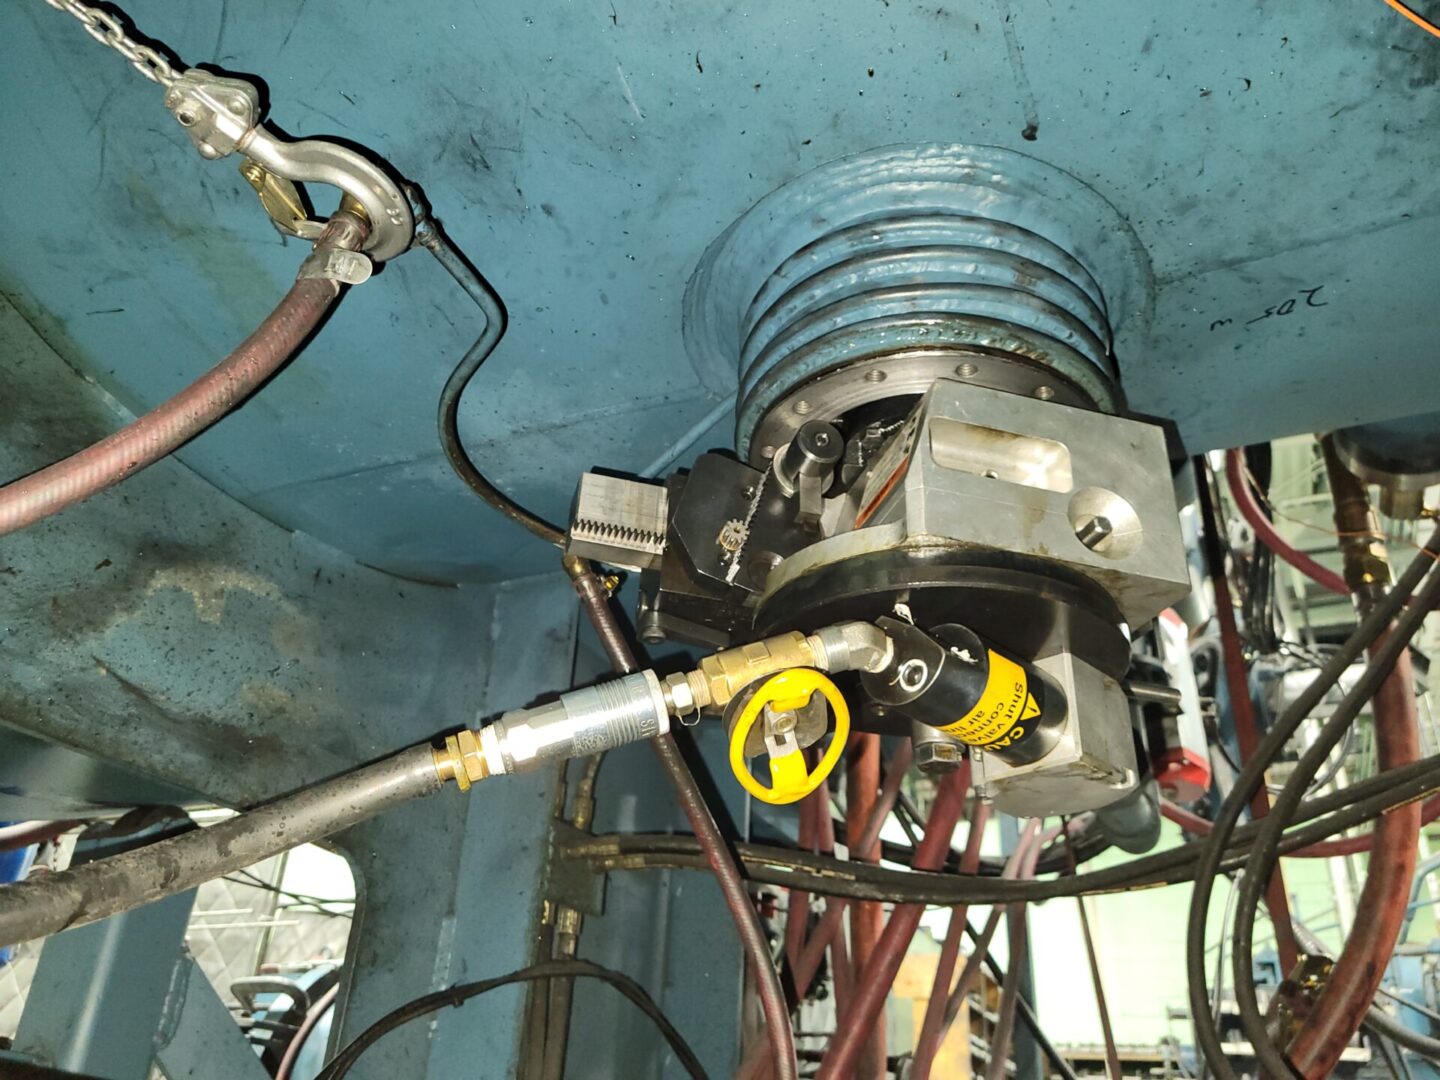
FF5000 machining a flange on the bottom of a vacumn furnace at Penn United
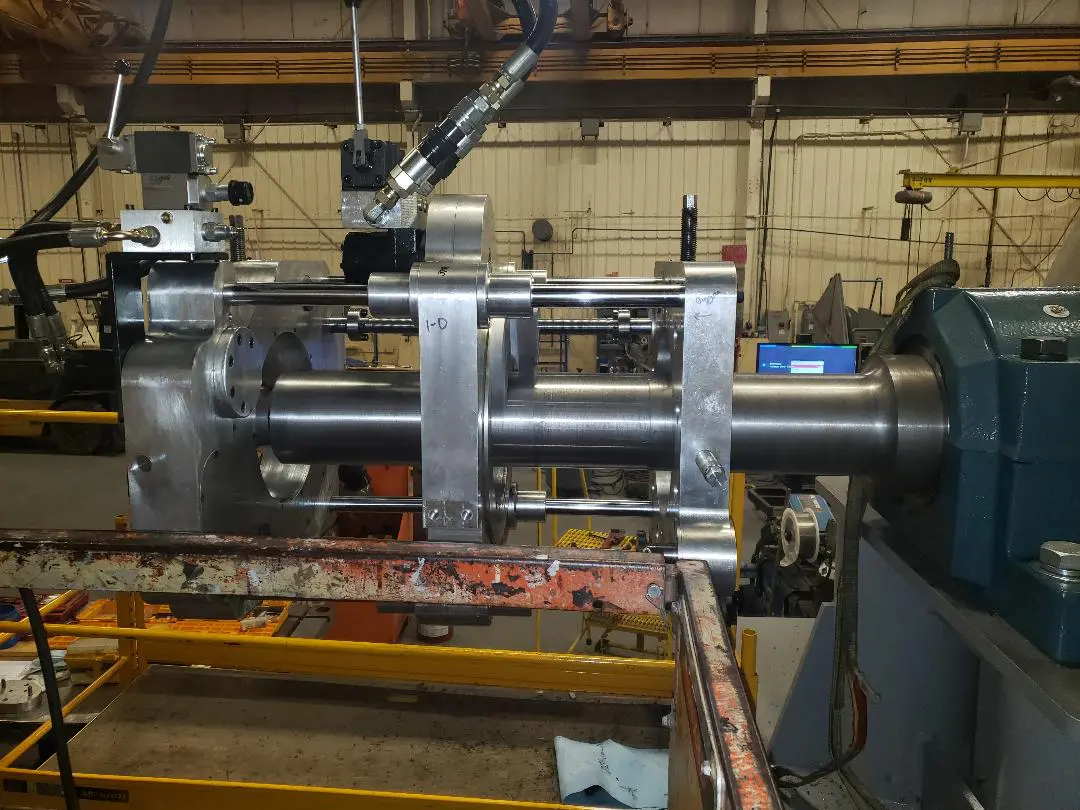
In Line Turning
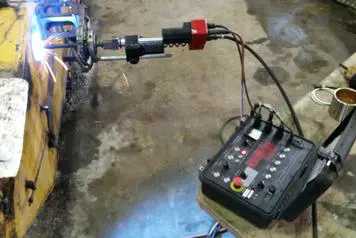
Automatic Bore Welding
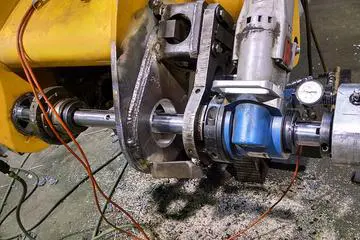
Rebuilding the ear and line boring a loader frame
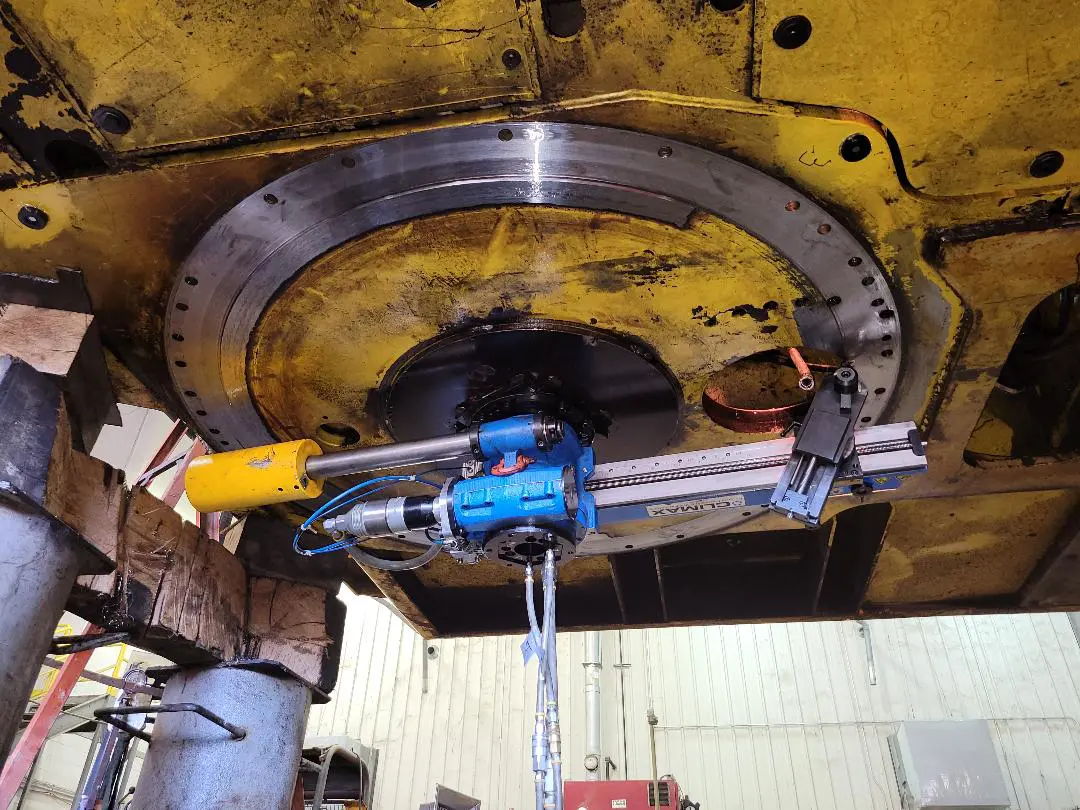
Climax FF6300 Machining underneath a Komatsu PC300

Climax FF6300 Machining the car body frame
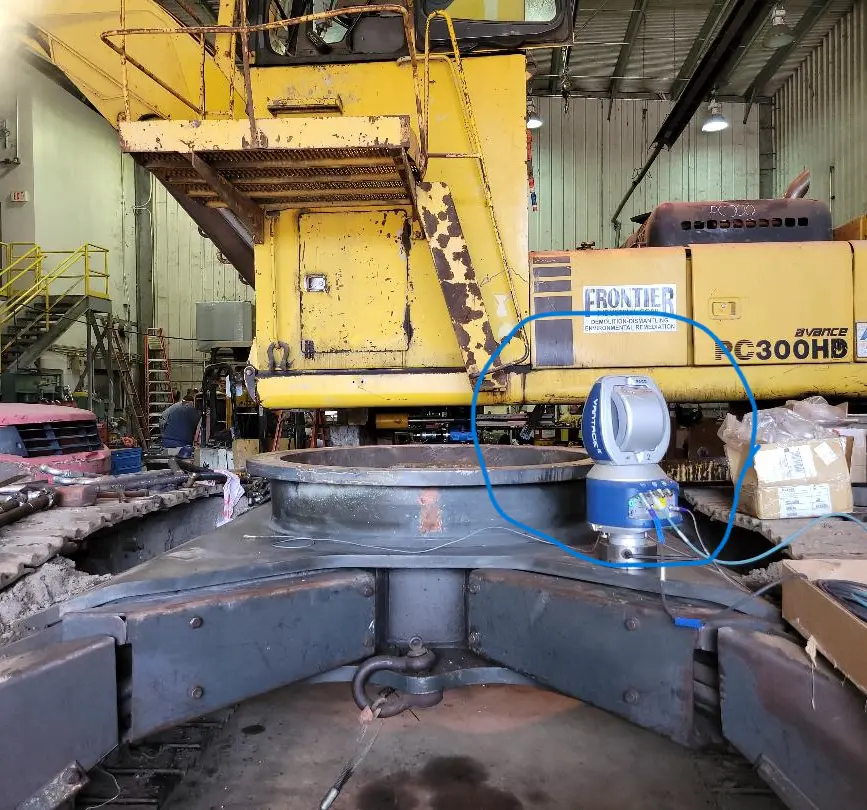
FARO Laser Tracker checking flatness of the car body bearing
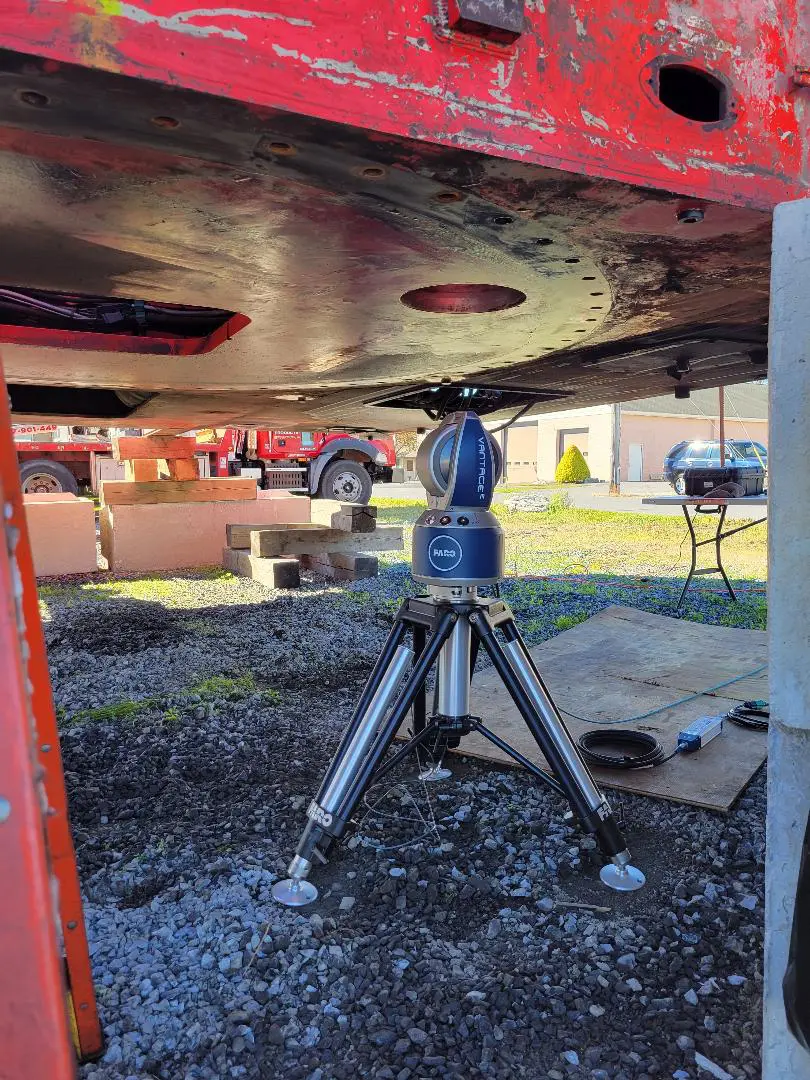
Faro Tracker checking the flatness of the slewing bearing in relation to the rotation drive on a PLM Crane
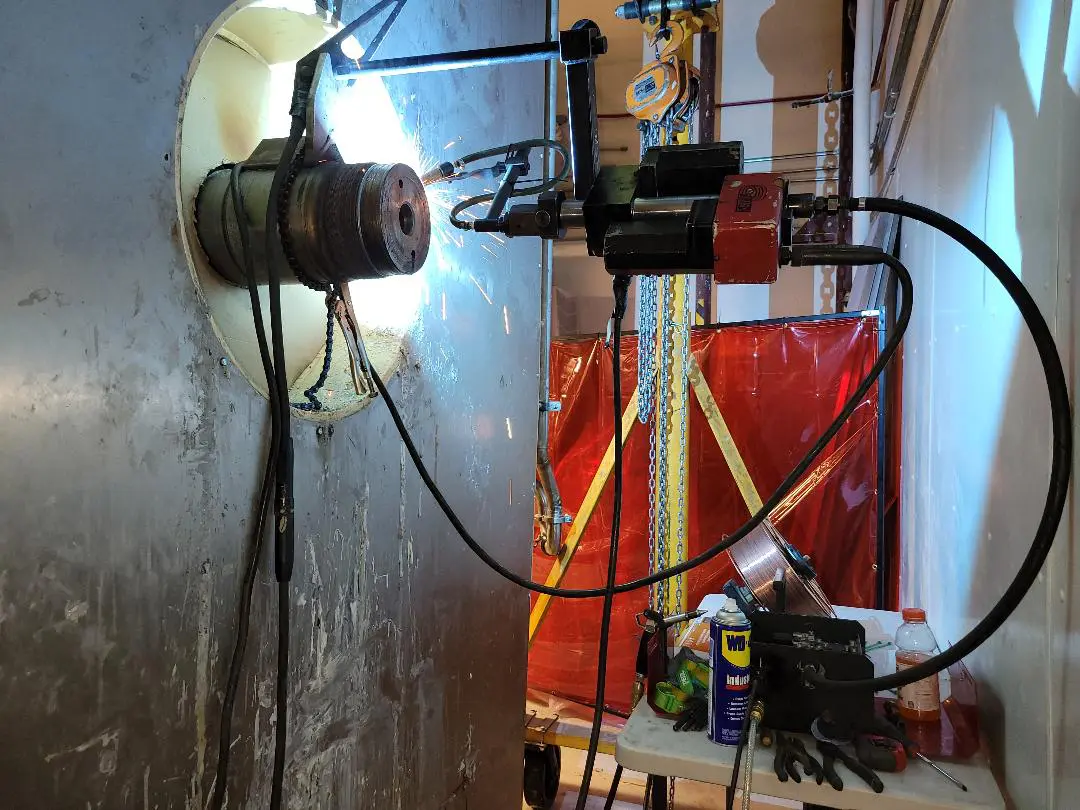
Weld build up of the OD on a shaft inside a candy factory in VT
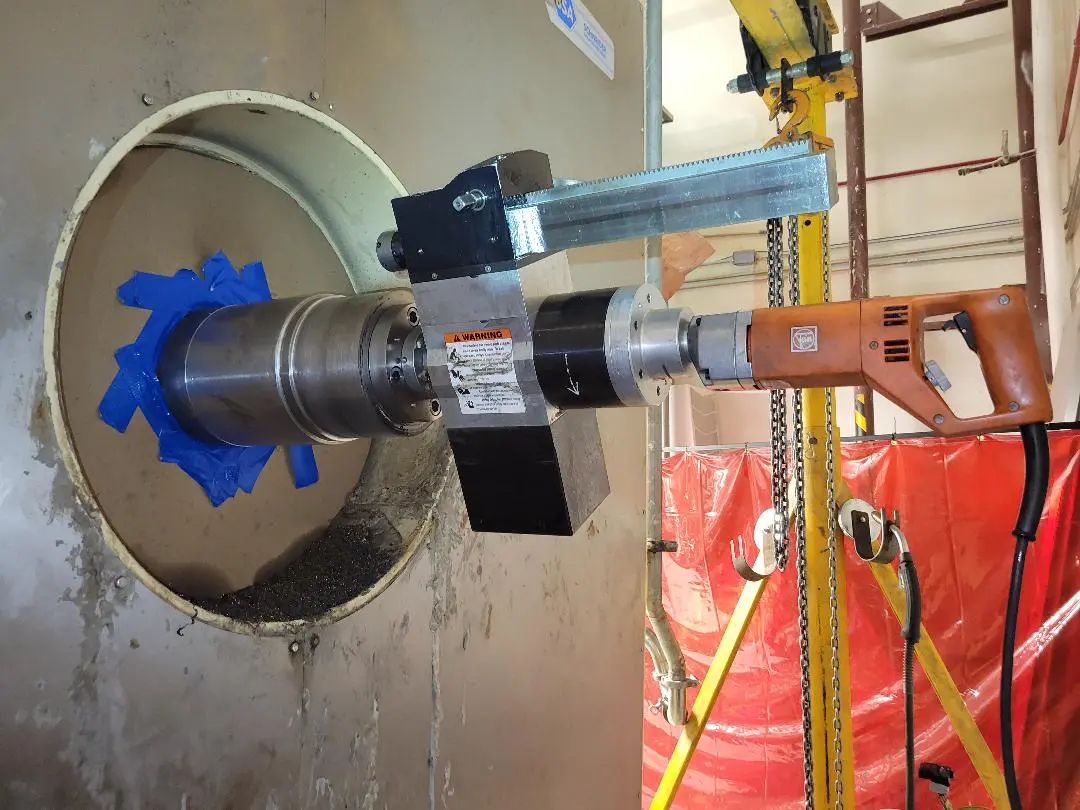
PL2000 machining a shaft inside a candy factory in Vermont
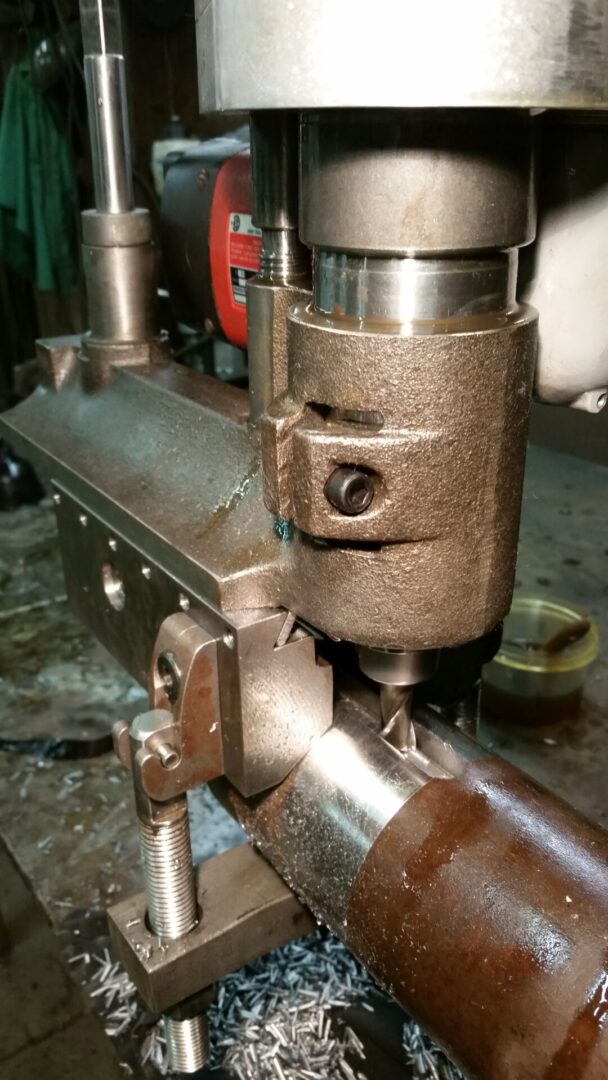
Repair a journal and keyway inside a carpet factory
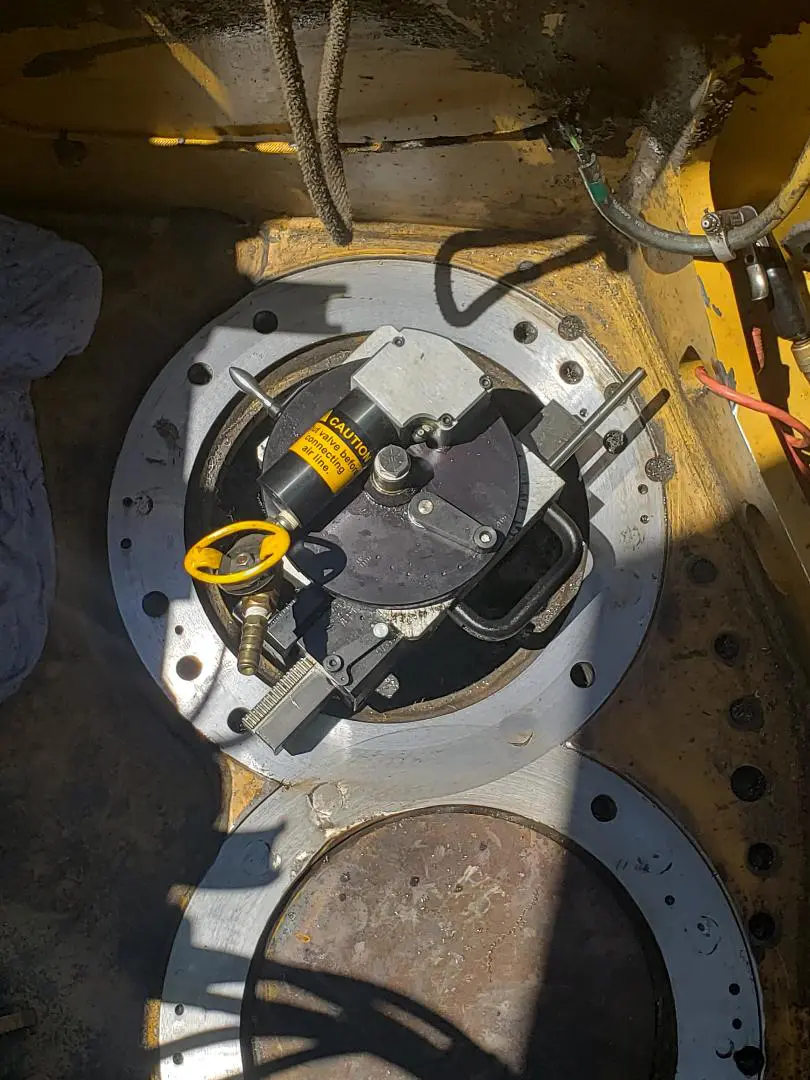
Rotational Gear Box Mount, swing drive flanges machined on a CAT345 Excavator
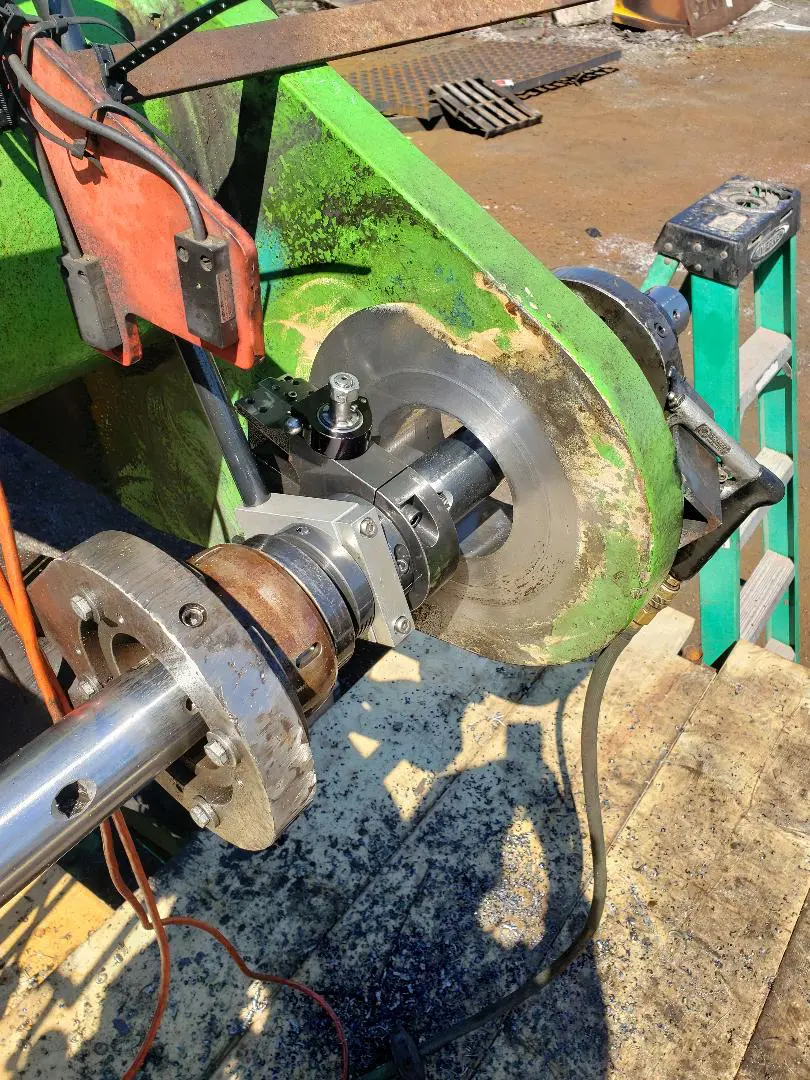
Loader Frame Mount Bored and Faced on the job site
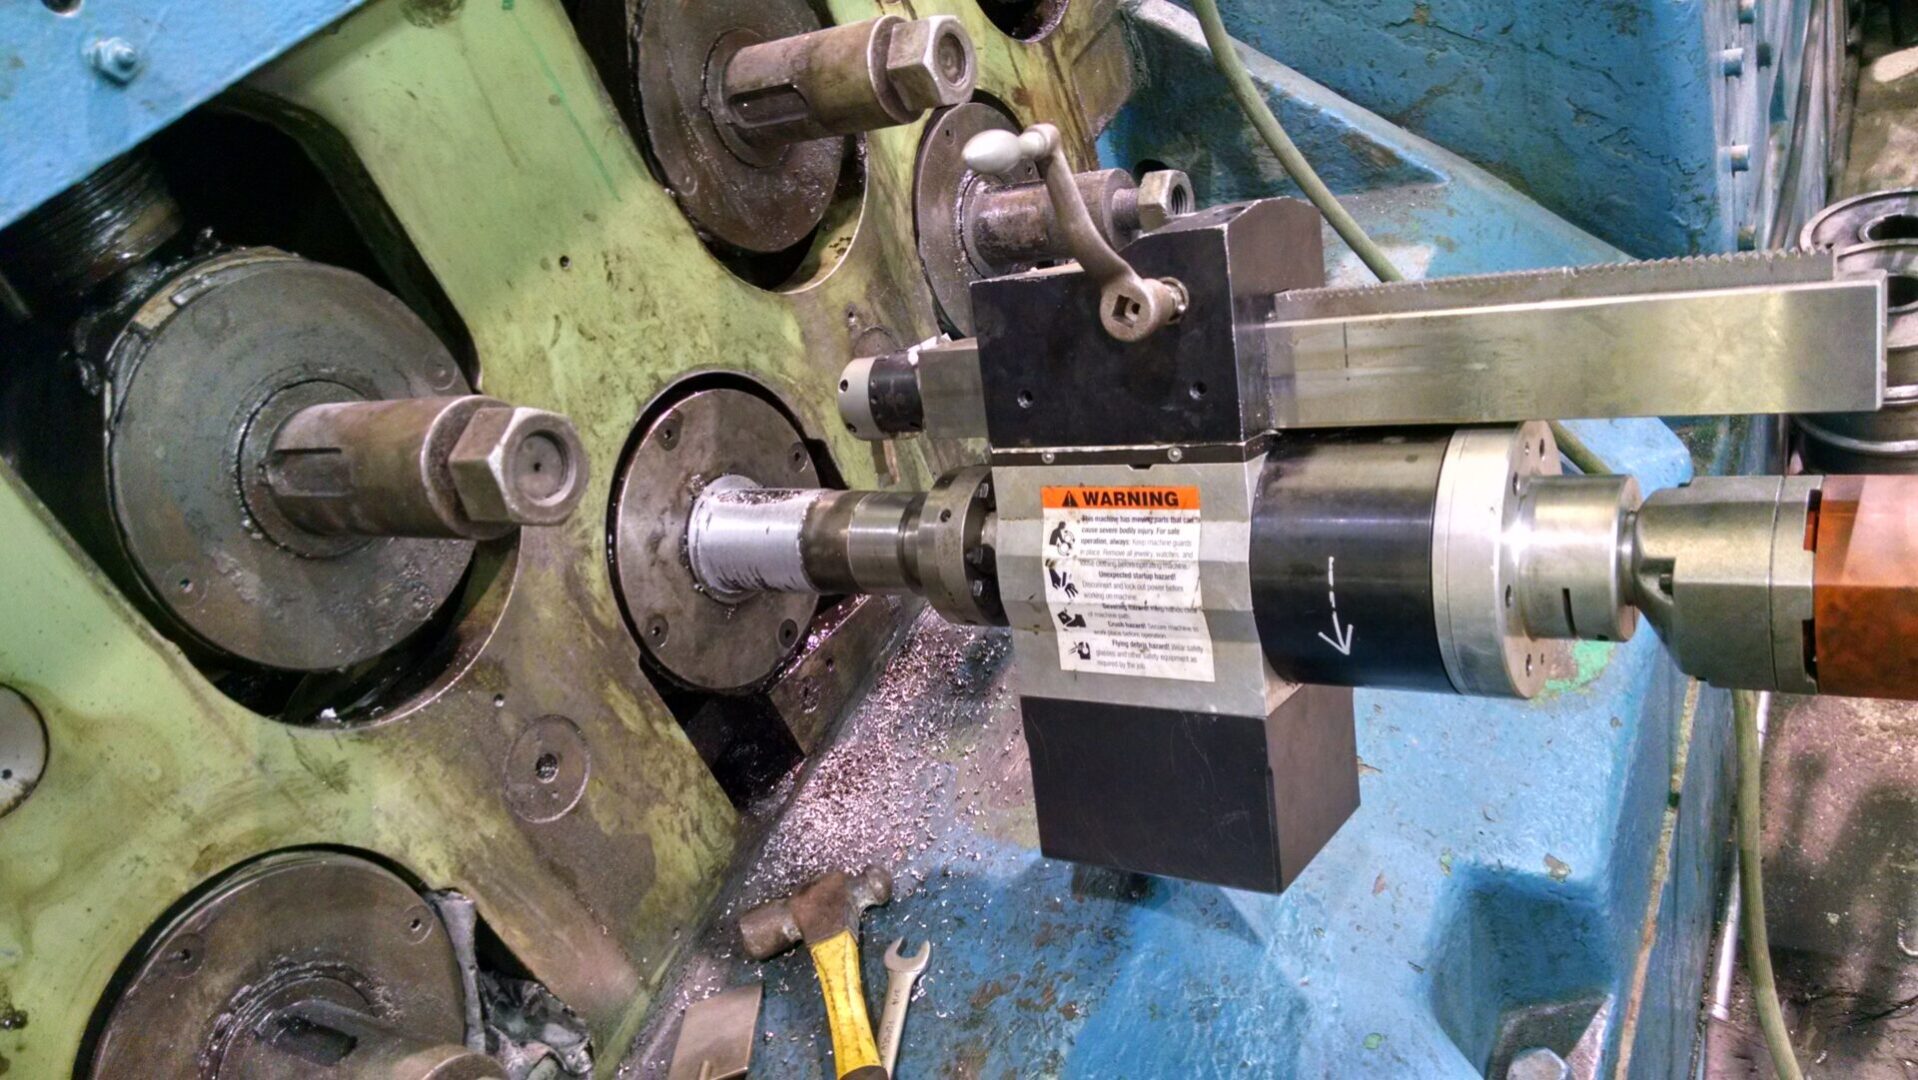
Repair of multiple journals in a pipe manufacturing plant
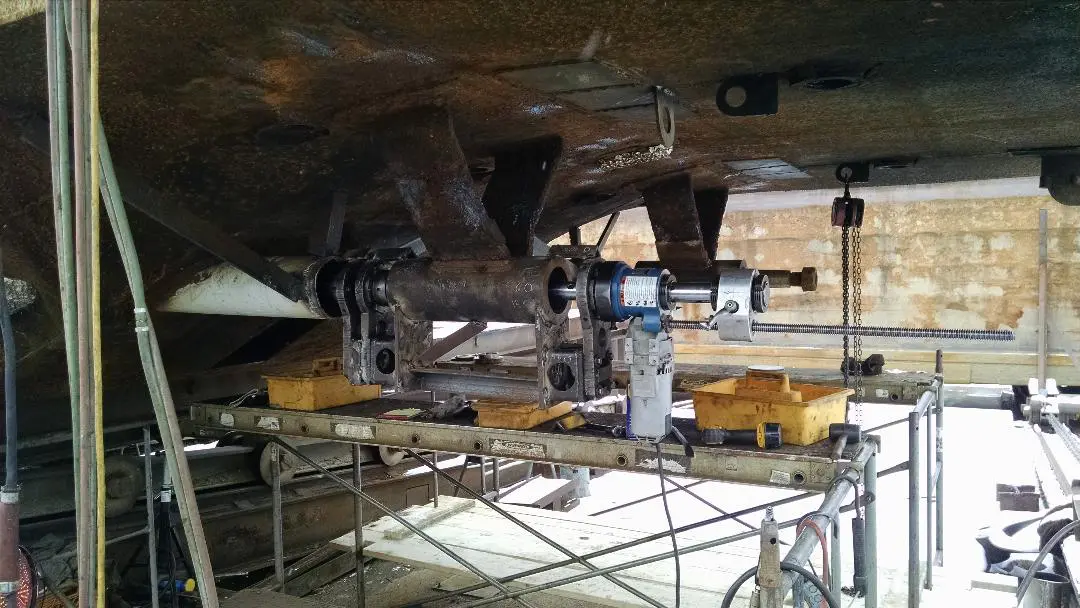
Machining of the stern shaft tubes on a tug boat
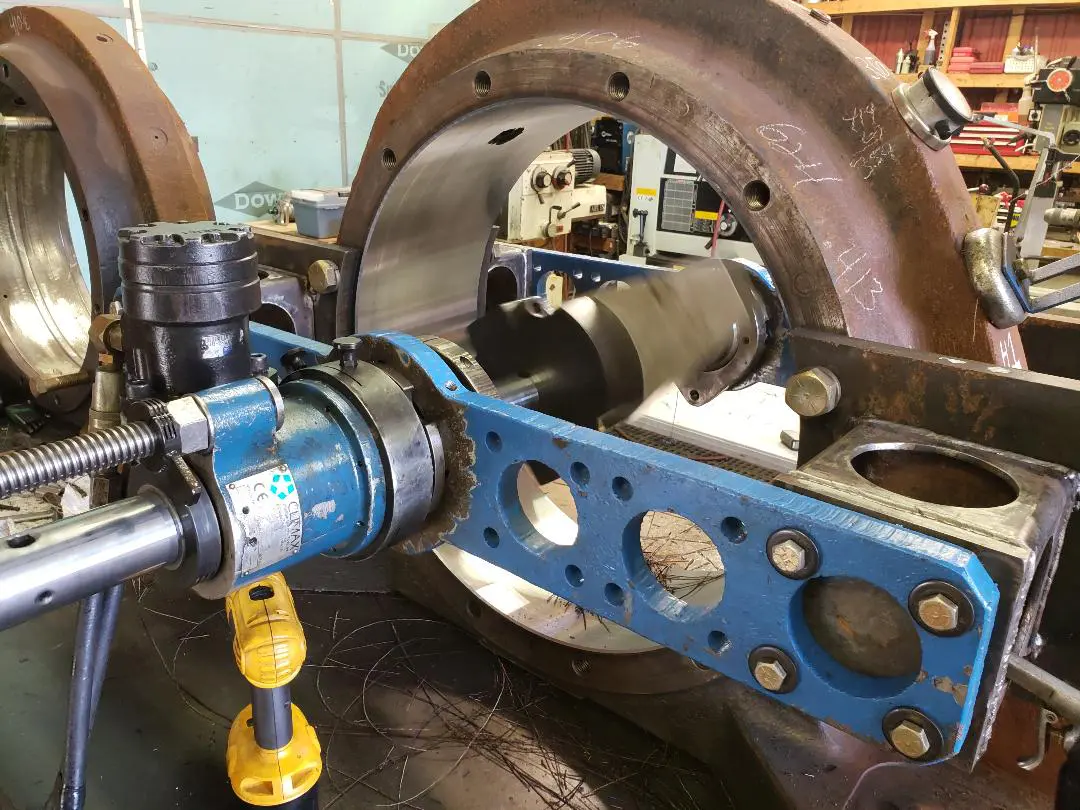
Refinishing a bearing housing for a shredder plant
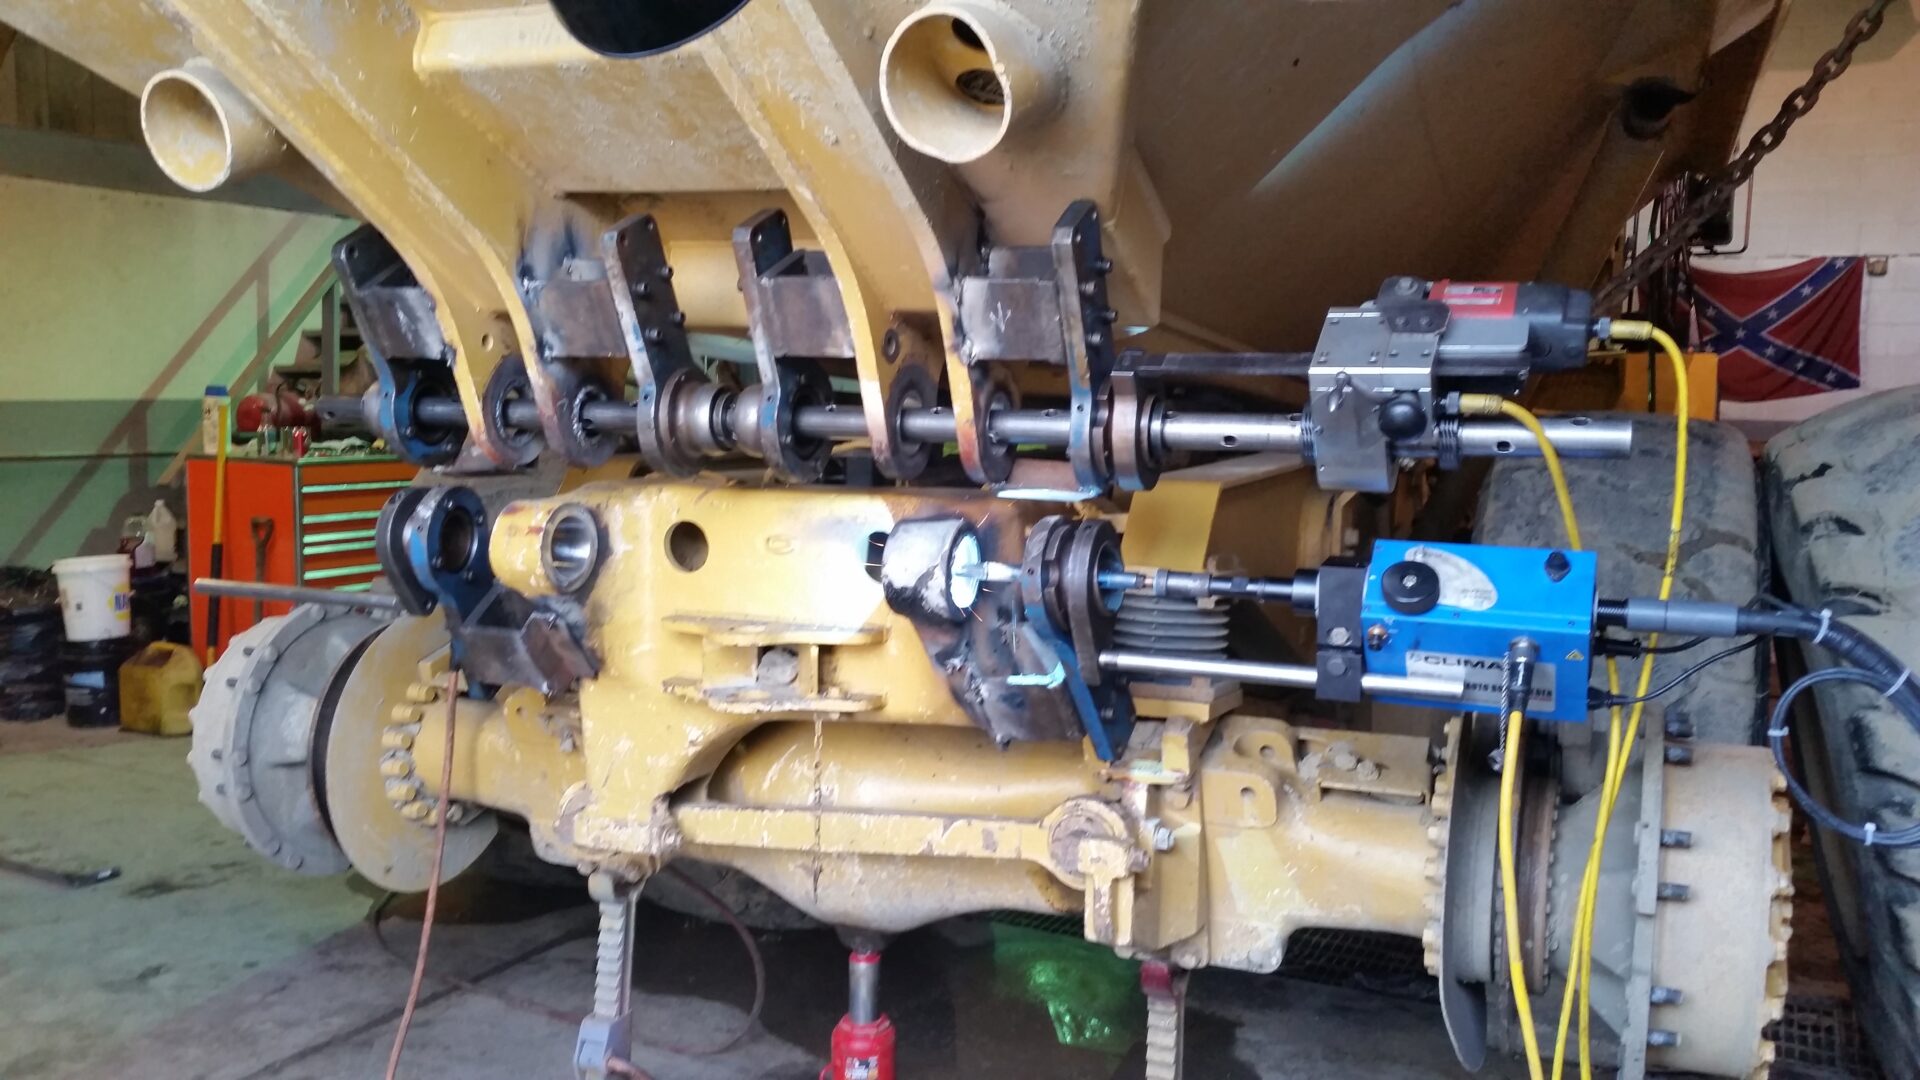
Saving time by welding and machining all at once
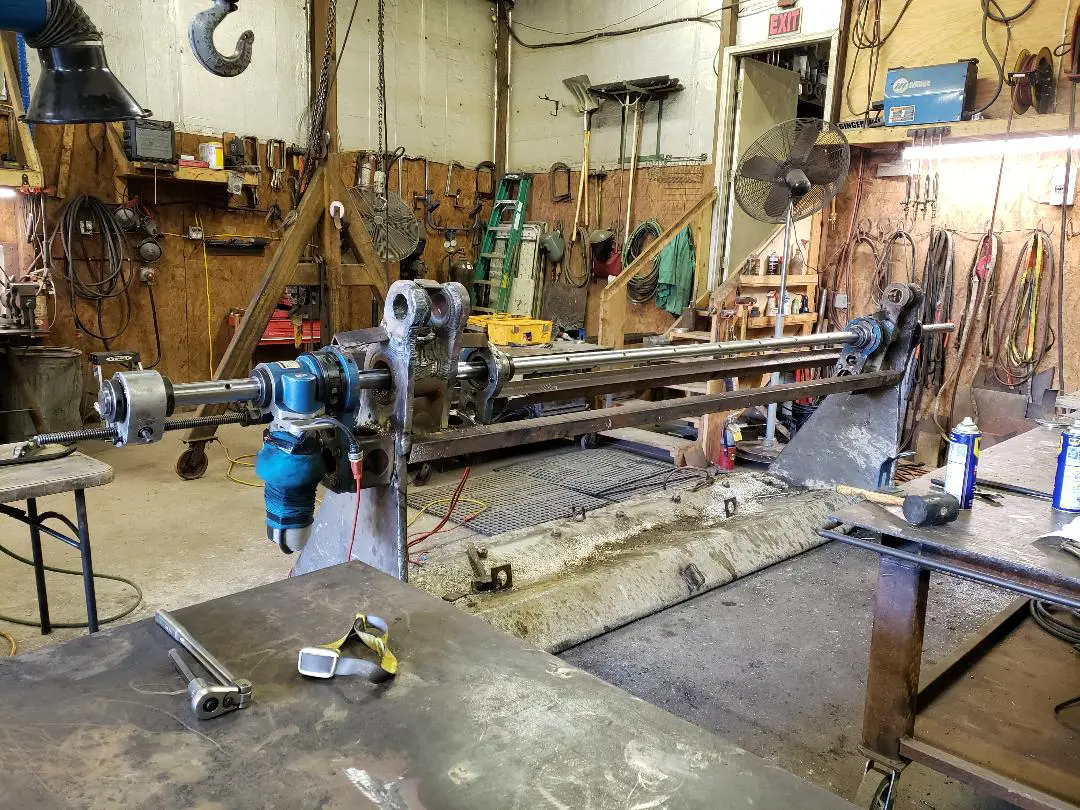
Double line boring with a 16 foot bar
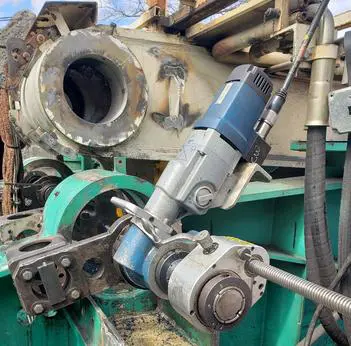
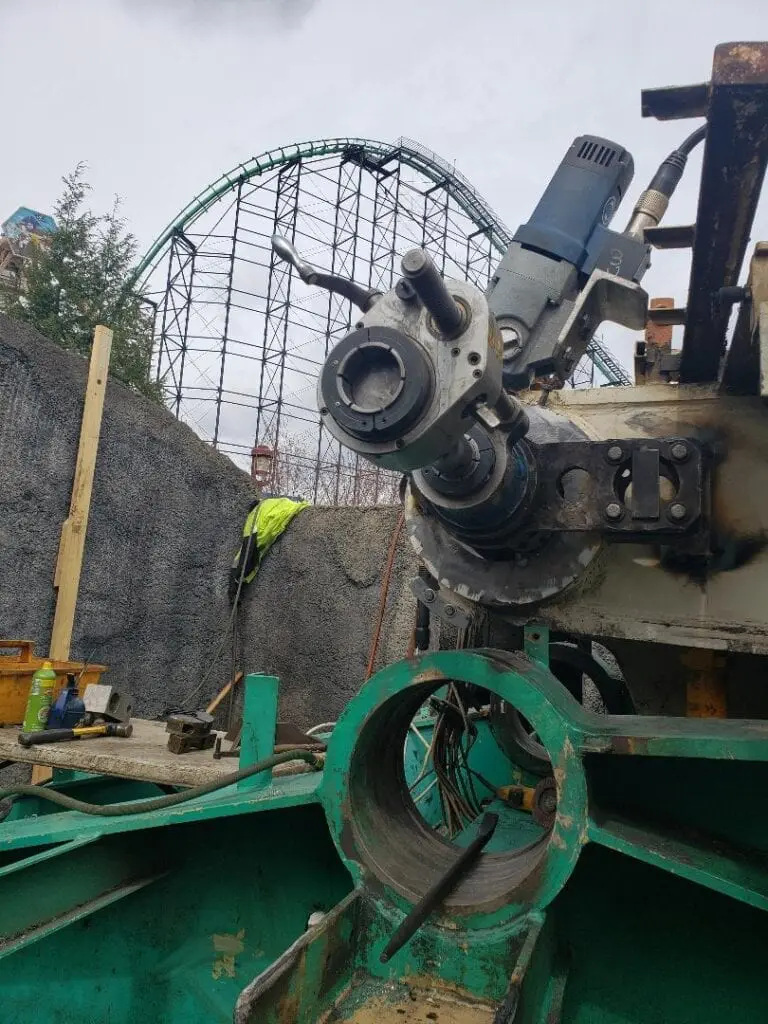
Precision machining of an amusement park ride
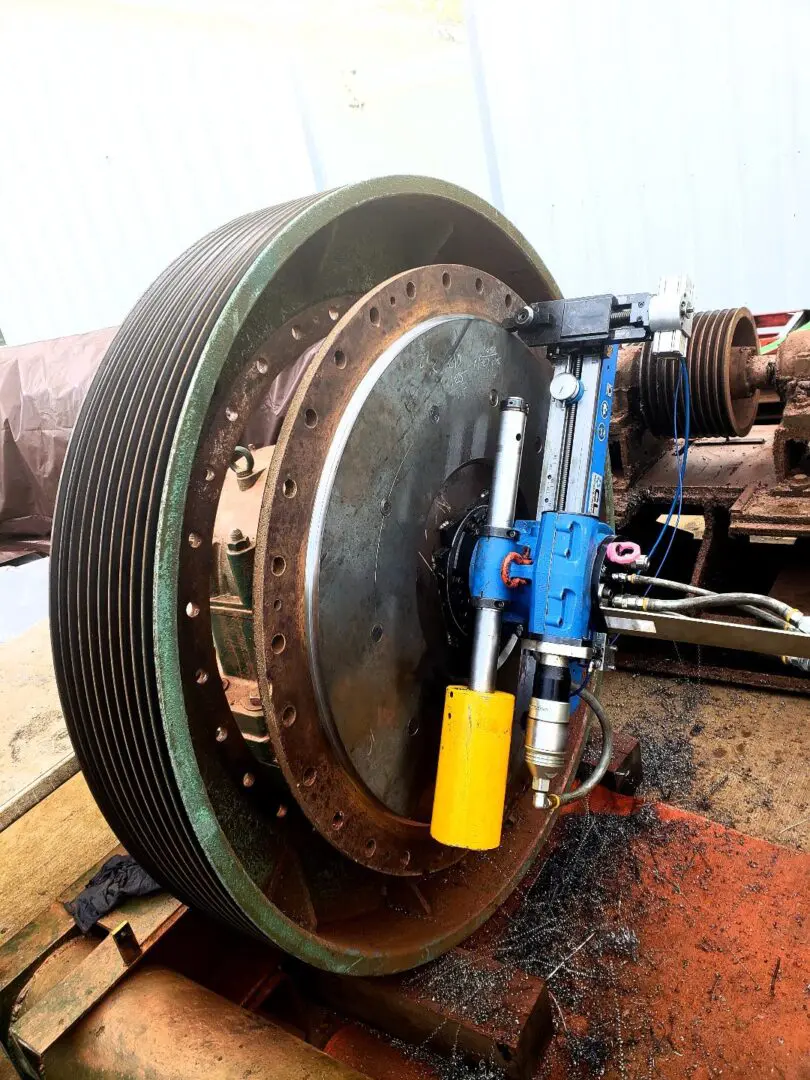
Flange facing inside the factory
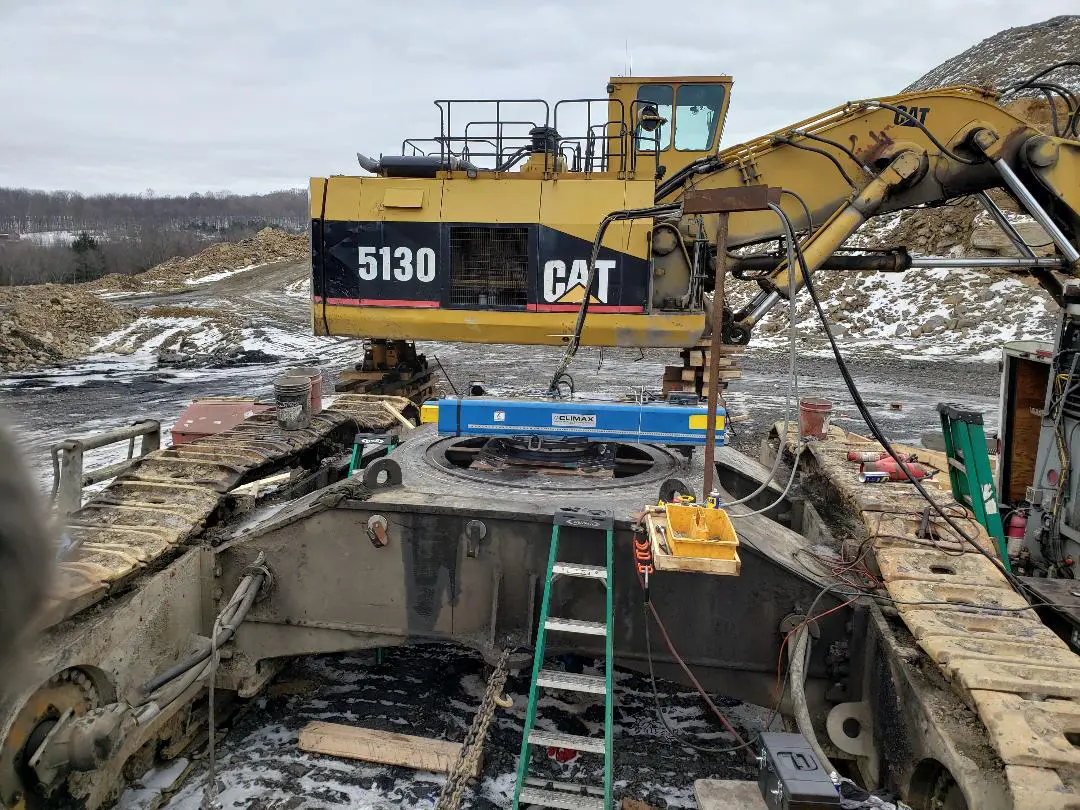
Refacing the car body flange
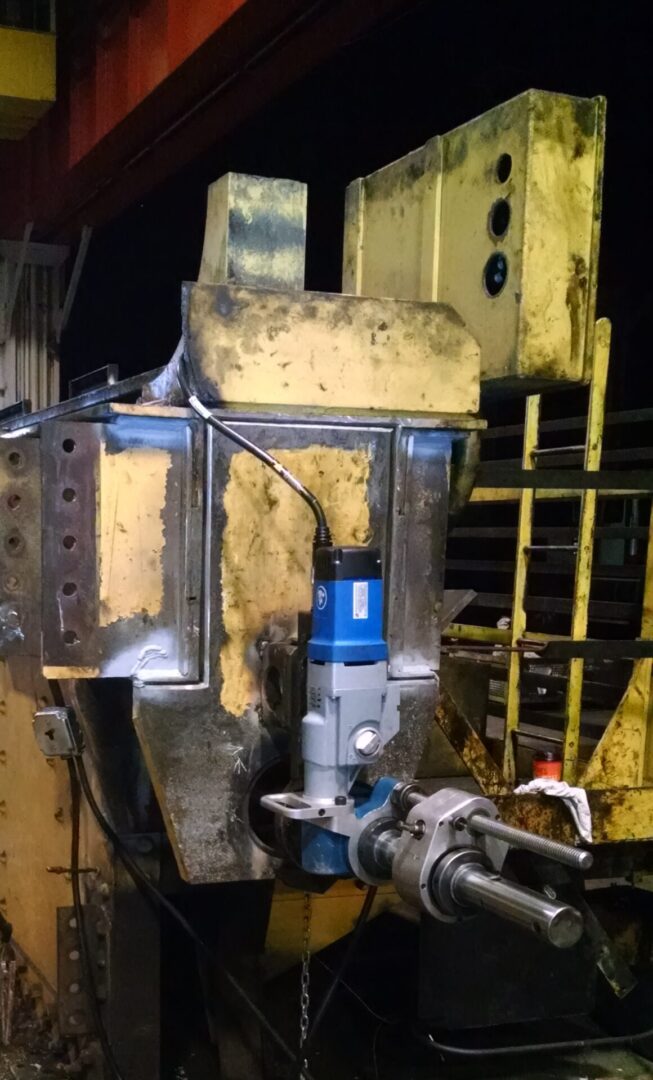
Bore repair of an overhead crane bridge in a steel facility
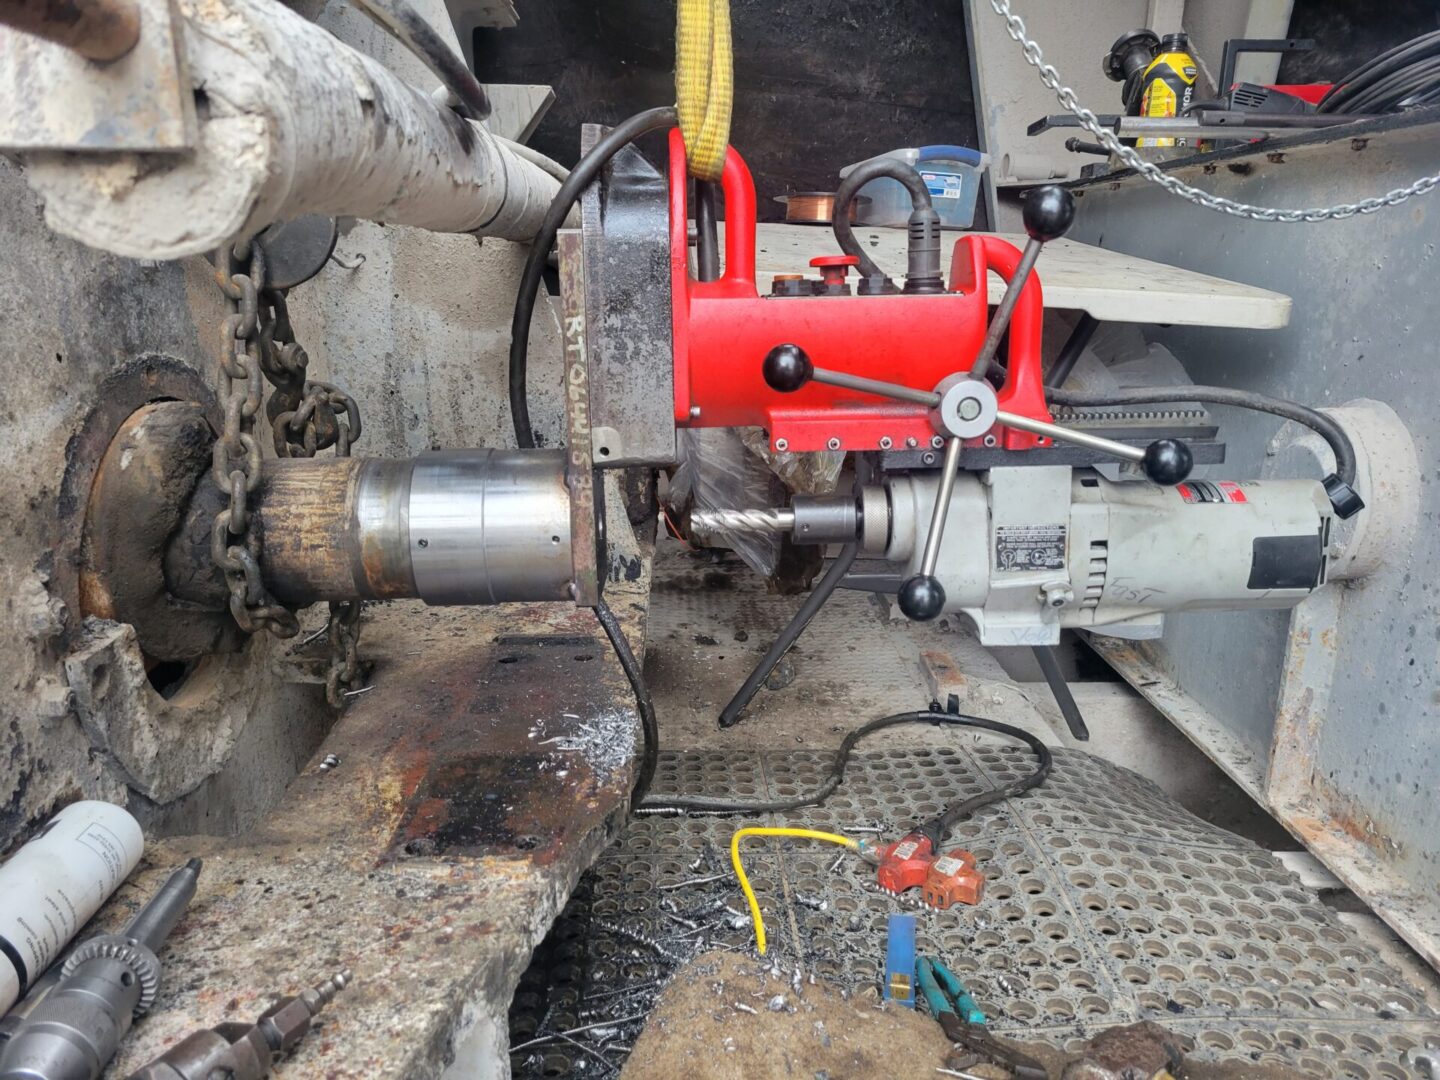
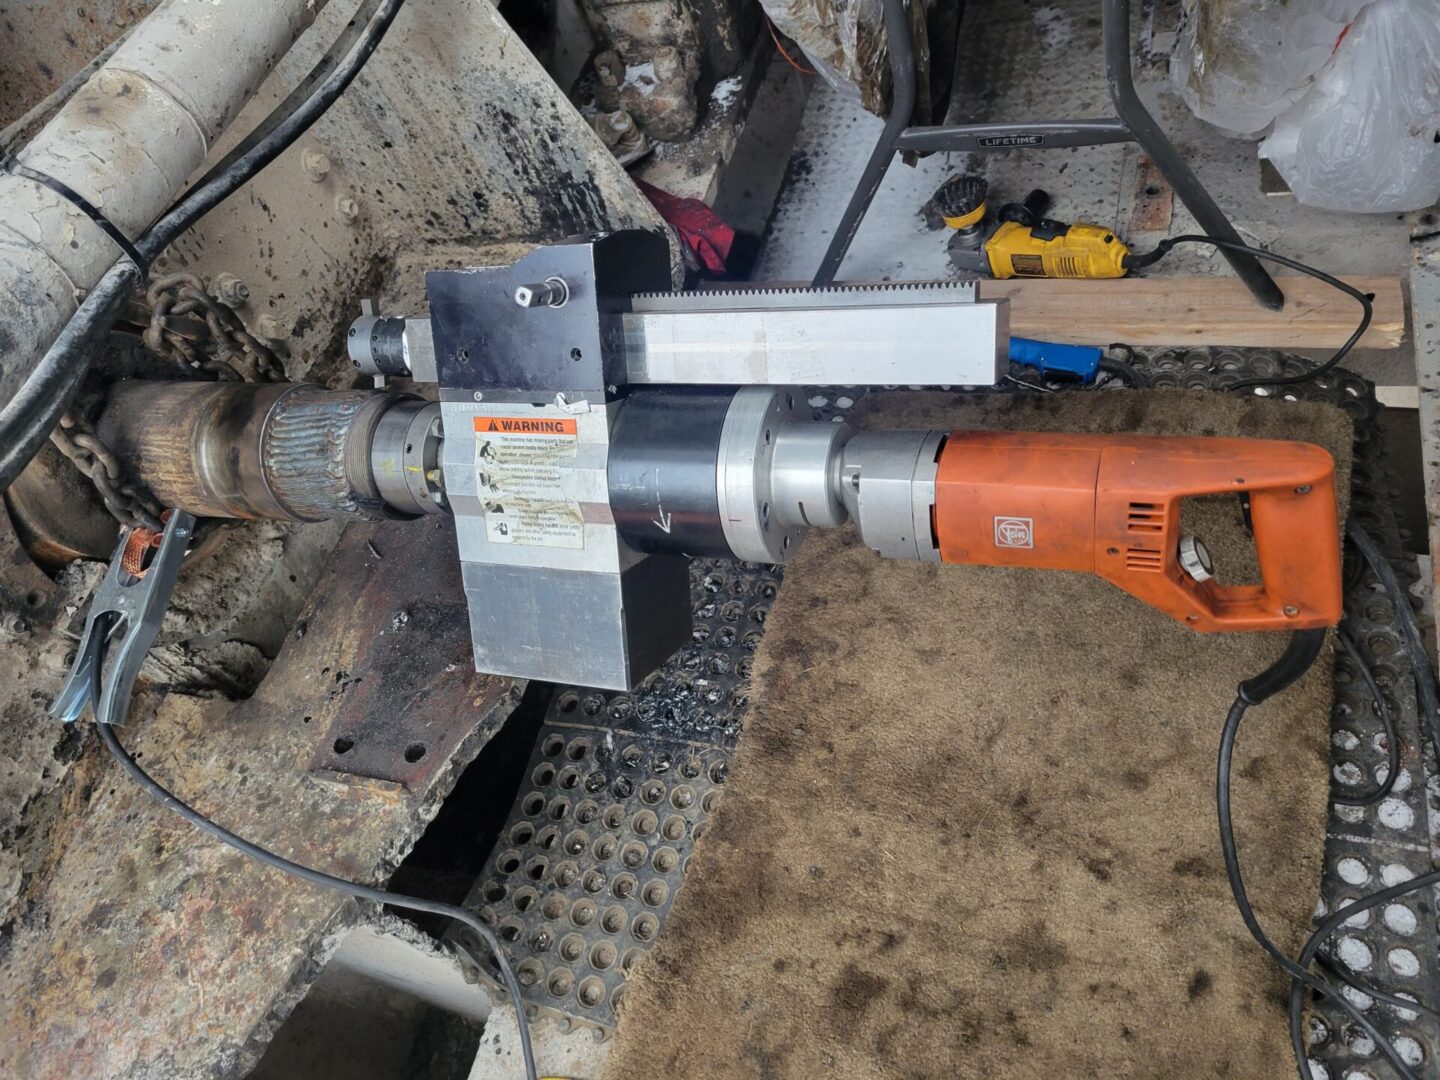
Drilling the mounting for the PL200 and refurbishing the pug mill shaft. Wiest Paving and Asphalt in Butler, PA
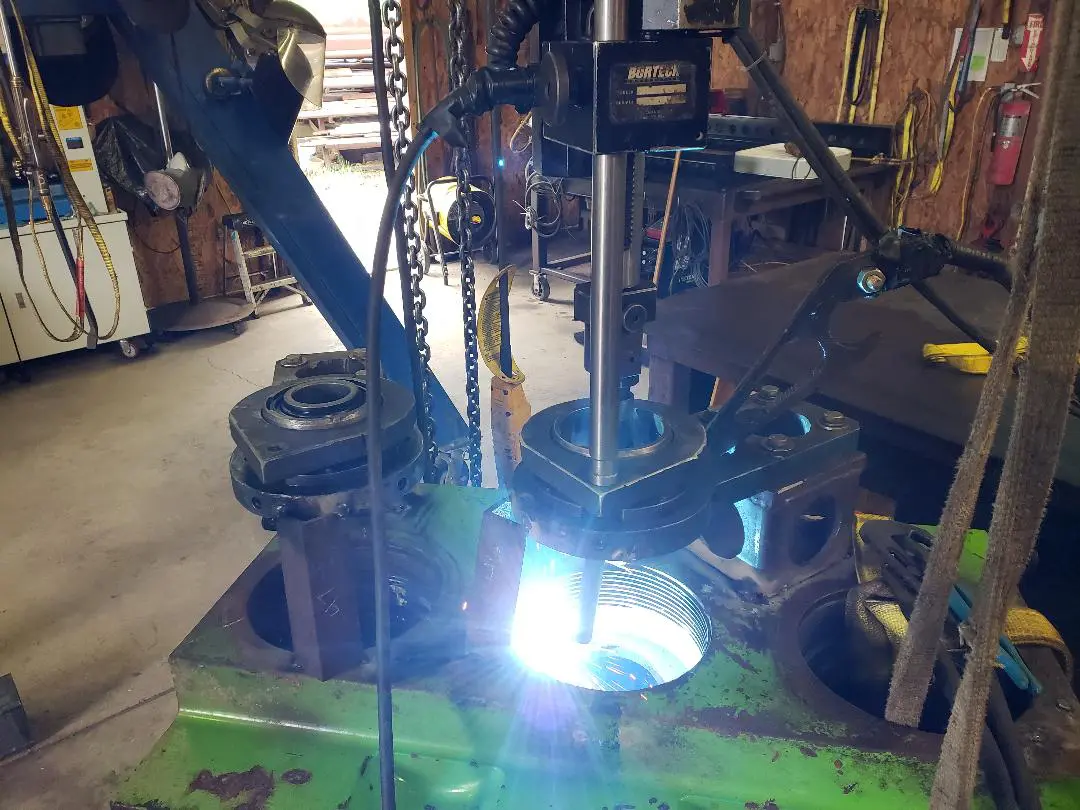
Weld build up and bore out a mud drill for the drilling industry
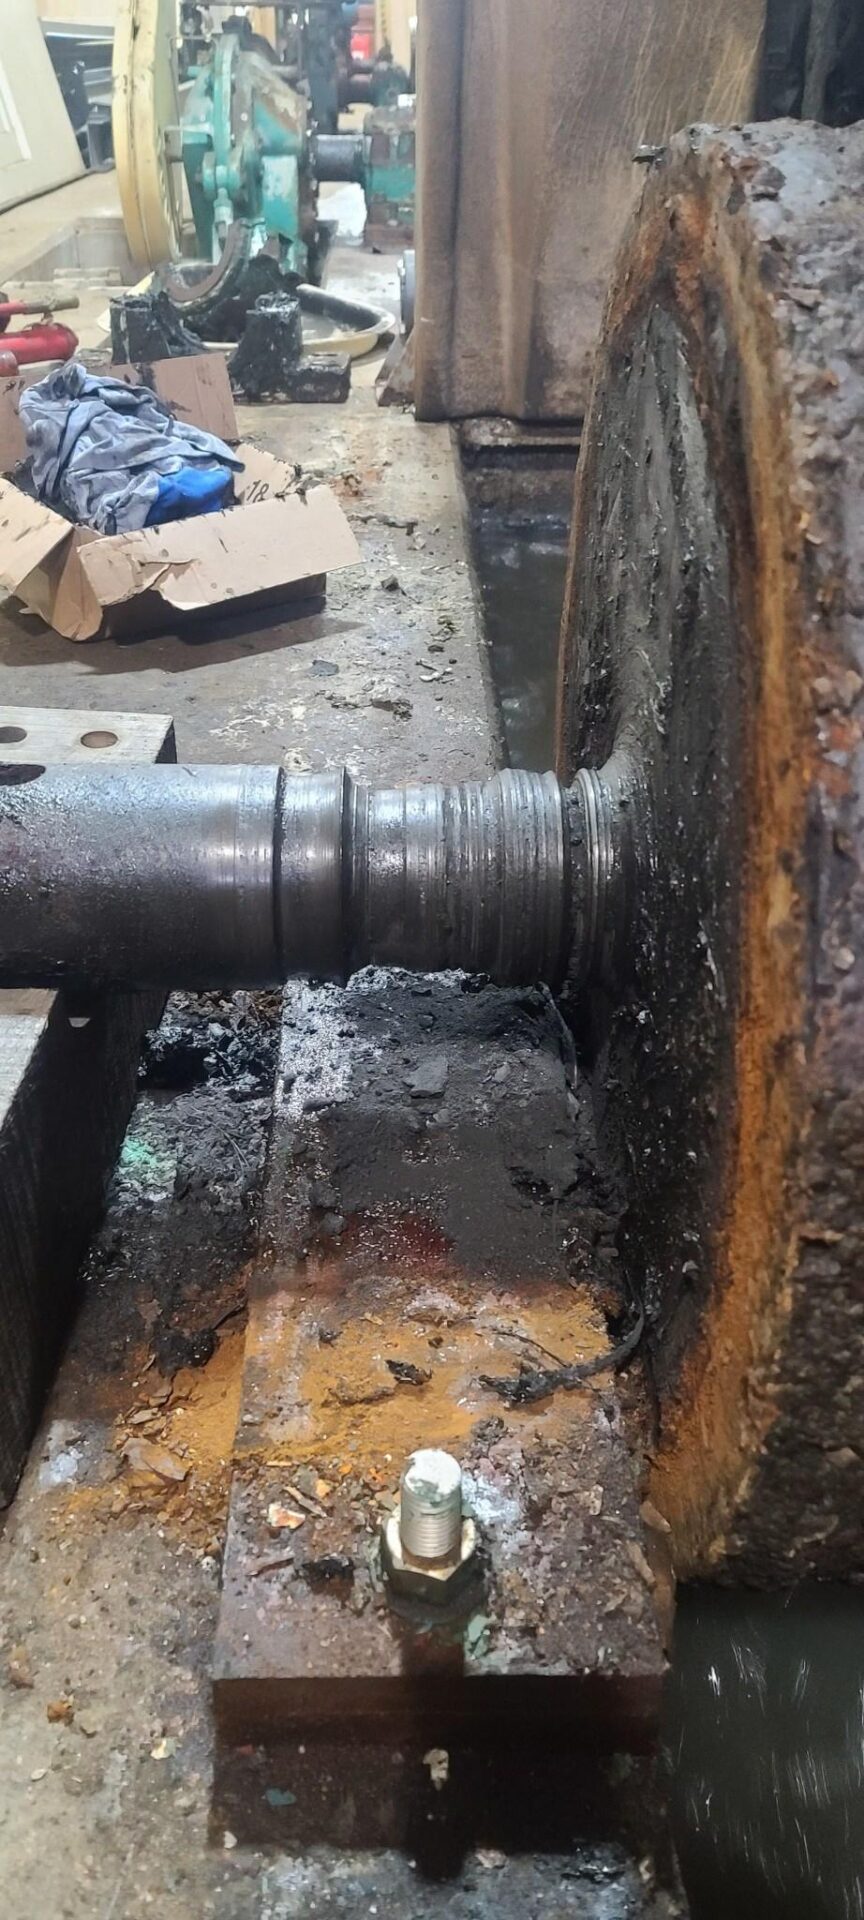
Before picture of a worn journal
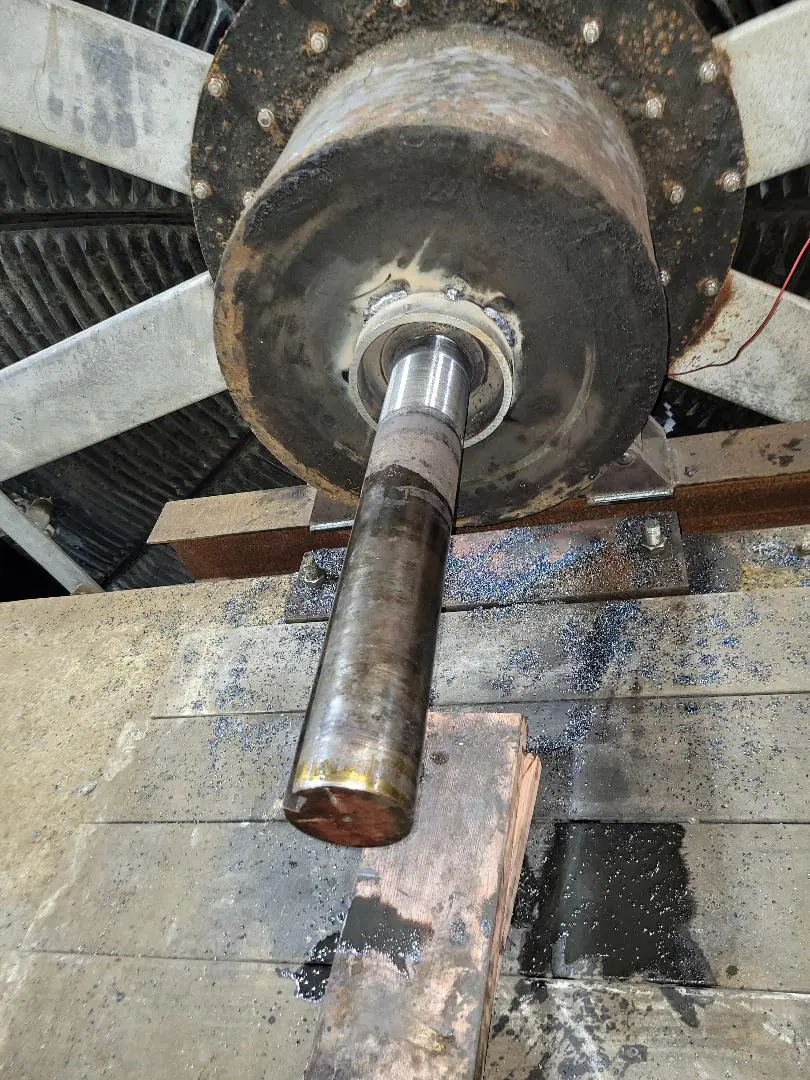
After weld build up and using the In Line Turning Machine
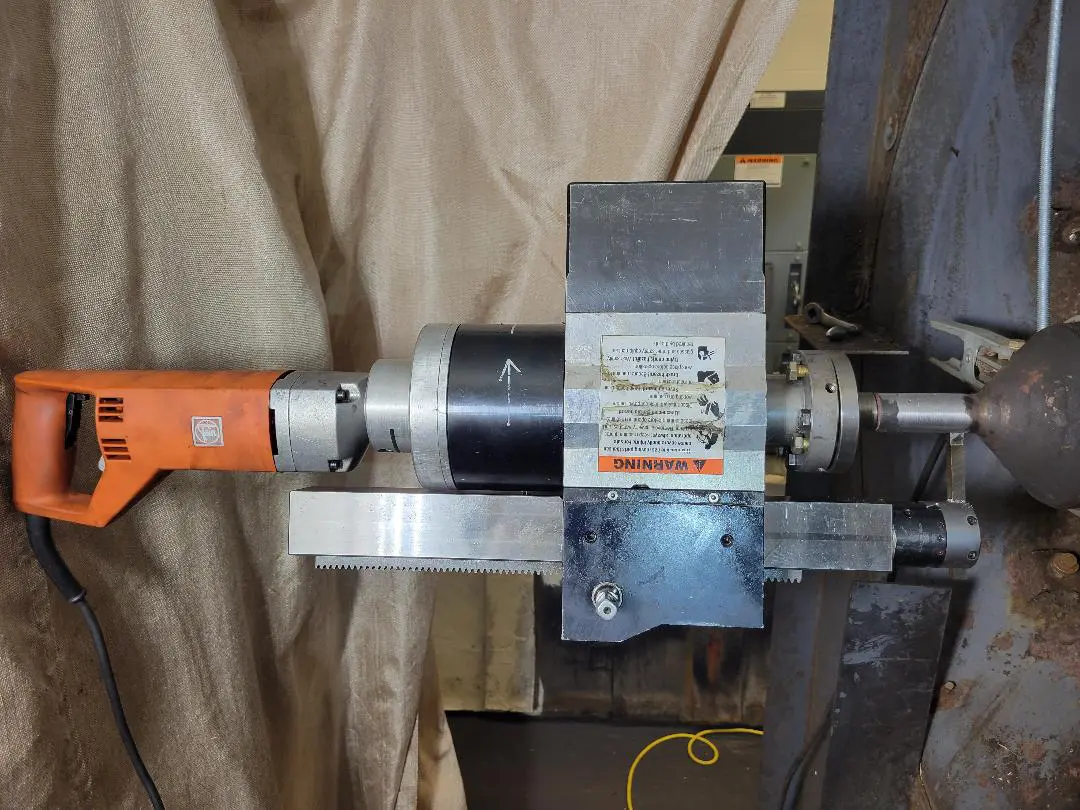
Climax PL2000 portable lathe machining the journal inside a auto parts factory
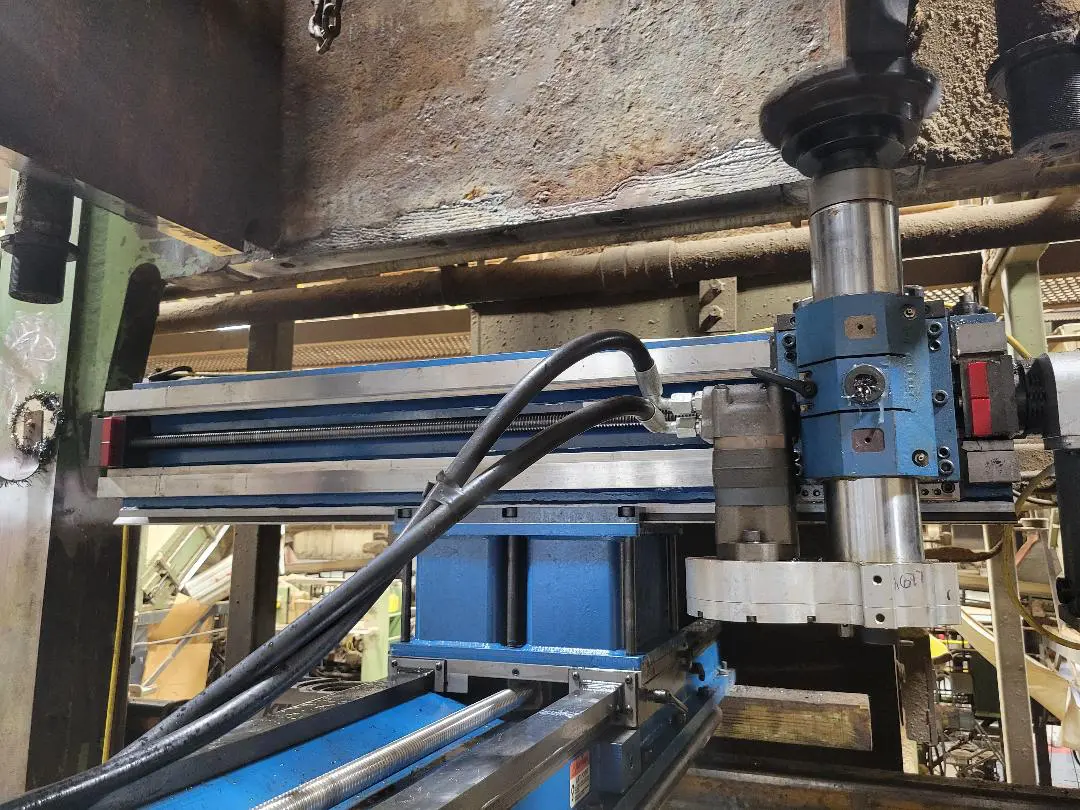
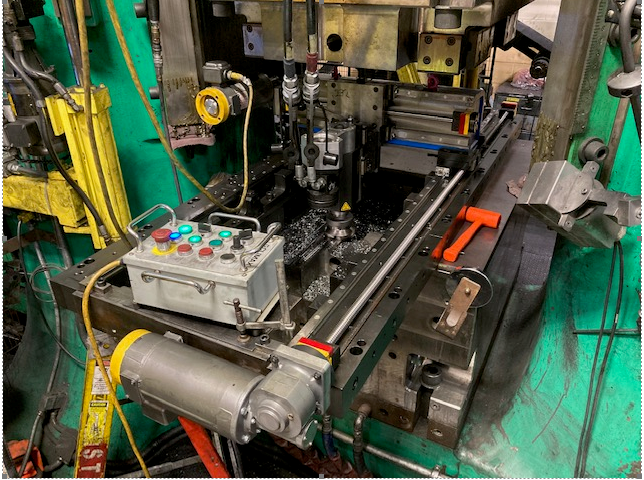
Climax PM6000 portable milling the faces of a press to be level and square with the bottom platens
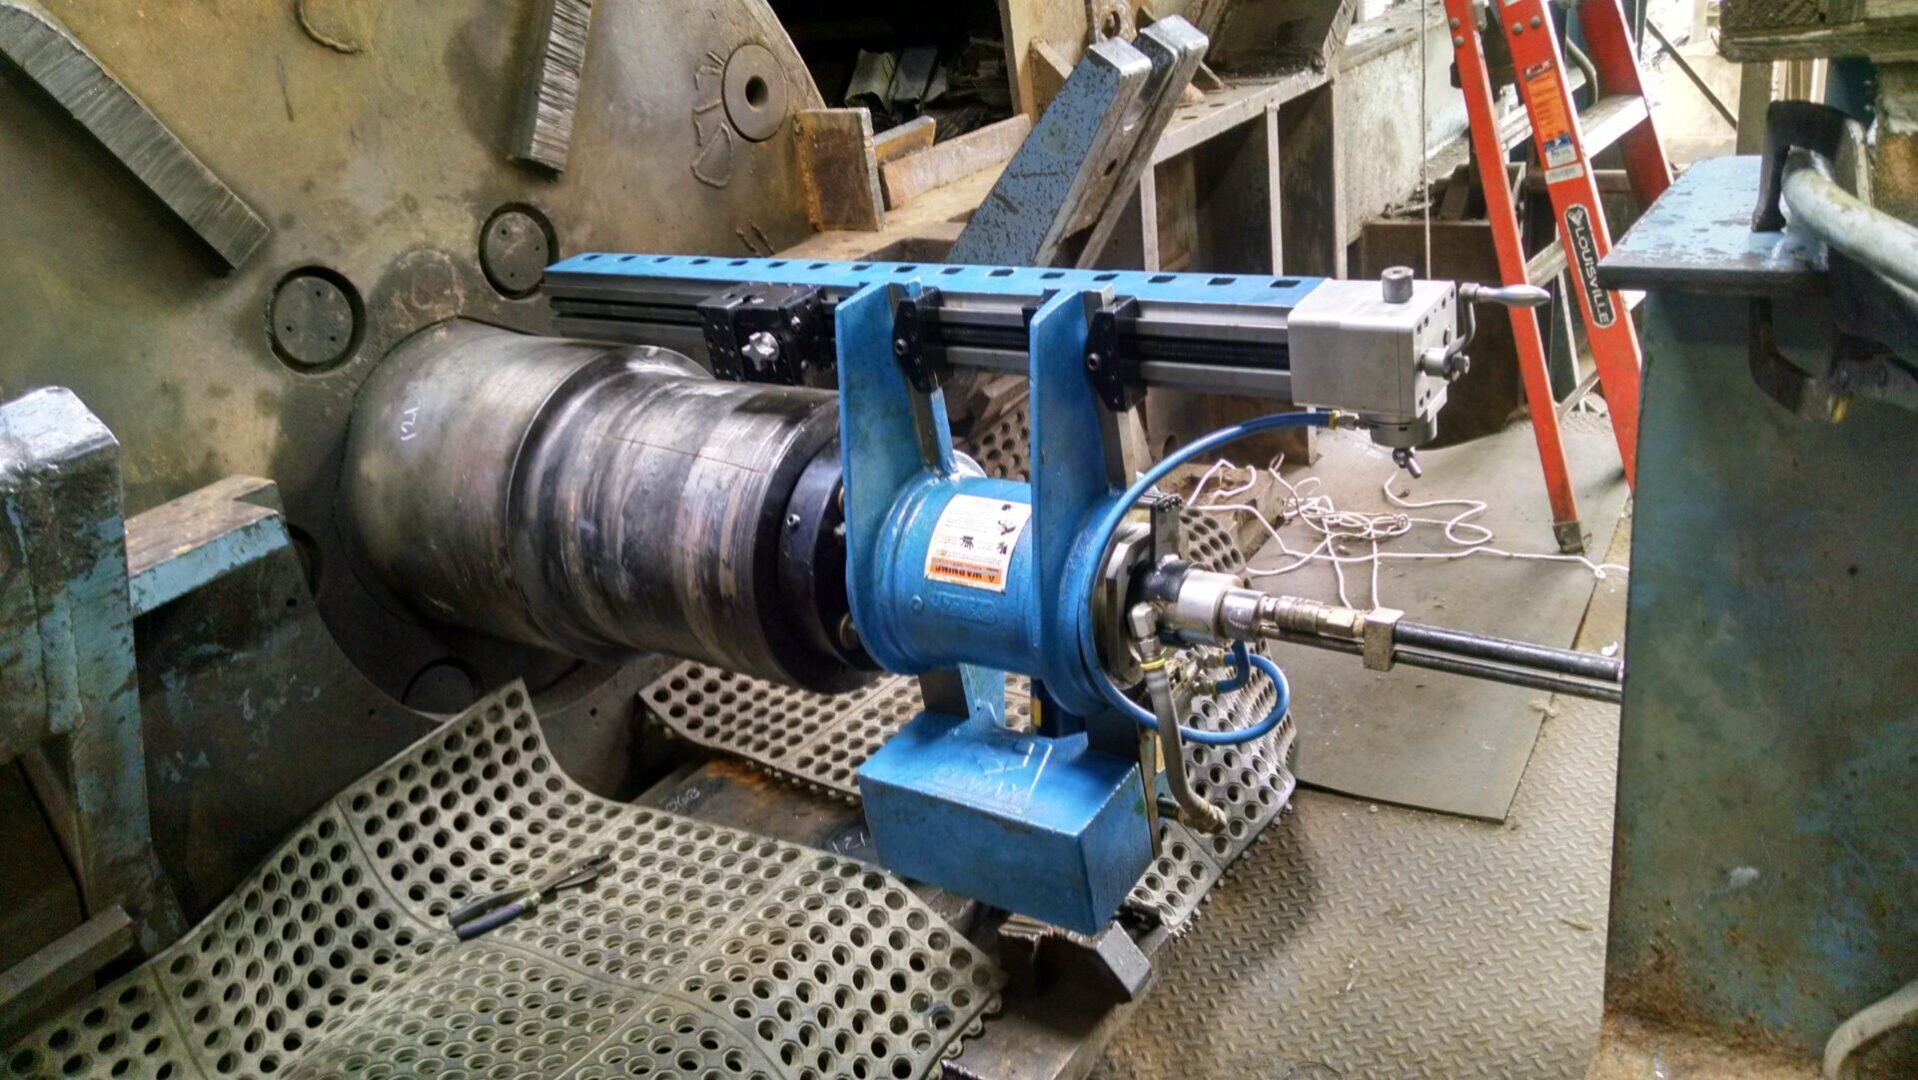
Climax PL4000 portable lathe used for machining larger diameter journals
Introducing the Climax CM6200
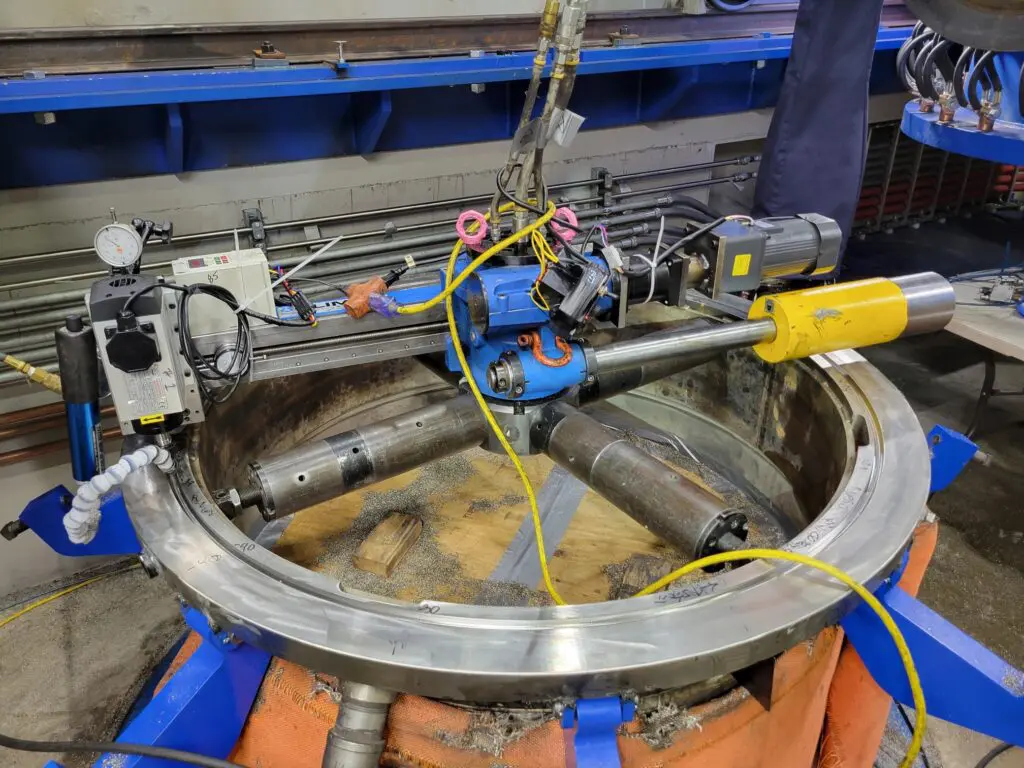
This machine is used for machining large flanges 73.5–199 inches (1866.9–5054.6 mm) in diameter. With a center machine clearance designed to fit over 24 inches (609.6 mm) diameter kingpins, this circular mill can be configured for the following operations:
New Equipment for Gantry and Linear Milling
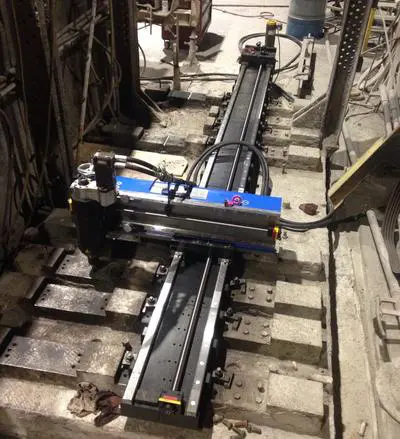
This is the Climax LM6200 that can be used in both the linear and gantry configurations. Modular bed sections allow the length to be expanded from 48 to 192 inches, It has a linear setup for cutting keyways right in the plant.
Also available is the Climax LM5200 for smaller and tighter areas. It can also be set up in linear and gantry configurations. Modular bed sections allow the length to be expanded from 48 to 96 inches.
Both of these machine are available for rent.
York 1600 In Line Turning Lathe
This in line turning lathe is the perfect tool for onsite resurfacing of large shafts, stub shafts and bearing journals/seats, requiring little disassembly or costly relocation of equipment. The ILT1000 has the range of 4" to 10" diameter and the ILT1600 range is 8" to 16" diameter.
Talk to Us
Procure all of your fabrication and repair needs. Contact us for inquiries, services, rentals, and price quotes. Our friendly staff will be more than willing to assist you!
